
Nowadays, PCs have got a tremendous variety of energy-saving features. Such functionalities are specifically helpful for laptops, which tend to mostly work on battery power than by being plugged into the power supply. One of the most popular features helpful for saving power and battery life is known under the name of Hibernate mode (also referred to as Suspend to disk), which switches off your device. Before the operating system switches off, it remembers your present user session to the HDD so that you can start exactly where you logged off when your PC wakes up after the hibernation period is over.
What does hiberfil.sys stand for?
hiberfil.sys stands for a system file in Windows computers that stores the present memory data of the PC’s state and is applied by the “Sleep” and “Hibernate” power-saving features. The file is generated and controlled by the Windows OS itself and can weigh several gigabytes in its volume (in Windows 10, it normally varies between three to five gigabytes). The hiberfil.sys file helps to restore the user session in times when the system loads after hibernation or sleep period.
Windows itself puts the hibernation file into the source directory of the system partition, normally into the root directory of C:\. Nevertheless, hiberfil.sys stands for a hidden and protected operating system file, therefore, you are not able to see it based on the default settings. Hence, if you would like to amend this parameter, for instance, to view the size of the file, perform the below-said measures:
- Refer to the View tab and choose the Hidden items checkbox.
- Select Options, and then choose Change folder and search options.
- In the dialogue box that comes up, proceed to the View tab and uncheck Hide protected operating system files (Recommended).
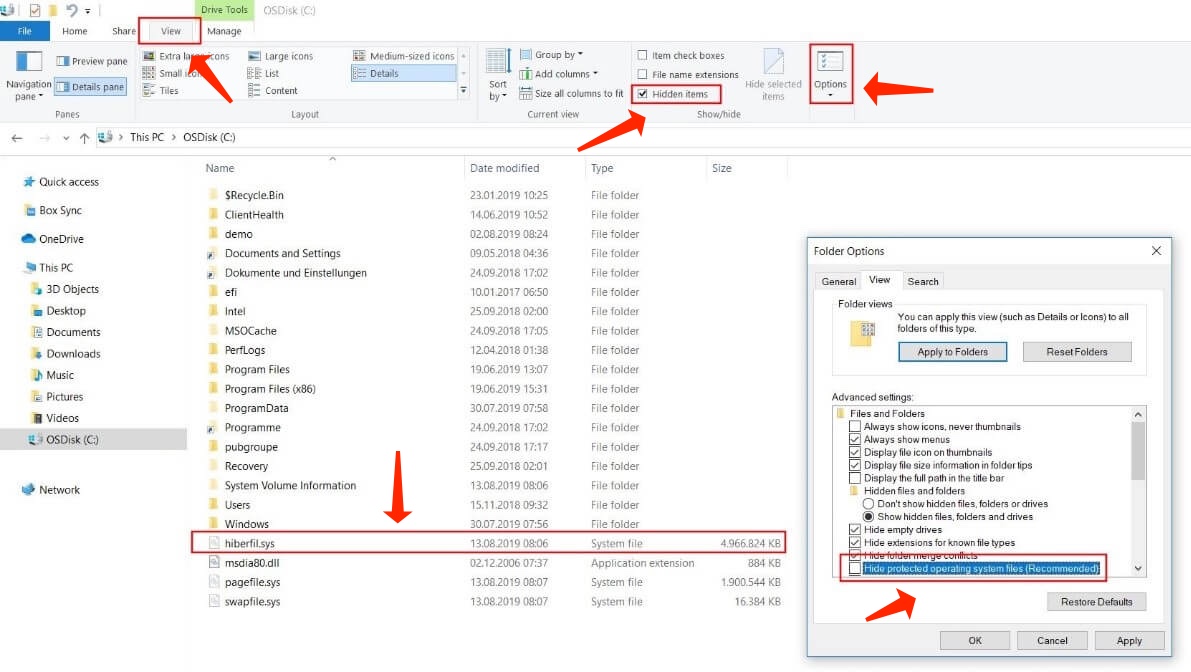
Unhidden hiberfil.sys file in the source directory of the Windows partition
Guide to remove and deactivate the hibernation file
Even though hiberfil.sys is hidden and defended system file, you can get rid of it without any problems in times when you don’t want to enjoy the power-saving features in Windows. In fact, the hibernation file has no impact on the common features of the operating system. Nevertheless, you can’t apply the typical delete solution (right-click and “Delete”) due to the fact that Windows actively applies this particular file. In times when you attempt to do this, you’ll see an alert indicating that the hiberfil.sys file is open in another application.
The remedy is to deactivate Hibernate mode. Windows will then automatically get rid of hiberfil.sys consequently. We’ll now give an explanation on exactly how to perform this procedure in Windows 7, 8 and 10.
Guide to deactivate hiberfil.sys in Windows 10
There are two solutions to deactivate the hibernation file that conveys the data about your session to the HDD: Either deactivate the service by means of the Command Prompt or amend the registry entry for hiberfil.sys. In both instances, you need to have the appropriate access rights due to the fact that the hibernation file is a system file, as referred to above.
Getting rid of hiberfil.sys by means of PowerShell in Windows 10:
To switch off caching in the system file by means of PowerShell, all you have to implement is a run a command. Nevertheless, in the first place, you ought to launch PowerShell with the administrator’s rights by means of the keyboard shortcut [Windows] + [X] or right-clicking the Windows icon and selecting Windows PowerShell(Admin) Windows PowerShell.
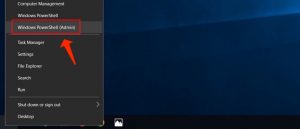
Windows 10 Quick Menu
As soon as you start PowerShell (you may have to indicate a password), specify in the following CMD command to deactivate the hiberfil.sys file:
powercfg /hibernate off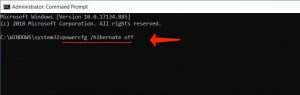
Windows 10 Powershell
Hit Enter for confirmation of your choice. Hibernate mode will be deactivated and the hiberfil.sys file will be automatically removed.
Also consider reading: How to Repair Sound Problems in Windows 10
Getting rid of hiberfil.sys by means of the registry in Windows 10:
You shouldn’t deactivate the hiberfil.sys file using the registry unless you are technically savvy in using the registry database. Improper entries or amendments to the entries can eventually result in Windows 10 failures to operate in a proper manner.
The service is basically simple to switch off with the help of this solution. Initially, refer to the “HibernateEnabled” registry entry, which can be found here:
\HKEY_LOCAL_MACHINE\SYSTEM\CurrentControlSet\Control\PowerDouble-click the above-said entry and specify the value in the Value data field to 0 to deactivate Hibernate mode and get rid of the hiberfil.sys file:
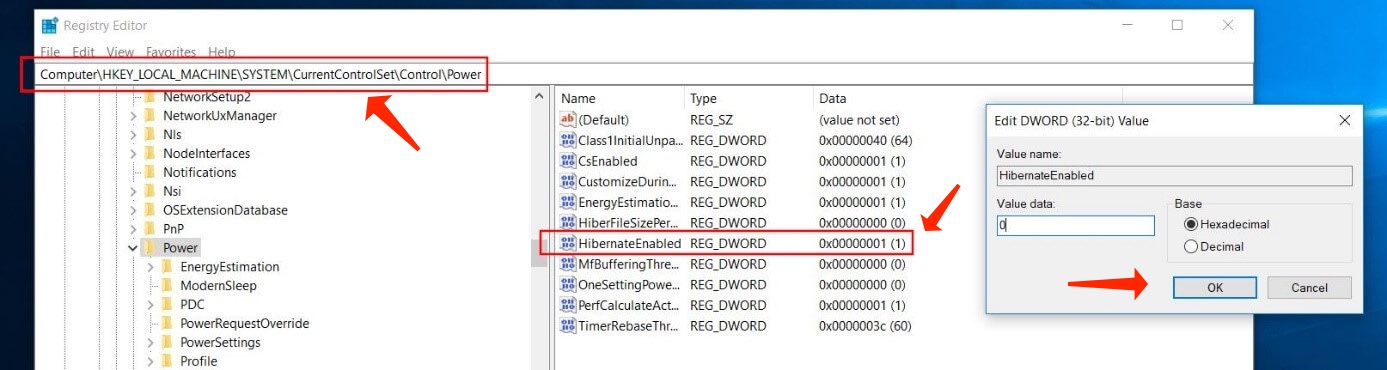
Windows 10: Open entry in the Registry Editor
Getting rid of hiberfil.sys in Windows 7 and 8: Step-by-step tutorial
You can also get rid of the hibernation file from your system if you’re the customer of Windows 7 and 8. Similar to Windows 10, you can select between Command Prompt and the registry database. The process is almost identical to Windows 10.
Getting rid of hiberfil.sys with Command Prompt in Windows 7 and 8:
Even though the command to deactivate hiberfil.sys is the same in all versions of Windows, the milestones for opening Command Prompt are different based on your OS version. Unlike Windows 10, Windows 7 and Windows 8 haven’t got a Quick Access Menu, therefore, this option for starting Command Prompt isn’t applicable. Instead, go to the Windows Start menu and apply the built-in search functionality. Just type the below-said text in the search bar:
cmdWindows will display Command Prompt as a matching result. Right-click to choose it and select Run as administrator. Provide the CMD command given above and select Enter to deactivate caching for Hibernate mode and to delete hiberfil.sys:
powercfg /hibernate offWindows 10 Powershell
Getting rid of hiberfil.sys by means of the registry in Windows 7 and 8:
Identical to Windows 10, you start from the Start menu if you would like to deactivate hiberfil.sys through the registry. But instead of referring to the search bar, choose the Run feature. If it’s not displayed in your Start menu, you can unhide it in the following manner:
- Right-click the taskbar.
- Choose Properties.
- Proceed to the Start Menu tab and choose Customize.
- Go to Run command and select OK. Select Apply to save the amendments.
Start the “Run” dialogue and provide the command for opening the Registry Editor:
regedit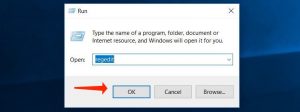
Window’s Run feature
Now go to the directory for the registry entry of Windows Hibernate mode:
\HKEY_LOCAL_MACHINE\SYSTEM\CurrentControlSet\Control\PowerAfterwards, click HibernateEnabled and define the value of this key to 0 to delete the hiberfil.sys file. In case the key doesn’t exist, generate it manually: Right-click in the window on the right and choose “New” and then DWORD value. Provide “HibernateEnabled” as the key name:
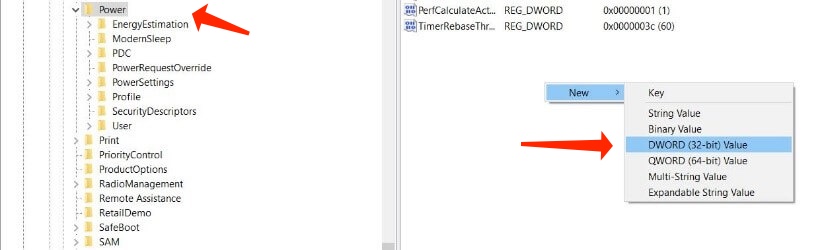
Generating a key in the Windows Registry
References
- How to open Registry Editor in Windows 10: https://support.microsoft.com/en-us/help/4027573/windows-10-open-registry-editor
Leave a Comment