
High CPU usage results in the system slowdown. For instance, the apps require more time for launching, the data processing is much longer, system freezing may occur periodically. To fix this issue, you need to check the load on main PC components (on the CPU1, in particular) and to decrease it until the system begins to function normally.
Reasons for high CPU load
High CPU load can be the result of active programs demanding more power: contemporary games, professional graphic and video editors, server programs. After completing the work with such programs be sure to close them instead of minimizing. Thus, you will be able to save the PC resources. Some programs may function in the background even after being closed. In this case, you will need to close them via the «Task Manager»2.
If you don’t have any third-party programs active, however, there is a high CPU load, there may be several reasons here:
- Viruses. There are many viruses that don’t perform a considerable damage on the system, however, result in high load and make the common actions very complicated;
- «Clogged» registry. As time goes by, there are certain bugs and trashed files in the operating system, that may result in considerable load on the PC components;
- Programs in «Startup». Certain software may be added into this section and be loaded without the user’s permission along with Windows OS (the higest CPU load occurs during the system startup);
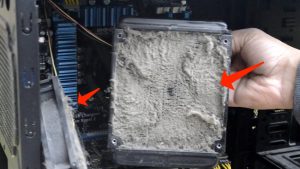
- A lot of dust in the desktop tower. The dust in its nature does not load the CPU, however, it may result in overheating, thus decreasing the quality and the stability of the CPU performance.
Also try not to install programs that do not meet the minimum system requirements of your PC. Such software may load and run relatively well, however, it may result in maximum CPU load, thus decreasing the stability and the performance quality with time.
Method 1: Cleaning «Task Manager»
In the first place, inspect what processes consume the majority of system resources and, if possible, terminate them. The same applies to the programs that are loaded along with the operating system.
Do not terminate system processes and services (specifically marked, which makes them different from the rest), if you don’t know what exact function they perform. It is only recommended to terminate the custom processes. You may only terminate the system process or service when you’re confident that this will not result in the system reboot or in the blue screen of death.
Pay attention to this guide: How to Resolve the Most Annoying Issues in Windows 10
Instructions to terminate unwanted components:
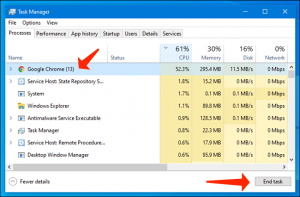
- Apply the Ctrl+Shift+Esc hotkey, open «Task Manager». If you have Windows 7 or older version, apply the Ctrl+Alt+Del hotkey and select «Task Manager» from the list.
- Proceed to the «Processes» tab in the upper part of the window. Click on «More details» in the bottom part of the screen to see all active processes (including those running in the background).
- Locate the processes that cause high CPU load and terminate them, by clicking on them with the left mouse button and selecting «End Task» in the bottom.
Also via the «Task Manager» you need to clean the «Startup» section. This is how to do it:
- In the right part of the window, go to «Startup».
- Now choose the programs that cause the highest CPU load (as specified in the «Startup impact» column). In case you don’t need this program to be loaded along with the system, highlight it and select «Disable».
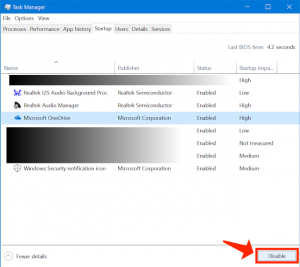
- Implement the 2nd step with all other components that cause high CPU usage (if you don’t need them to be started along with your operating system).
Method 2: Removing viruses
Minor viruses causing CPU load and masking themselves under various system services may be easily removed with the help of any reliable anti-virus software.
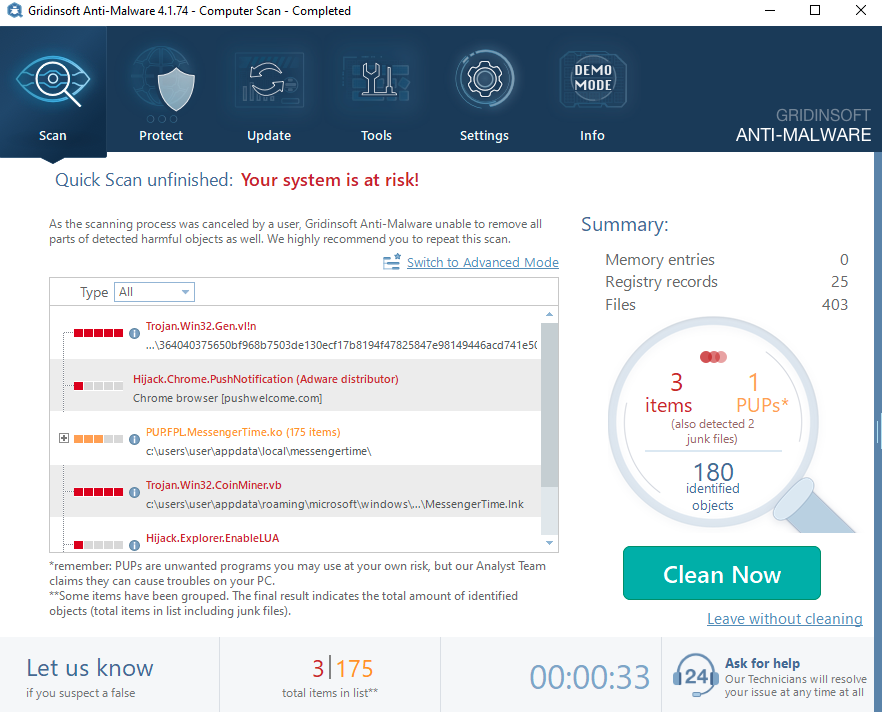
Let us review the system cleanup and virus removal process on the example of GridinSoft Anti-Malware:
- Download the program on the official Gridinsoft page.

- Click on the “install-gridinsoft.exe” file to begin the setup process. Once the software is installed, start scanning your workstation.
- Once the scanning is successfully accomplished, click on “Clean Now” to fix the issues:
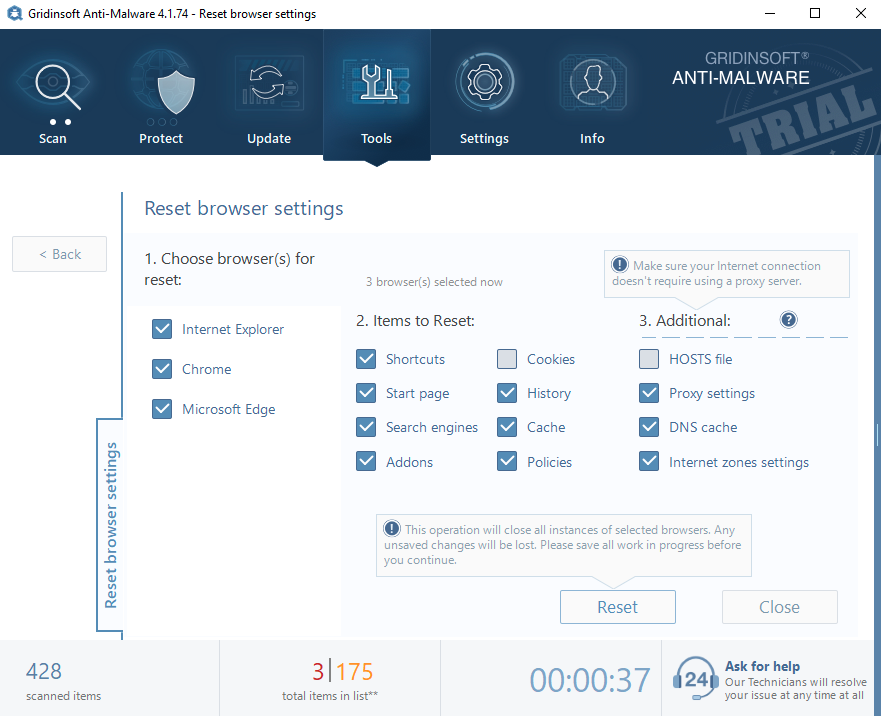
- Consider resettings browsers automatically with GridinSoft Anti-Malware. In the menu of the program, click on “Tools“, then select “Reset browser settings“:
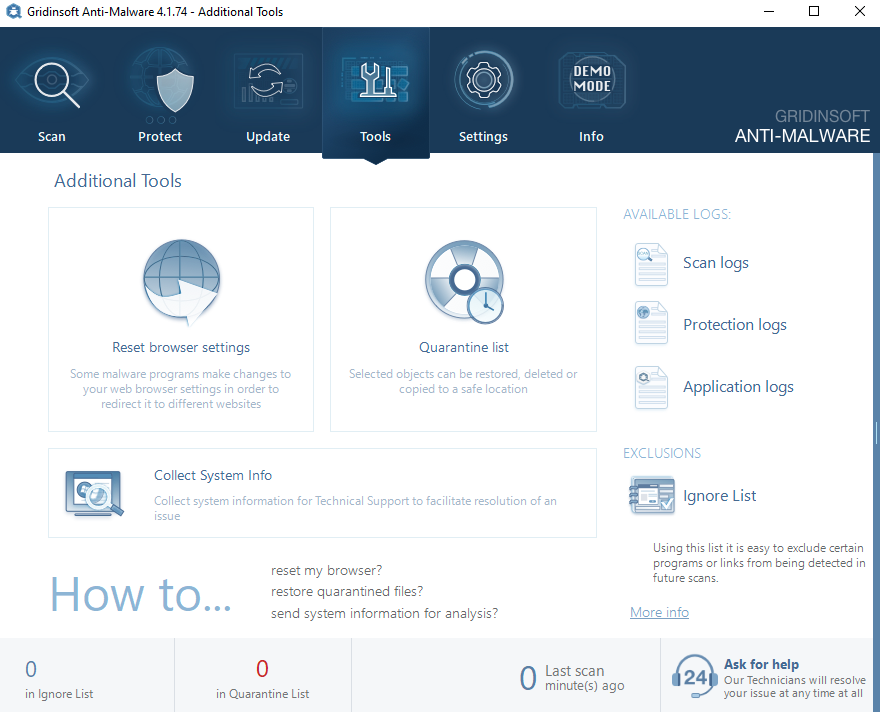
- Select the preferred browsers and the appropriate options, then click on “Reset“:
Method 3: Cleaning the PC from dust and thermal paste replacement
The dust by itself does not cause CPU load, however, it may penetrate into the cooling system, thus resulting in CPU overheating and diminishing the quality and stability of the computer performance. To clean up your PC from dust, use a dry rag. It is better to use special napkins for cleaning PC components, as well as cotton swabs and a low-power vacuum cleaners.
Instructions to clean the computer case:
- Disconnect power supply, undo the computer case cover.
- Wipe all the dusty areas with the napkin. Areas that are difficult to access may be cleaned with a brush. Also, at this stage, you may use the vacuum cleaner on low-power mode.
- Disconnect the cooler. If possible, unplug the ventilator from the radiator.
- Clean dust from these components. In case with radiator, consider using the vacuum cleaner.
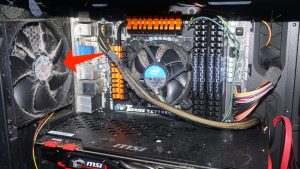
- While the cooler is unplugged, remove the old thermal paste layer with the help of cotton swabs/discs damped into spirits. Afterwards, put a fresh layer of thermal paste.
- Wait for 10-15 minutes until the thermal paste dries and install the cooler back to its location.
- Put back the computer case cover and connect the PC to the power supply.
Consider reading: How To Increase Internet Speed On Windows 10.
Following these tips and instructions you will be able to substantially decrease the CPU load. It is not recommended to download various programs supposedly meant to speed up the CPU performance, since you will not get any improvement at all.
READ ALSO: PC running slow? Ten things to check before you start replacing hardware.
References
- Central processing unit: https://en.wikipedia.org/wiki/Central_processing_unit
- Task Manager (Windows): https://en.wikipedia.org/wiki/Task_Manager_(Windows)
Leave a Comment