
Certain solutions that’ll make our Windows 10 function much faster are set forth below:
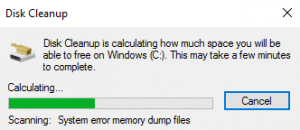
Apply Disk Cleanup to get rid of unwanted files
- Look for Disk cleanup in the search box of the taskbar.
- At this point, click on it to launch it. Then, choose the drive you would like to clean.
- Allow a few seconds as it will perform the checkup of requested the disk.
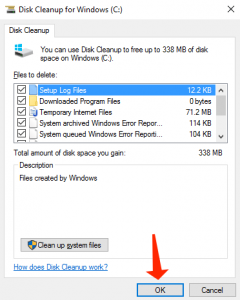
- Then, choose all files and confirm with OK.
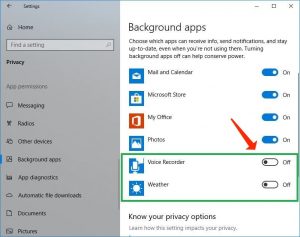
Boost Windows 10: Deactivate Background Programs
Proceed to Settings -> Privacy -> Background apps and deactivate all unwanted programs1 functioning in background and “eating” your precious data and CPU resources.
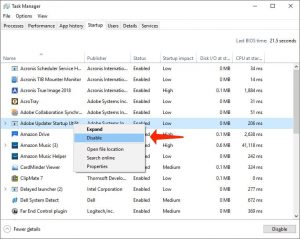
Deactivate Programs on Startup
Step 1 – In the first place, use the Task Manager by applying the Ctrl + Shift + Esc.
Step 2 – The next step is to click on startup tab.
Step 3 – Then, right-click on any software or program which you would like to deactivate on startup.
Get rid of Unwanted temp files
- Perform a right-click on windows icon on your taskbar.
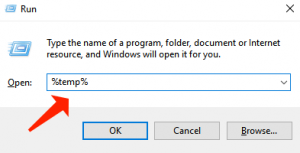
- Select Run. Optionally, you can also apply the windows key + R hotkey to reveal the run command box.
- At this point, specify %temp% in the run command box and press Enter.
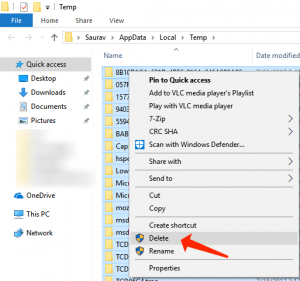
- Then, get rid of all files in this folder
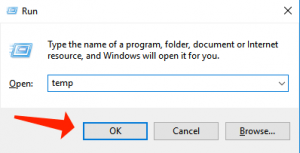
- The next step is to right-click on windows key and select run.
- At this point, specify temp in the run command box and press Enter.
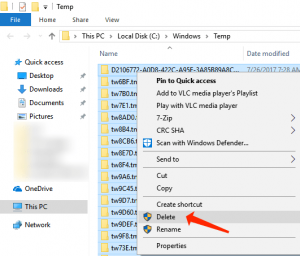
- Then, get rid of all the files in this temp folder too.
Get rid of Prefetch files
Step 1 – Right click on the Windows 10 taskbar and select run from the Menu.
Step 2 – Then, specify prefetch in the text area and press Enter.
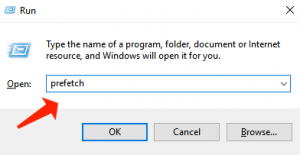
Step 3 – The next challenge is to get rid of all the files in this folder too.
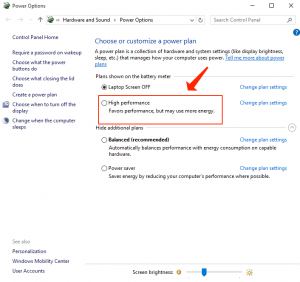
Boost Windows 10: Select High Performance Power Plan
- Proceed to Settings > System > Power & Sleep
- Refer to Additional Power Settings.
- Select High Performance Power Plan which renders better Performance
In case Your Windows 10 computer Remains Slow, You can undertake the measures below
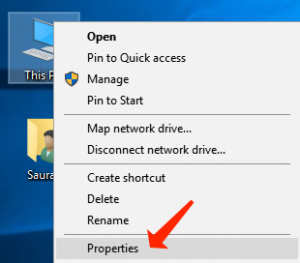
Modify the system for the best functionality
This solution assists in deleting unnecessary features of your workstation, such as animations and other visual effects.
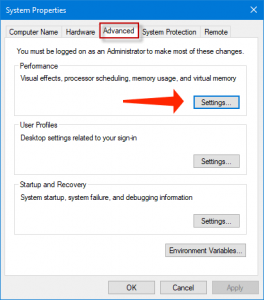
- Right Click on “This PC” icon on Desktop. Select “Properties” to reveal the “System Settings” window.
- Choose “Advanced System Settings”.
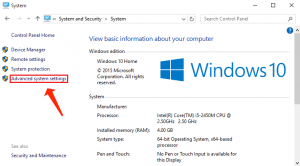
- In the “Advanced” parameters, select “settings” below the Performance area.
- Select “Visual Effects” tab area. And then Select Adjust for best performance.
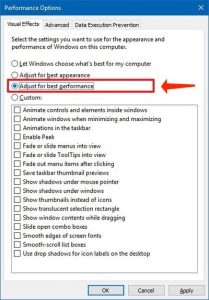
- Don’t forget to click on “OK” for the amendments to take place.
Also consider reading: 🥇 [Top 10] Best File Recovery Tools of 2020.
Modify registry for mouse and menu delay parameters
Step 1:
Right-click on the Windows key and select run.
Step 2:
Specify regedit and press Enter.
Step 3:
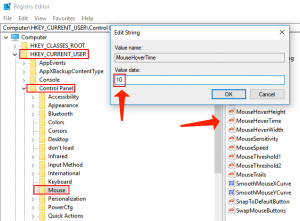
As soon as the registry editor window comes up, proceed to the following destination.
- HKEY_CURRENT_USER
- Control Panel
- Mouse
Step 4:
At this point, Double click on MouseHoverTime in the right section.
Step 5:
Then, amend the value data to 10.
Step 6:
Afterwards, proceed to the below-stated location.
- HKEY_CURRENT_USER
- Control Panel
- Desktop
Step 7:
Then, select MenuShowDelay from the right section.
Step 8:
At this point, amend its value data to 10.

Remove Unwanted Applications and utilities
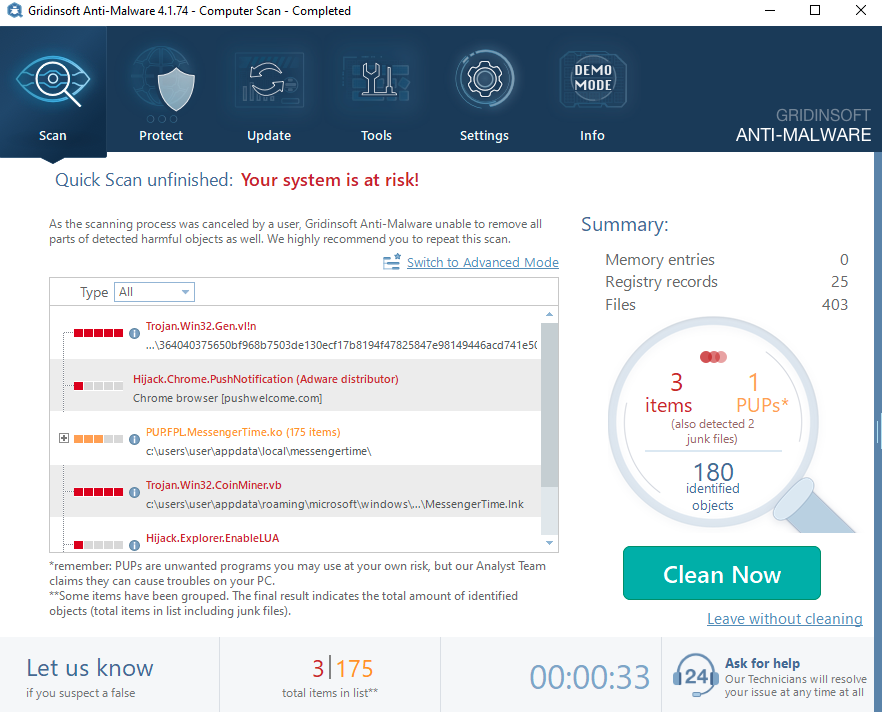
Certain resource-consuming programs which you may have previously installed may be the main reason of the slow performance of your Windows 10 PC. Simply proceed to the “Uninstall program” area of the Control Panel and get rid of any unwanted programs you don’t really need. Consider the automatic cleanup of your PC with GridinSoft Anti-Malware. You may download it on the official page https://gridinsoft.com/antimalware:
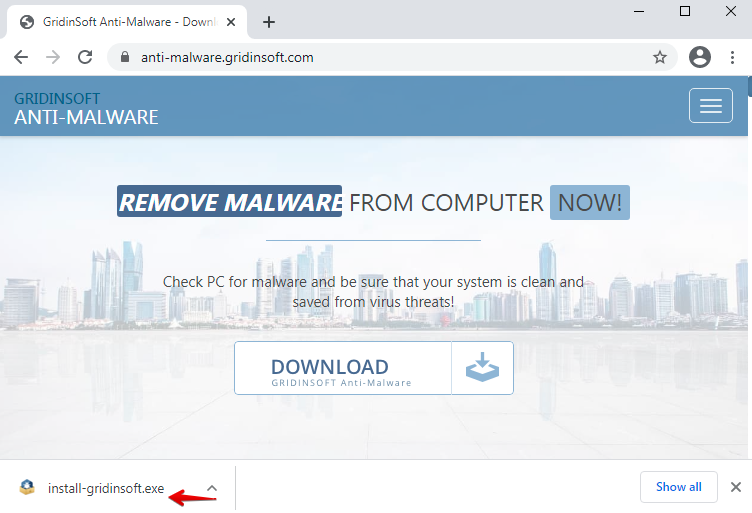
Click on the “install-gridinsoft.exe” file to begin the setup process. Once the software is installed, start scanning your workstation. The program will carefully examine your PC to detect the malware or adware you cannot visually establish. Once the scanning is completed, click on “Clean Now” to fix the issues:
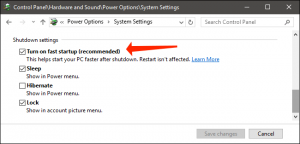
Activate Fast Startup
- Look for “Power options” in the Search bar of the taskbbar and click to launch it.
- Then, click on “Choose what the power buttons do” in the left hand area of the window
- A new window named System settings will come up. Click on Change settings that are currently unavailable
- Just uncheck the checkbox under this category that indicates “Turn on fast startup (recommended)”.
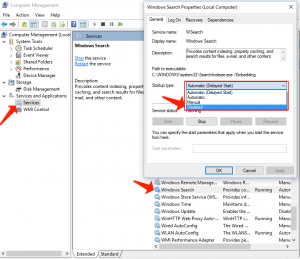
Deactivate Search Indexing
Search indexing, apart from improving the search responses, can weaken your Windows 10 speed, which can be sometimes very obvious. Thus, if you are not an active searcher on the web, deactivating the search indexing parameter is a better solution.
To stop/deactivate the search indexing procedure, please implement the below-mentioned recommendations:
- Perform a right-click on ‘This PC’ or My Computer and Select ‘Manage’.
- Then, Proceed to ‘Services and Applications’ -> ‘Services’.
- Locate ‘Windows Search’ and double-click on it.
- Select ‘Startup type’ and amend it to the “disabled” state. Use OK for confirmation.
Switching off UAC
The User Account Control (UAC) notifies the customer every time before launching any manual application executed by the customer. This is the default parameter in Windows 10. You can amend it to install applications in a more simpler way. The solutions needed to switch off UAC are as follows:
Step 1:
Click on Windows Search bar placed at bottom left area of your screen. Specify “uac” and click on the first option rendered.
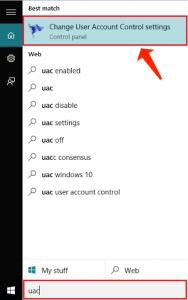
Step 2:
Move the bar to “never notify” area and click on “OK”.

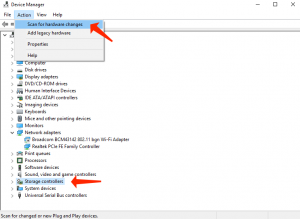
Updating Device drivers
Updating any outdated drivers in your system may help to speed up the system speed. Simply look for update device drivers in the search field.
At this point, choose select your computer name from the list and then select Action -> Scan for hardware changes.
Boost Windows 10: Optimizing Folder Options
Step 1:
Look for file explorer options in the windows 10 search field of the taskbar.
Step 2:
At this point, once it comes up, click on the view tab.
Then, uncheck the below-said options
- Always show icons, never thumbnails
- Display file icon on thumbnails
- Display file size information in folder tips
- Show encrypted or compressed NTFS files in color
- Show pop-up description for folder and desktop items
- Show preview handlers in preview pane
On the other hand, be sure to check the following options quoted below:
- Hide empty drives
- Hide extensions for known file types
- Hide folder merge conflicts
- Hide protected operating system files (Recommended)
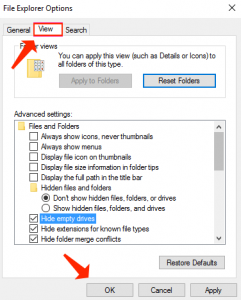
Don’t forget to Click OK.
Deactivate Unwanted extensions and add-ons of your available Browsers
In case you use Google Chrome, then go to its menu, click on “More Tools” and select “Extensions”. Then, delete the extensions to minimize their load on system. If you use Mozilla Firefox, delete add-ons to make it faster. You can also reset browsers to make them fast. In case you are the customer of Microsoft Edge, you can also modify its settings to make it rapid.
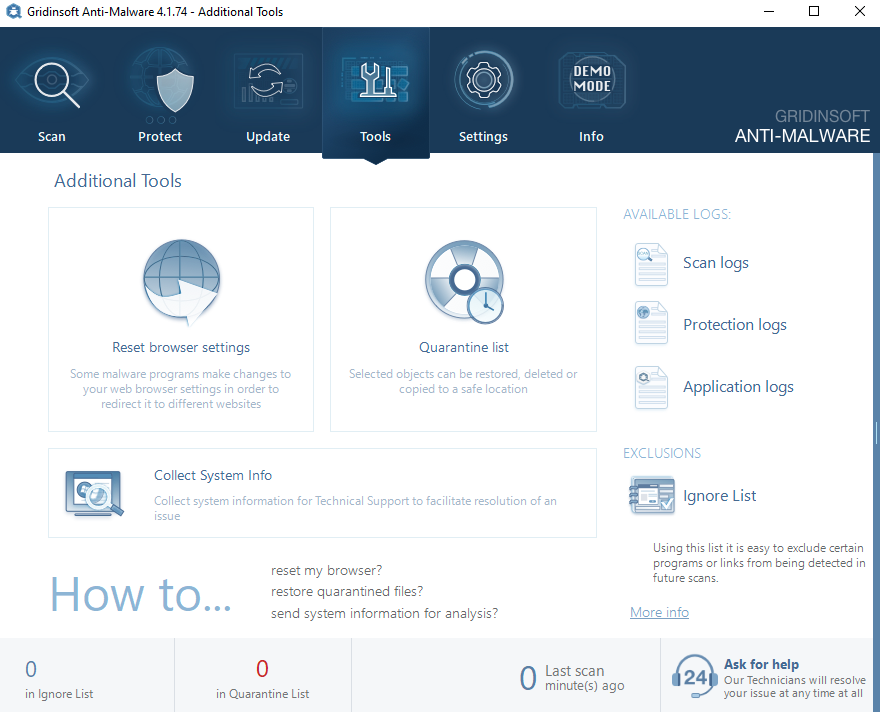
Consider resettings browsers automatically with GridinSoft Anti-Malware:
In the menu of the program, click on “Tools“, then choose “Reset browser settings“:
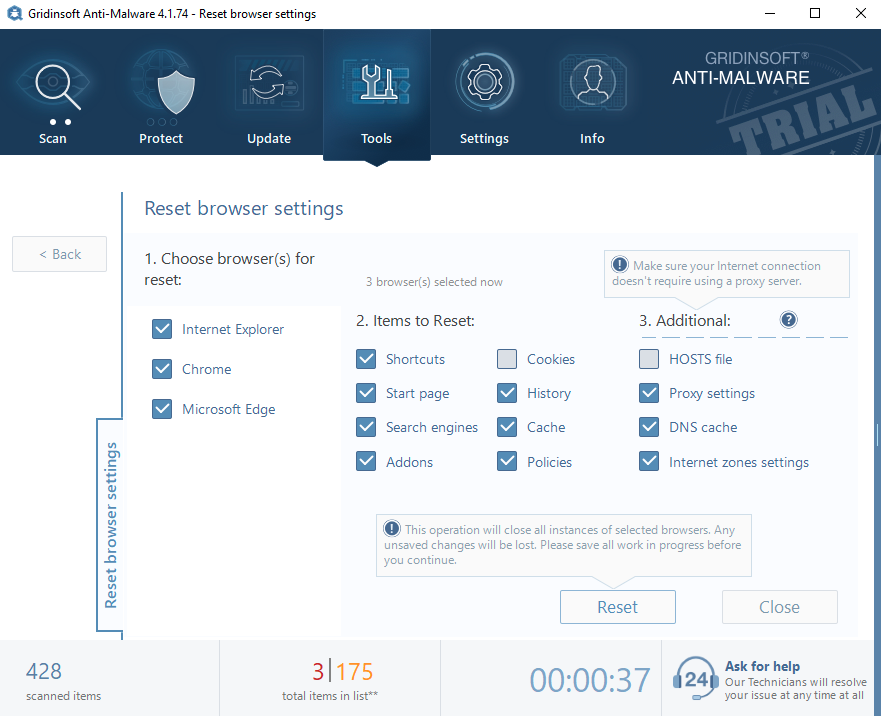
Choose the preferred browsers and the appropriate options, then click on “Reset“:
Boost Windows 10: Clean Temporary File everytime by Clicking on a Batch file
Apply the windows + r hotkey and launch the run command box. At this point, specify %temp% in it and press Enter. Then, get rid of all temp files in the folder. You can also generate a batch file and store it on your desktop. Thus, once you click on it at any time of your choice, it deletes all the temp files from your system.
The temporary files in windows 10 can be deleted by generating a batch file. Launching this file leads to cleaning all the cookies, cache and any other temporary data. The tips to form the file are set forth below:
Step 1:
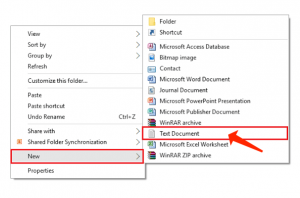
Right-click on the screen, go to the new section and select “Text Document”.
Step 2
Simply Copy and Paste the Code Given Below in the Notepad File.
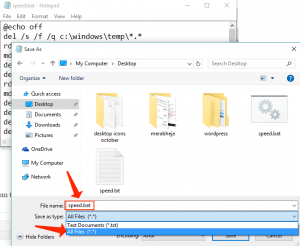
@echo off
 del /s /f /q c:\windows\temp\*.*
 rd /s /q c:\windows\temp
 md c:\windows\temp
 del /s /f /q C:\WINDOWS\Prefetch
 del /s /f /q %temp%\*.*
 rd /s /q %temp%
 md %temp%
 deltree /y c:\windows\tempor~1
 deltree /y c:\windows\temp
 deltree /y c:\windows\tmp
 deltree /y c:\windows\ff*.tmp
 deltree /y c:\windows\prefetch
 deltree /y c:\windows\history
 deltree /y c:\windows\cookies
 deltree /y c:\windows\recent
 deltree /y c:\windows\spool\printers
 cls
Step 3:
Save the file as “speed.bat”.
Clear all types of windows 10 cache
Boost Windows 10: Hide all Non-Microsoft services
- Right click on the Windows 10 taskbar and select run.
- At this point, specify msconfig in the run command box and hit Enter.
- Then, go to the services tab.
- Inspect the option mentioning hide all microsoft services.
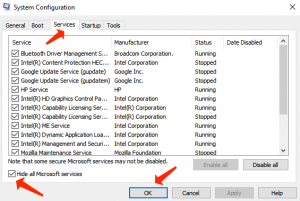
- Press Ok.
If Nothing else helps, you can consider resetting your PC without losing data
This will definitely make your PC exceptionally fast and you will also not lose your important information. It will refresh your operating system and will unambiguously make it rapid. Simply try resetting your windows 10 PC.
Proceed to Settings -> Update & Security -> Recovery -> Get started
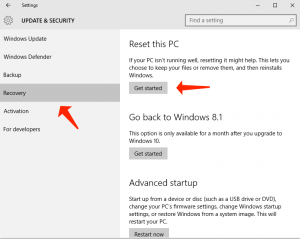
At this point, select Keep my files, if they’re really important to you.
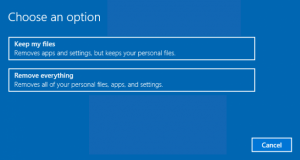
The reset procedure takes about a few hours, so take your time.
References
- Windows 10 background apps and your privacy: https://support.microsoft.com/en-us/windows/windows-10-background-apps-and-your-privacy-83f2de44-d2d9-2b29-4649-2afe0913360a
Leave a Comment