
“DNS Server is not responding” is a networking issue you can sometimes witness on your PC. It is usually followed by the inability to connect to any website, which is pretty painful for the vast majority of people. Fortunately, it is relatively easy to solve that problem – by just adjusting the settings. In this article, I will show you that – and help with fixing the “DNS server is not responding” error.
What is DNS?
To better understand what this issue stands for, it is important to know what a DNS server is and how it influences your networking1. You may just skip the explanation and go to the solution. People know user-friendly URLs – like howtofix.guide or youtube.com. However, they are not suitable for computers – and in particular for network infrastructure. Machines use the system of IP addresses, which look like 123.456.78.90 or 2001:0db8:85a3:0000:0000:8a2e:0370:7334. This sequence of numbers acts like an address that guides the internet packages through the Internet. Domain Name System, or shortly DNS, is literally an address book that helps your PC to find the proper address of a site you’re trying to connect to.
Once you typed the URL in the browser’s address bar and press Enter, your computer sends a request to the DNS server. It responds by sending your device the IP address of a website server that will be best for you to connect to. Not all of them may suit – your DNS server usually contains the records that suit your location most of the time. And, as you can guess, when DNS malfunctions or does not respond at all, it may be problematic to surf the Web.
Why does DNS Server is not responding error appears?
DNS server errors may have different natures, from your fault to the problems on the server side. Also, something can go wrong with your network router – and in that case, the problem may touch even hardware elements. It is pretty complicated to figure out what exactly went wrong – you can perform the troubleshooting I offer below way faster. There are 10 possible ways of solving this problem – let’s start from the least complicated to the most.
DNS Server is not responding — how to fix it?
Reboot your router
The simplest and the least time-consuming option is to simply reboot the network router. It may experience random firmware issues, and switching it off and back on will likely help the device. Most devices have a power switch button on the back side – just press it once and wait for 10 seconds, then press it again. If you cannot find the one, just plug it off from the power supply, and plug it back in after the same 10 seconds.
Disable your antivirus
Sometimes, the things which are designed to work for our good may malfunction. They never do this intentionally, but you should be aware about that probability. Shutting down your antivirus may help to fix the problem. Additionally, check the tray – sometimes, antiviruses keep running in the background even after pressing the Close button.
Disabling secondary connections
You may have multiple connection options – each VPN and proxy server you’ve used adds one. Moreover, they may appear as you use different ways of network connection. Having several active simultaneously may cause an issue – the inactive connection hangs on the connection, and the one you currently use fails to connect because there is an unprocessed request.
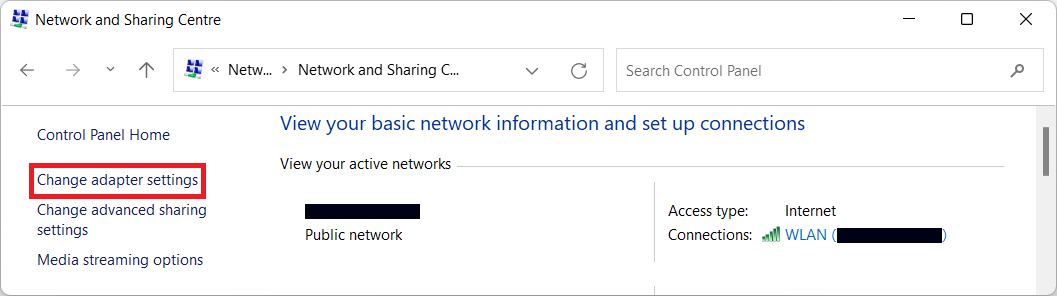
Go to Control Panel → Network and Internet. There, go to the Network and Sharing Centre → Change adapter settings.
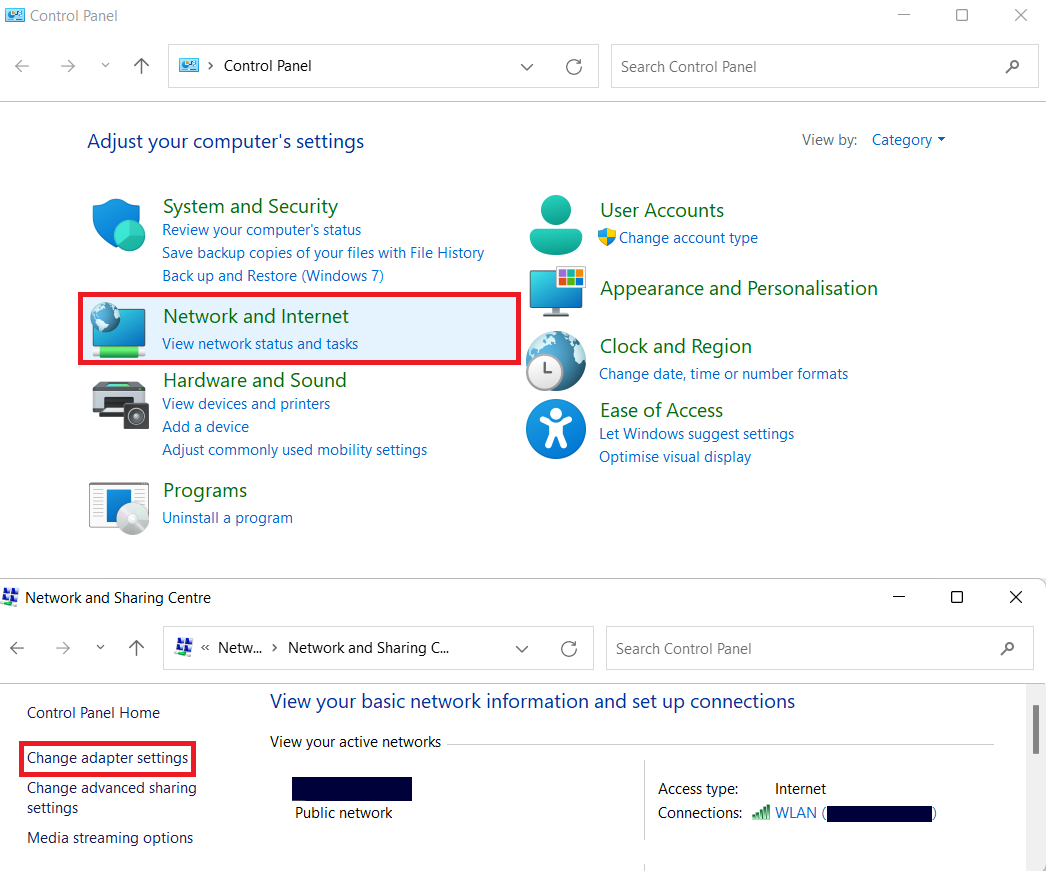
In this menu, you will see the list of all connection options you’ve ever had.
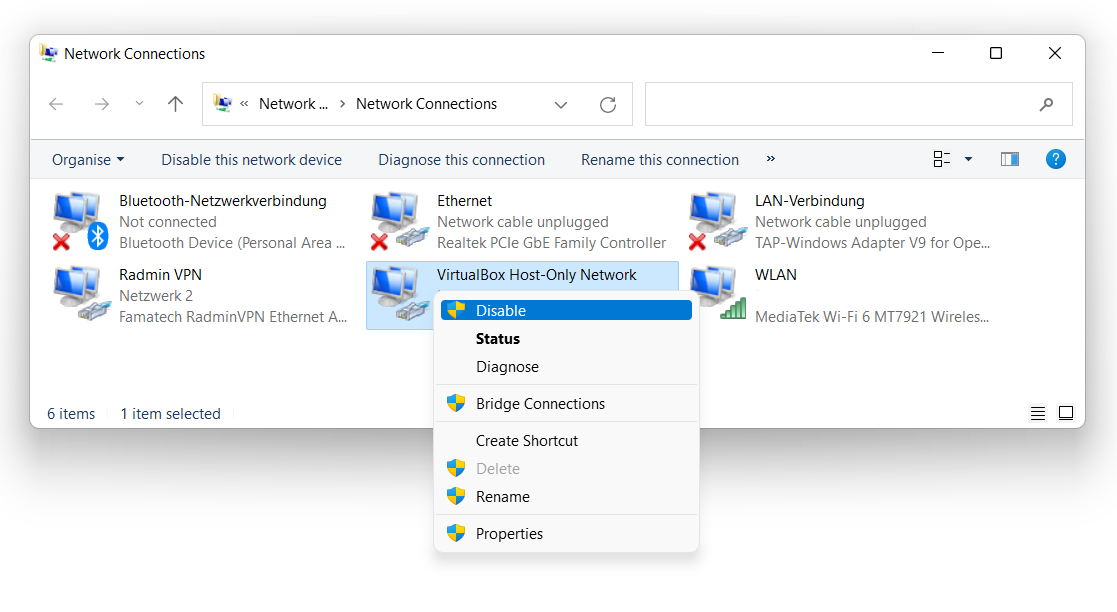
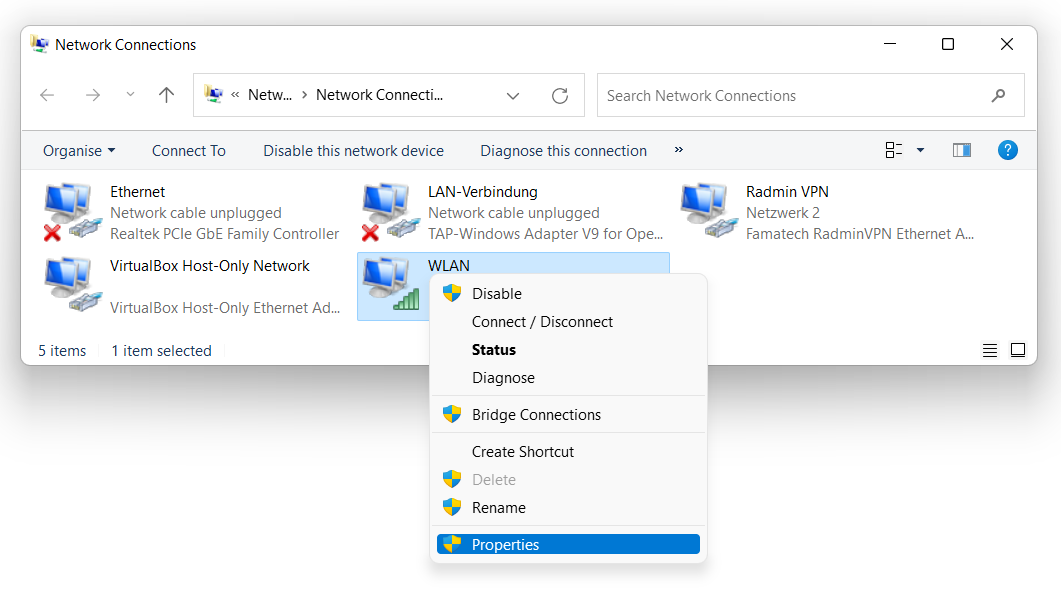
Disable ones you currently don’t use – leaving WLAN and Internet active will likely be enough. If you currently use VPN, leave it on as well – its connection option will have the corresponding name.
Update drivers
In some cases, the DNS server is not responding issue may be caused by outdated network card drivers. Most of the manufacturers publish the latest version of them on their official websites. It is strongly recommended to get the drivers from the official source, as third-party sites cannot guarantee that the package you receive is genuine and clean of malware. Meanwhile, driver-level viruses can easily create chaos on your device.
Updating the drivers through the Device Manager interface (the default Windows utility) is not recommended as well. It is not dangerous, but may bring no effects, as these updates come from Microsoft’s servers. They upload the new driver versions, too, but not as often as the developers, and sometimes they miss some minor updates – like the ones which may fix the DNS issue.
Disable Windows update p2p feature
To give users a choice for updates delivery, Microsoft made it possible to download the new patches through peer-to-peer connections. That allows to decrease the traffic consumption but slows down the overall process. Meanwhile, the exact process may influence the networking settings, making the DNS server unreachable. Disabling p2p delivery will cross out this possible source of a problem.
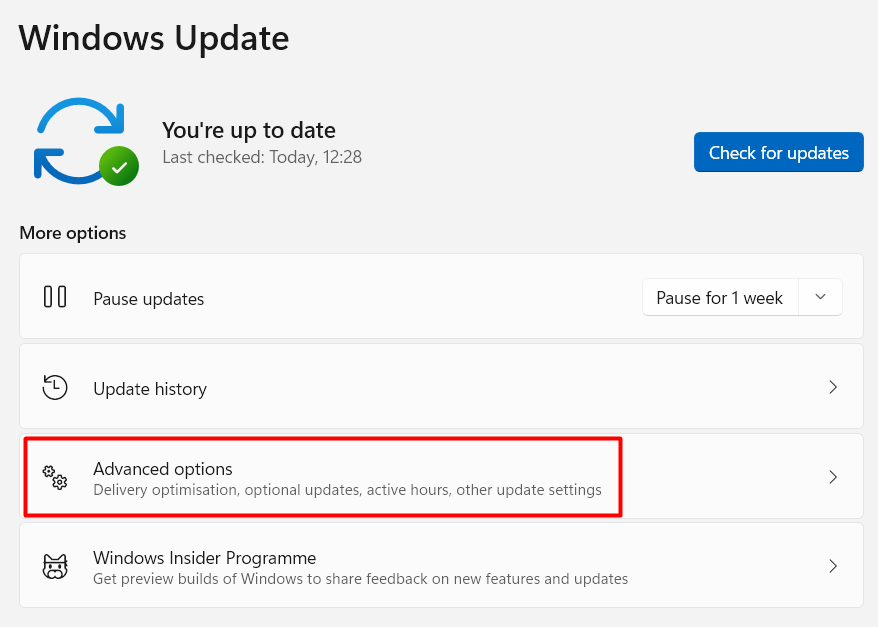
Open Settings → Windows Update. There, press the Advanced options button.
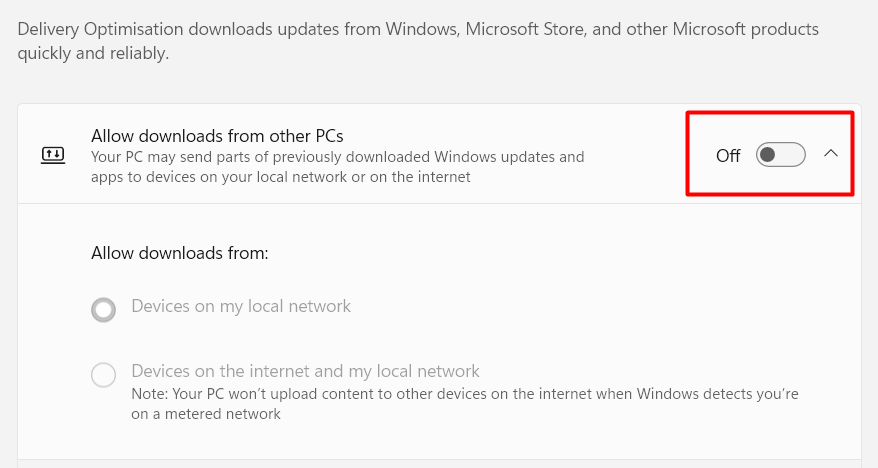
There, scroll down to Delivery Optimisation. Here, opt-out the Allow Download from Other PCs option.
Reboot Windows into a Safe Mode with Networking
In some situations, network connections and in particular the DNS connections may be severed by the software you have on your device. That’s a pretty rare case, but worth testing, since malware can be a reason for such a problem. Safe Mode supposes that your system will be booted without any third-party software and related services loaded in the background. An option “with Networking” will make it possible to test the connection.
Press Windows button, then hold the Shift button on your keyboard, and press Reboot in a power-off menu. In such a way you will be transferred to a recovery menu.
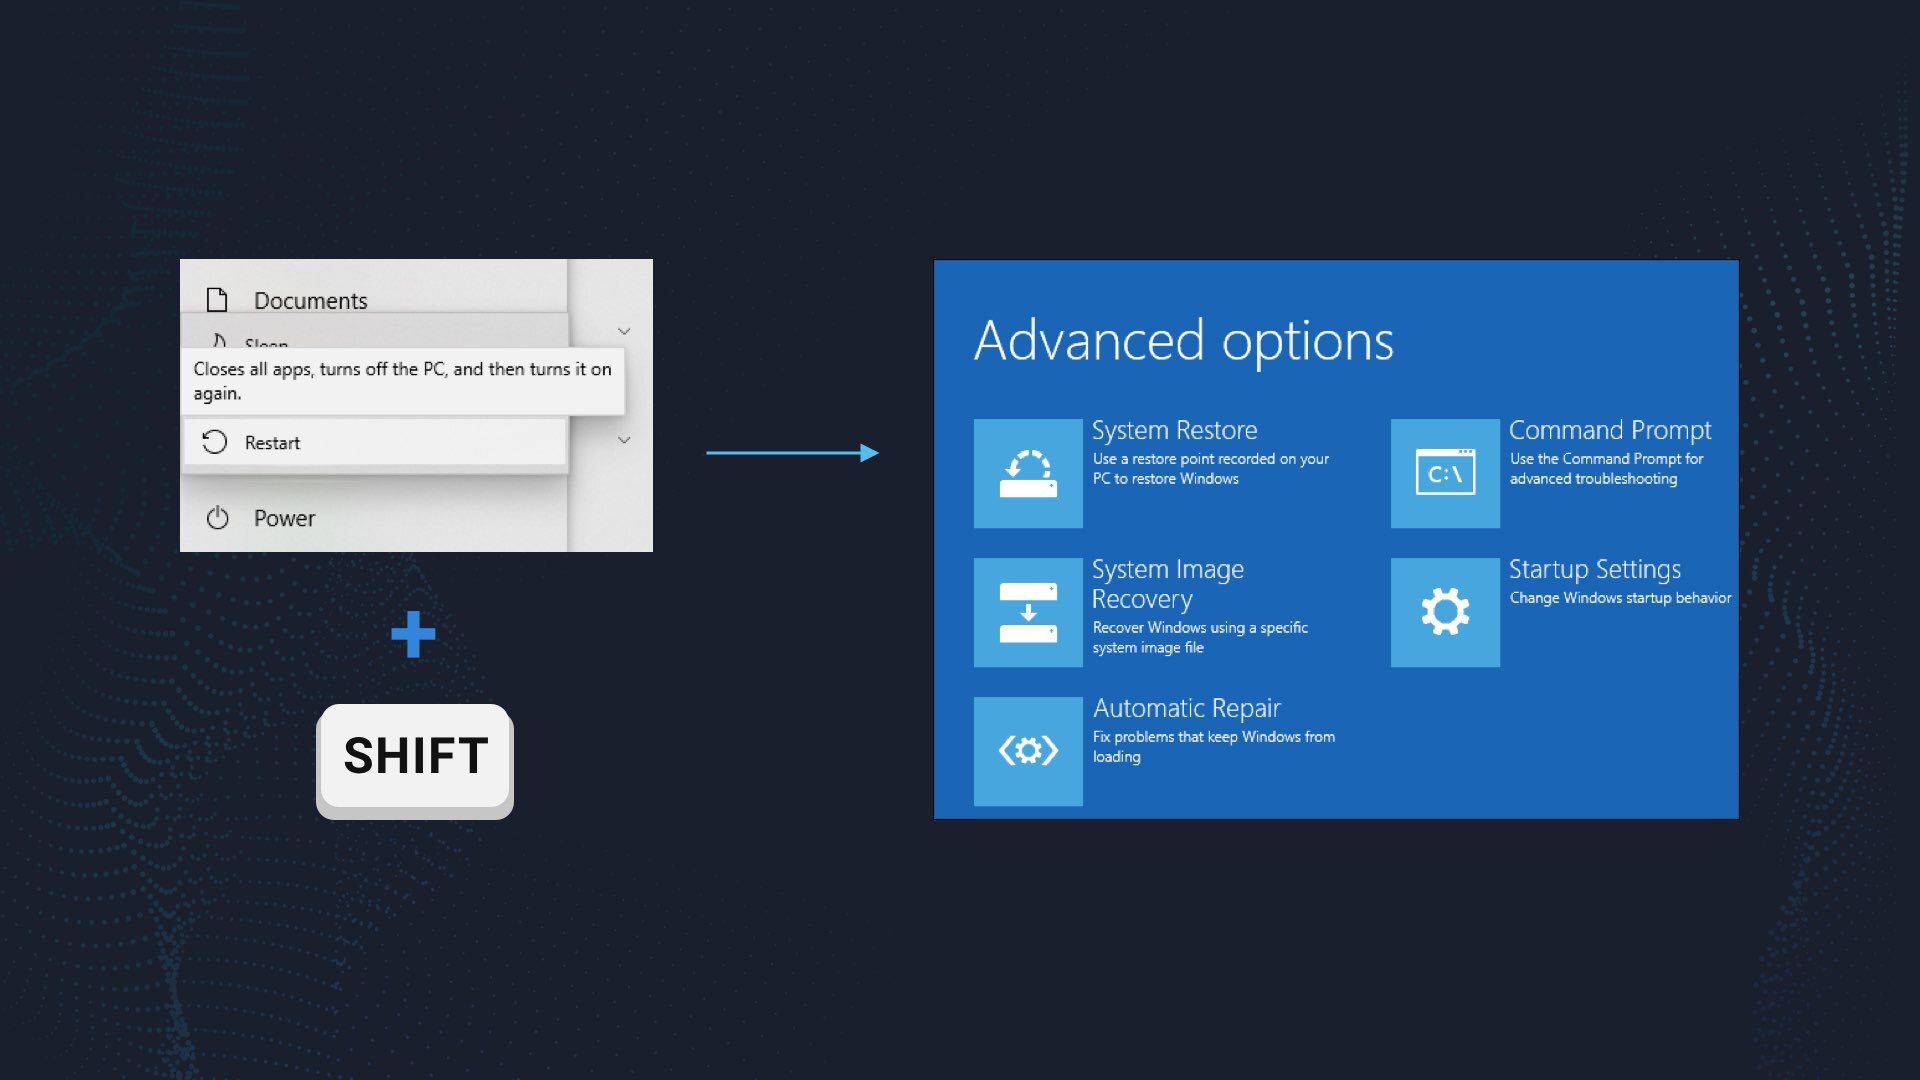
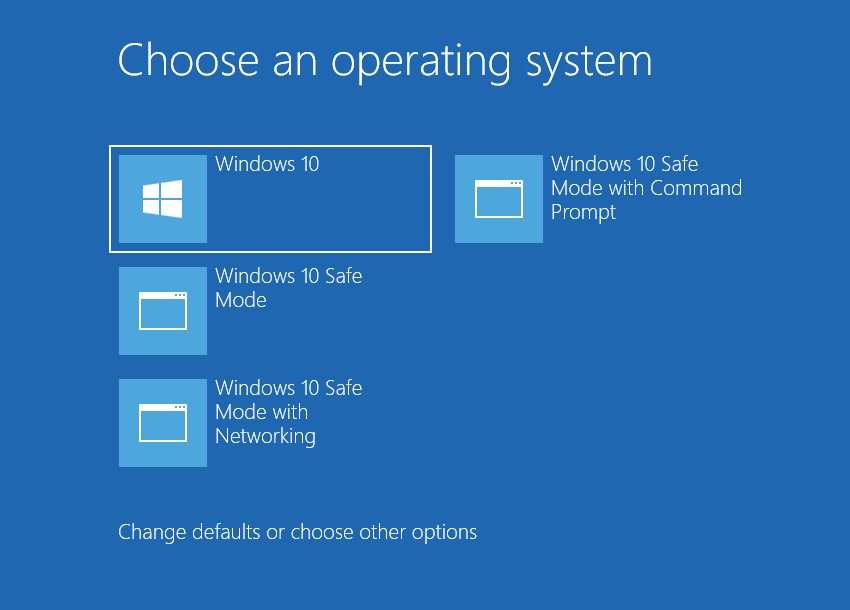
There, go to Startup Settings → Windows 10 Safe Mode with Networking. Press Enter, and your PC will be booted back, but with the aforementioned changes.
If the problem was solved after that step, hence the issue is called by the software you have on your PC. To weed out possibly malicious origins, I’d recommend you to scan your computer with a decent anti-malware solution. GridinSoft Anti-Malware will fit perfectly for this task.
Disable IPv6 feature
IPv6 is a supposed successor of an IPv4 standard, that offers a much wider range of possible IP addresses. That solves the issue which appeared in mid-’00s – the addresses pool was swiftly draining, as each new device in the network required a separate address. Currently, an amalgamation of IPv4 and IPv6 is applied – and that is the possible source of a problem. Disabling the IPv6 usage will not influence your networking experience – as any endpoint has a duplicated v4/v6 address.
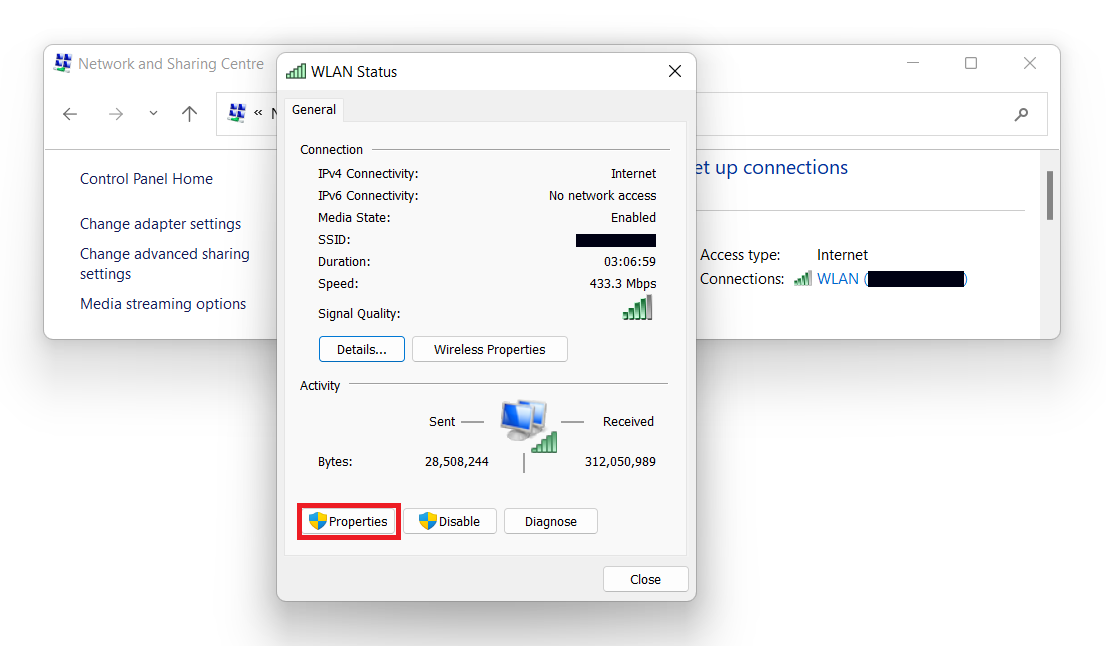
Open Control Panel → Network and Internet. There, click on Network and Sharing to open the information about your current connections.

Press on the top one, which represents the connection you’re currently using. In the appeared window, choose “Properties” to open the adapter parameters.
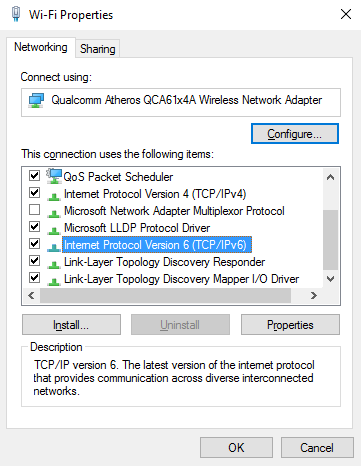
There, you need to scroll down and find the “Internet Protocol Version 6” parameter. Unmark it, and press “OK”
Change the DNS server
If the DNS server that your system has set by default during the networking setup is working wrong, you may try alternatives. For instance, you can use a DNS server offered by Google – it is safe and legit to use, and it is free2. Changing these settings require you to open networking settings in a Control panel once again.
Go to Network and Internet → Network and Sharing Centre → Change adapter settings.
There, choose the connection you currently use, and click it with a right mouse button. Choose “Properties”. You’ll see the adapter settings window.
There, find the Internet Protocol Version 4 option, click it once, and go to the Properties button.
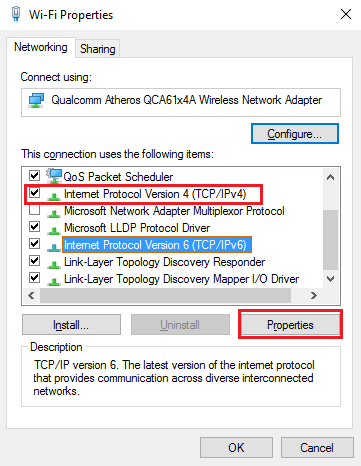
In the lower part of a window, opt for “Use the following DNS server addresses”. Then, specify the 8.8.8.8 address as a Preferred DNS, and 8.8.4.4 as an Alternative. Click OK to save the settings.

Enter MAC-address manually
Sometimes, the issue of the DNS server is not responding may occur because of the error in the MAC-address set by default for your device. MAC-address is a virtual address of the exact device, that allows to distinguish it from others in the network. Sometimes, the system of MAC-address assigning may fail to work properly – so you need to set it up manually.
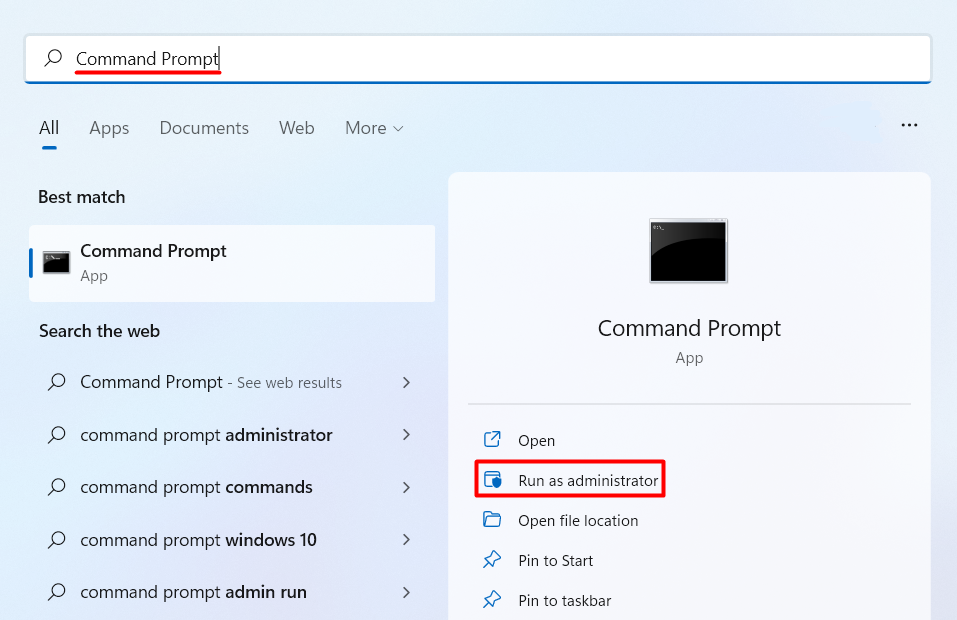
Open Command Prompt with administrator privileges.
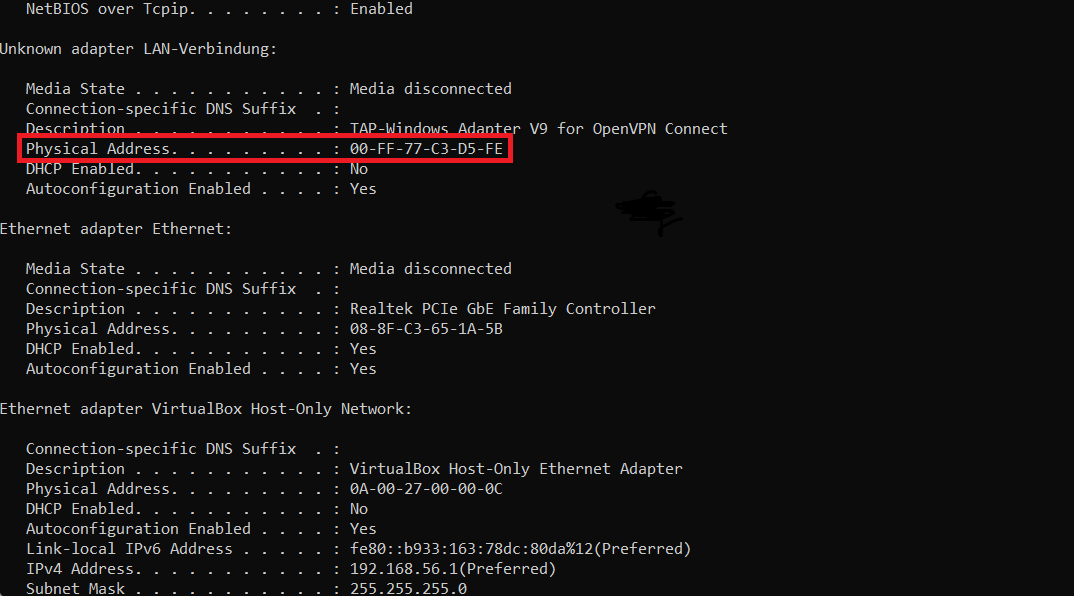
There, type the following command: ipconfig /all. It will respond with a list of current networking properties of your PC. You need to find a “Physical Address” row, and copy its value.
After that, go to the Control Panel → Network and Internet → Network and Sharing centre. Choose the option from the top of the list – it’s your currently active connection – and press on the network name badge.
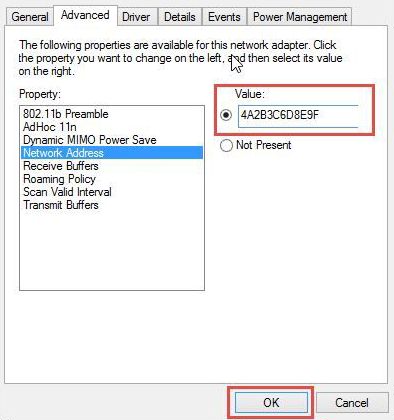
In this window, go for Properties, and click on Client for Microsoft Networks. In the appeared window, opt for the Advanced tab, and find there “Network Address” row”. Click on it, and paste the value you’ve copied before into the field that appeared in the right part of the window. Press OK to apply the changes.
Clear DNS cache and reset the IP address
Your system caches the IP addresses of the sites you visit more often than others. That list of cached IPs may sometimes get bugged, and prevent the computer from receiving a correct DNS address. Meanwhile, IP configurations can turn out to be wrong as well, especially after your manual changes in them and alterations from a third-party software. Cleaning the cache and resetting the IP setups may fix the situation as well.
Start a Command Prompt with administrator privileges. Then, type each of the commands you can see below, one by one, pressing Enter after each command.
netsh int ip reset

netsh winsock reset

ipconfig /flushdns

ipconfig /renew
They will wipe out the DNS cache and revert the IP settings to the original state.
References
- The detailed article about DNS, its history and mechanism on Wikipedia.
- Google’s official notice about public DNS servers they offer for free.
Leave a Comment