How can you decrypt ransomware? In some time is possible to decrypt files infected with ransomware.
First, you need to calm down and avoid acting in a rash. You need to realize that your computer has been attacked by ransomware, which means that the problem is not limited to just losing encrypted files. Most likely, an active infection is still present on your computer. In all your further actions, you should consider that everything you do on the computer, like running programs, entering credit card numbers, and making calls, can now be intercepted by cyber-criminals.
Step 1. Remove spyware and backdoors
Now the main task is to get rid of a virus that spies on you or continues to encrypt all available files. To do this, follow the link to download GridinSoft Antimalware, and following these instructions clean your system from infection. Many users fear doing this because they think all encrypted files will also be deleted along with viruses. This is not true! Encrypted files are not a virus. They will not be removed by the virus removal tool.
Once your system is clean, you can proceed to the next step – determine the type of ransomware you were attacked. All of them are divided into families based on a principle they use. For example, such families as STOP/Djvu, Dharma, Zeppelin, Sodinokibi, Matrix and the others are widely known. Some have a decryption method that does not suggest turning to attackers for ransom. Others, it is practically impossible to decrypt.
Step 2. Find your kind of infection
To determine the type of threat, you can use the search on our site, for example, by entering the search extension of the files you received as a result of infection. Or you can search by attackers’ e-mail, usually found in a separate file or a folder with encrypted files. Here is an example of a search if all your files changed their extension to “.msop”:
Or an example of a search by ransomware e-mail “[email protected]”:
If you couldn’t find the type of virus that attacked you, use this form to send us a request for review:
Step 3. Try to recover your data
Now, determine the specific type of threat carefully. Read the article, which describes in detail what you are dealing with and what are the ways to solve the problem. Remember that the easiest way is to restore your files from a backup. Checking if it is there makes sense even if you think you didn’t do it. The fact is that windows can back up on their own without notifying you.
If no backup is found, look in the cloud storage: Google Docs, OneDrive, Apple iCloud, and others that you may have used. Quite often, people in a panic forget that they used cloud services and that their files are still stored there. If there is no backup, try using the utilities specified in the infection description.
You need to understand that if the tool indicates that it cannot help you, most likely, it means that the type of virus that infects your computer appeared recently. So the developers of anti-virus solutions need time to add your case to their database. This can take either a few days or several months. Here it would be best if you were patient. Periodically check our site for new decryption methods. We regularly update our materials and monitor the release of updates.We can recommend that you collect all encrypted files on a separate carrier along with a ransom note and save them until a solution is found.
Step 4. Reporting ransomware to authorities
Each ransomware case contains a pile of information that may help catch the ransomware developers and get the decryption keys from them. Local authorities responsible for cybercrime investigation often get information about new attacks only from mass media, besides getting it directly from the victims. The recent Emotet developer’s arrest is the approval: this trojan virus was among the most popular ways of ransomware injection. You can read the detailed guide with the specification of data you need to make a correct report in the separate article.
Step 5. Isolate the infected device
After being injected into one of the computers in the network, ransomware tries to spread on the whole network, infecting all possible computers. To avoid damaging more than a single PC, remove it from the web or plug out the Ethernet cable from its port if the system administrator is away. However, performing the removal/decrypting process requires a network connection, so it is recommended to use the first method.
Be also careful while trying to perform removal/decryption actions with the help of another PC (i.e., attaching your disk drive to someone’s computer). Several ransomware variants can infect the devices in such a way that a friend of yours will not like the result. And no one knows if ransomware can do the same in the future.
Step 6. Try to restore the files with PhotoRec
PhotoRec is a program that is originally designed to restore files that were deleted unintentionally. However, you can use PhotoRec to get your files back because of the specific ransomware encryption mechanism. The virus creates a copy of each file it intends to encrypt. Then, after successful ciphering, it substitutes the original document with the encrypted one and deletes the original variant.
Of course, things are not so easy. The biggest possibility of getting the files back appears when you have an HDD, and the amount of time passed after the encryption is minimal. After the file is deleted from the file system, its information is still available on the physical area of the disk, and such tools as PhotoRec can check the disks for such remnants.
However, because of HDD slowness, more and more people choose solid-state drives (SSD) as storage options. And the majority of modern OS use the special command to clean the described remnants to extend SSD lifespan. After this command, all file recovery tools will be useless.
But there is nothing bad in the attempt. Below, you can see the usage guide of PhotoRec, in text form and in the video.
At first, you need to download this app. It is 100% free, but the developer states that there is no guarantee that your files will be recovered. PhotoRec is distributed in a pack with other utilities of the same developer – TestDisk. The downloaded archive will have the TestDisk name, but don’t worry. PhotoRec files are right inside.
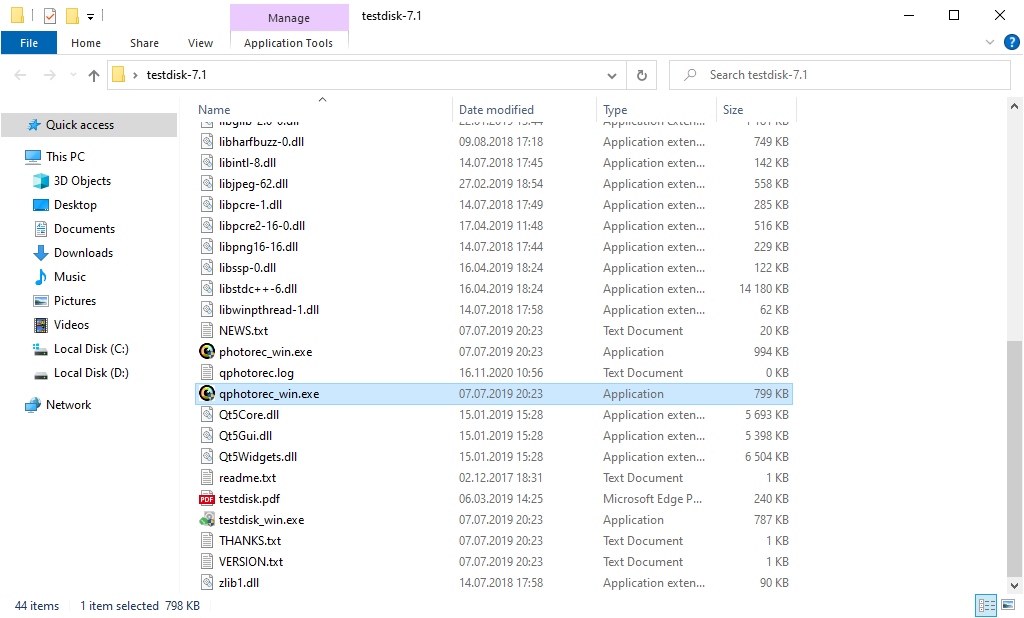
To open PhotoRec, you need to find and open “qphotorec_win.exe” file. No installation is required – this program has all the files it needs inside of the archive. Hence, you can fit it on your USB drive and try to help your friend/parents/anyone who was attacked by DJVU/STOP ransomware.
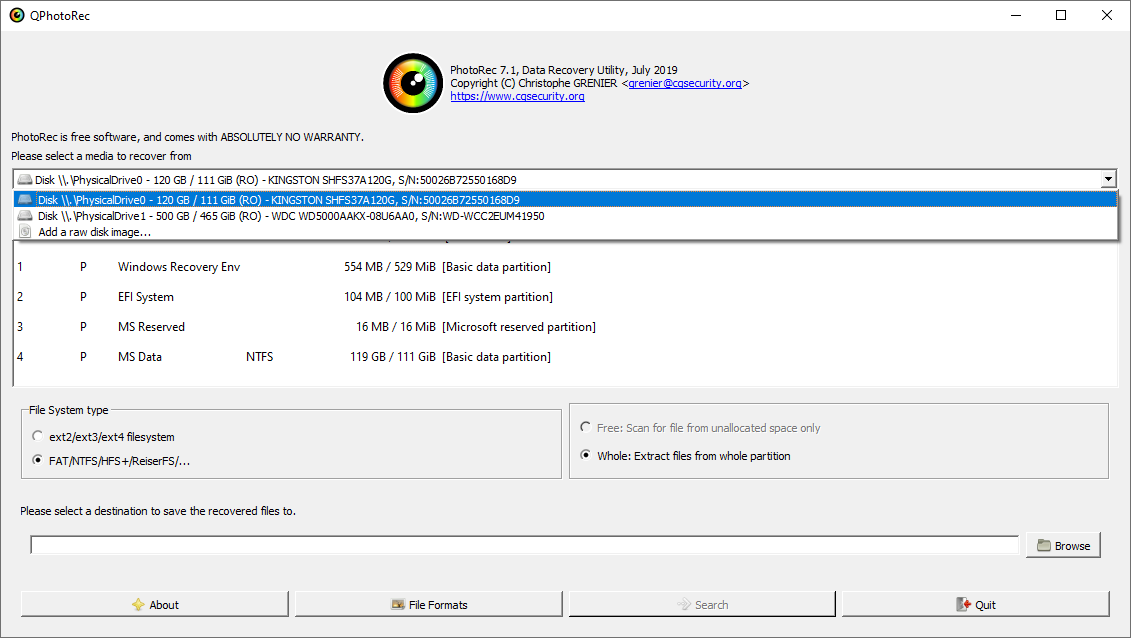
After the launch, you will see the screen showing you the full list of your disk spaces. However, this information is likely useless because the required menu is a bit higher. Click this bar, then choose the disk which was attacked by ransomware.
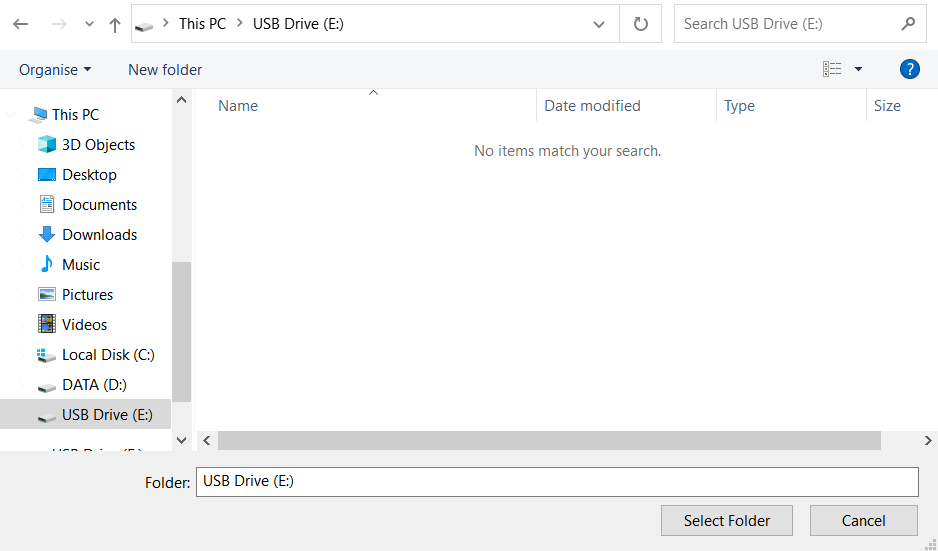
After choosing the disk, you need to choose the destination folder for the recovered files. This menu is located at the lower part of the PhotoRec window. The best decision is to export them on a USB drive or any other removable disk.
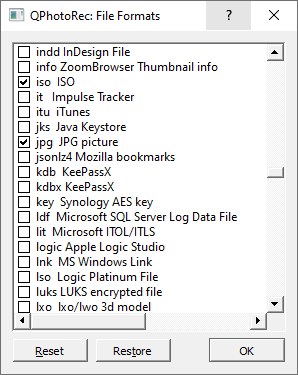
You need to specify the file formats. This option is located at the bottom, too. As mentioned, PhotoRec can recover files of about 400 different formats.
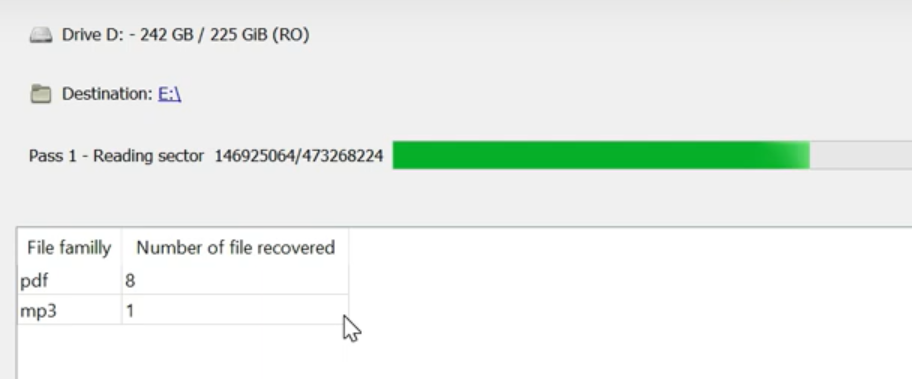
Finally, you can start file recovery by pressing the “Search” button. You will see the screen where the results of the scan and recovery are shown.
Step 7. Get a habit to create data backups
Backups can serve as a last hope after the ransomware attack. But there are some tricky points in this thing. The most widespread versions of ransomware can encrypt the backups if they are stored on your computer. Better choose cloud storage – they can offer you enough space for free to keep the old system variant. If you wish to keep several backups simultaneously, it is better to back up only important files – Excel tables, blueprints, photos, videos, etc. Fit them all into the archive and upload them to the cloud. Without the system files, it will be pretty small, so you will surely be able to keep several on your cloud drive.

