
Beginning with Windows 10 Microsoft operating systems renovate from previous version to next in a constant updates rollout process. This policy has been called “the biggest-ever change in Windows updates” back in 2015. The updates require computer restarts. And many users sometimes experience unwanted automatic restarts just in the middle of the work process. There is a feature of active hours in Windows 10 to avoid these annoying resets. In this article, you will learn how to set active hours, during which windows will never reboot automatically, and postpone update reloads.
Setting Active Hours via Settings
The first way to change active hours is the most normal one: through Settings. Do the following:
- Use the Start Menu search bar and look for Update & Security.
- Open the found item; you will see the active hours settings in the right part of the window. Press Change Active Hours.
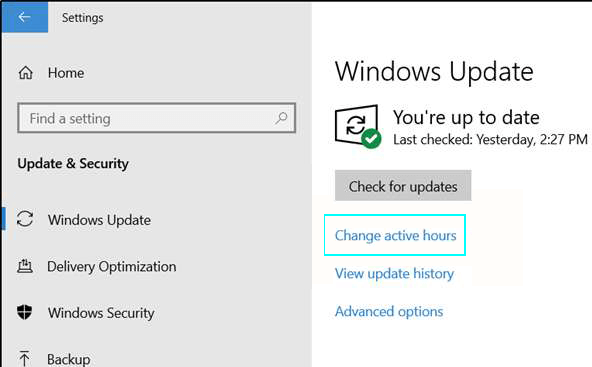
Press Change Active Hours to configure the no-restart period.
Windows will not restart your computer in the hours between the active hours’ start time and end time. The updates will wait there until the active hours end time. The maximum timespan you can set is 18 hours.
- Press Save as you finish.
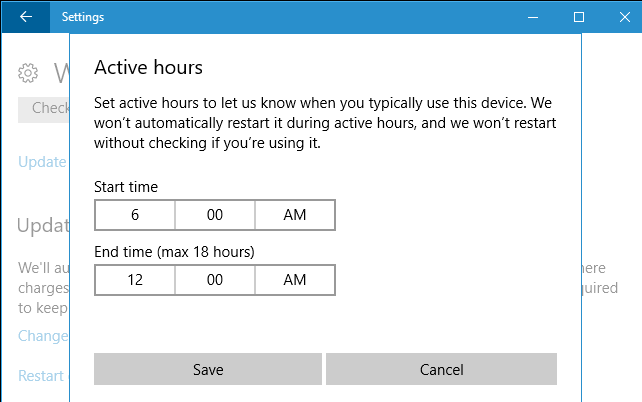
The maximum range for active hours in Windows 10 is 18 hours.
READ ALSO: Hide the Virus and Threat Protection Area in Windows 10
Setting the Max Active Hours Range in Local Group Policy Editor
You can set the maximum active hours range for the entire local network if you use Windows 10 Enterprise, Pro, or Education. That’s what you need to do:
- Go to the Start Menu search bar and look for Local Group Policy Editor.
- Open the found item.
- Take this path:
Computer Configuration – Administrative Templates – Windows Components – Windows Update
- Find this item in the right part of the window: Specify active hours range for auto-restarts. Right-click on it and choose Edit in the drop-down menu.
- In the opened window, check the Enabled button and set the time range between 8 and 18 hours.
- Press Ok. To apply the changes, you will need to restart your PC.
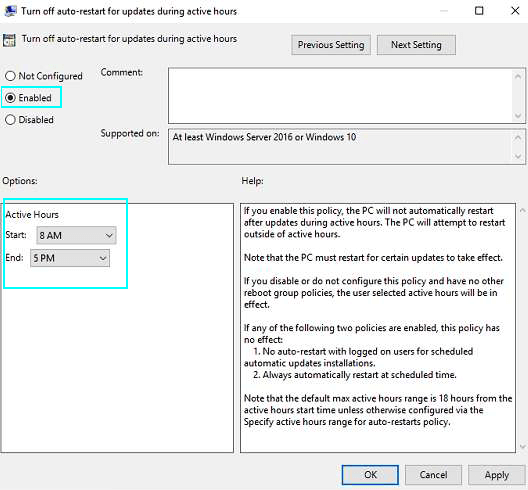
Local Group Policy Editor provides the same settings, but you can apply them for an entire LAN.
Please note: this method only affects the maximum range for active hours, not the hours themselves.
Using Regedit
This one is for experienced users, so proceed with caution. Microsoft recommends not doing this in the official document on system restarts scheduling. You can use the registry editor to set the active hours. Do the following:
- Find Regedit through the Start Menu search and run it.
- Click Yes as the User Account Control window appears.
- In the editor, follow this path:
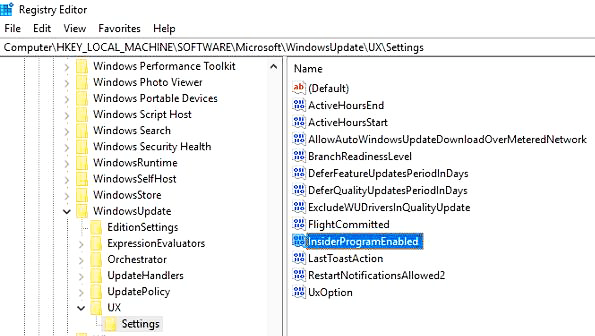
KEY_LOCAL_MACHINE – SOFTWARE – Microsoft – WindowsUpdate – UX – Settings
- Create a 32-bit DWORD value in the right pane.
- Give a name to this value: SmartActiveHoursState.
- Double-click on the created item and set its value to 0 (value 2 disables active hours).
- Click Ok to apply changes.
Experience Users might find it more suitable to use Registy Editor for changing any Windows settings.
How to Postpone a due Restart
There is a possibility of postponing system restarts up to 7 days. You can choose the exact date when Windows applies the updates. You can do this only when the update is waiting for a system restart. That’s what you do:
- Go to the Start Menu search bar and find and open the Update & Security.
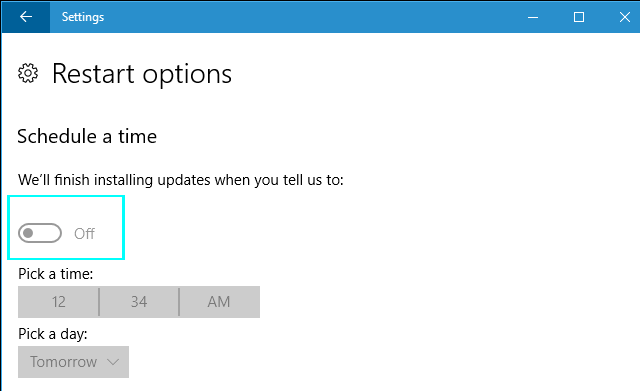
- Click Schedule the Restart (in the right pane of the window).
- Turn this function On and set a date and time for your system restart.
Considering upgrade to 11? Read on it: Windows 11 Security Approach: Zero-Trust Juggernaut Launched.
How to Override the Active Hours Settings
You can bypass the active hours dedicated period if you want to.
That’s what you need to do for that:
- Go to the Start Menu search bar and find and open the Update & Security.
- Open the found item and click options on the left pane to access Windows Update and then Restart Options.
- You can either restart right away or choose Custom Restart and set the nearest restart time for this particular update ignoring the Active hours.
Sometimes you need to override the settings you have previously did yourself.
Mind that the names of buttons and sections in your latest Windows 10 updated version might be slightly different from those described in this article.
READ ALSO: How to get rid of the most annoying issues in Windows 10.
Leave a Comment