
If you spectate the notification of PUA:Win32/OpenCandy detection, it looks like that your PC has a problem. All viruses are dangerous, without any exceptions. OpenCandy fills your PC with a variety of advertisements, opens your web browser without your intention and makes the system vulnerable to additional malware infiltration.
What does the pop-up with PUA:Win32/OpenCandy detection mean?
The PUA:Win32/OpenCandy detection you can see in the lower right side is shown to you by Microsoft Defender. That anti-malware application is quite OK at scanning, however, prone to be generally unstable. It is unprotected to malware invasions, it has a glitchy user interface and problematic malware clearing capabilities. Thus, the pop-up which says concerning the OpenCandy is just an alert that Defender has actually identified it. To remove it, you will likely need to use a separate anti-malware program.
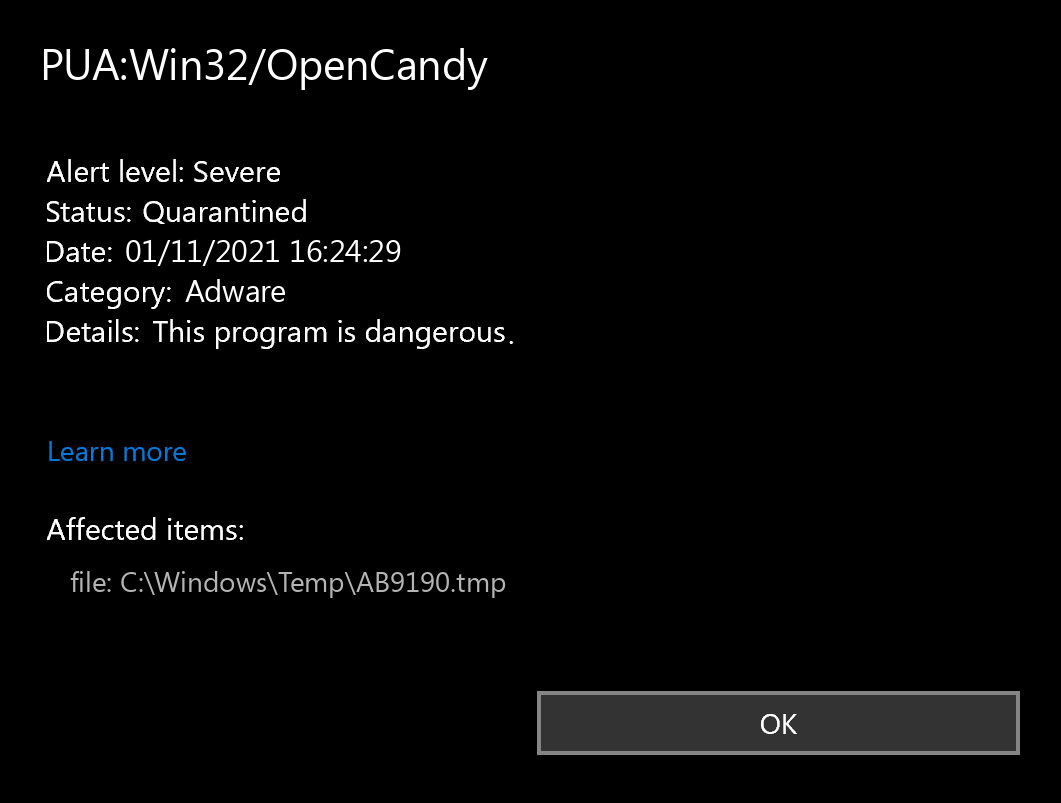
Microsoft Defender: “PUA:Win32/OpenCandy”
The exact PUA:Win32/OpenCandy virus is a really nasty thing. This malware demonstrates to you an unprecedented amount of advertisements. Have you ever saw the doorway pages? They are filled up only with banners – blinking, improperly designed and with weird information. Adware does the same thing to all pages you open. That malware brings profit to its developers in a very tricky way. You check the banners – they get profit. Furthermore, these banners frequently have deceptive and explicit content. Penis enlargement, porn websites advertisements, Microsoft virus alerts – all these things are usual for adware.
Adware Summary:
| Name | OpenCandy Adware |
| Detection | PUA:Win32/OpenCandy |
| Damage | Display advertisements in the browser, which are not related to the sites the affected users are visiting. |
| Similar | Fynservice Popup, Bestfunll, D0zi Popup, Didectiophy, Idea Shopping.xyz, Amarogitoribii, Mysmarterdeals Shop Popup, Adstop |
| Fix Tool | See If Your System Has Been Affected by OpenCandy adware |
Is PUA:Win32/OpenCandy dangerous?
How did I get this virus?
It is hard to trace the origins of malware on your computer. Nowadays, things are mixed, and spreading ways used by adware 5 years ago may be used by spyware these days. But if we abstract from the exact distribution tactic and will think about why it works, the reply will be pretty basic – low level of cybersecurity awareness. People click on promotions on weird sites, open the pop-ups they receive in their browsers, call the “Microsoft tech support” assuming that the scary banner that states about malware is true. It is necessary to know what is legit – to stay away from misunderstandings when trying to determine a virus.
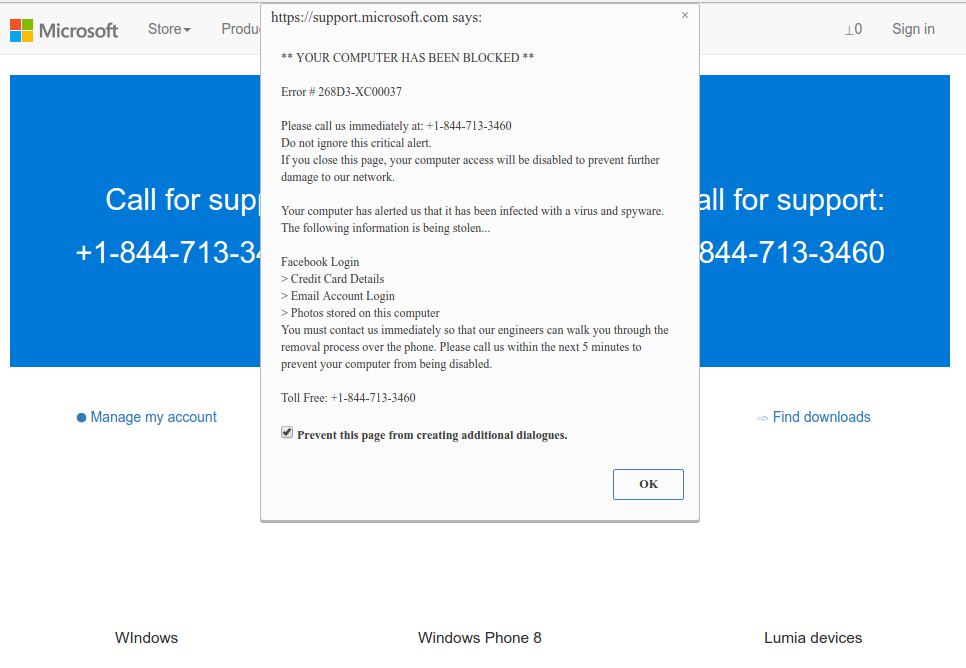
Microsoft Tech Support Scam
Nowadays, there are two of the most extensive methods of malware distribution – bait e-mails and also injection into a hacked program. While the first one is not so easy to stay away from – you should know a lot to recognize a counterfeit – the 2nd one is very easy to address: just do not use hacked programs. Torrent-trackers and other sources of “free” applications (which are, actually, paid, but with a disabled license checking) are just a giveaway place of malware. And PUA:Win32/OpenCandy is just one of them.
How to remove the PUA:Win32/OpenCandy from my PC?
Reset Browser settings after the adware attack
Adware makes a lot to keep annoying you even after being removed from your computer. It distorts the browser configurations, so it will not work correctly. Until you reset it, of course. Each browser has its own way to restore the default settings. Here are the guides for the most popular ones:
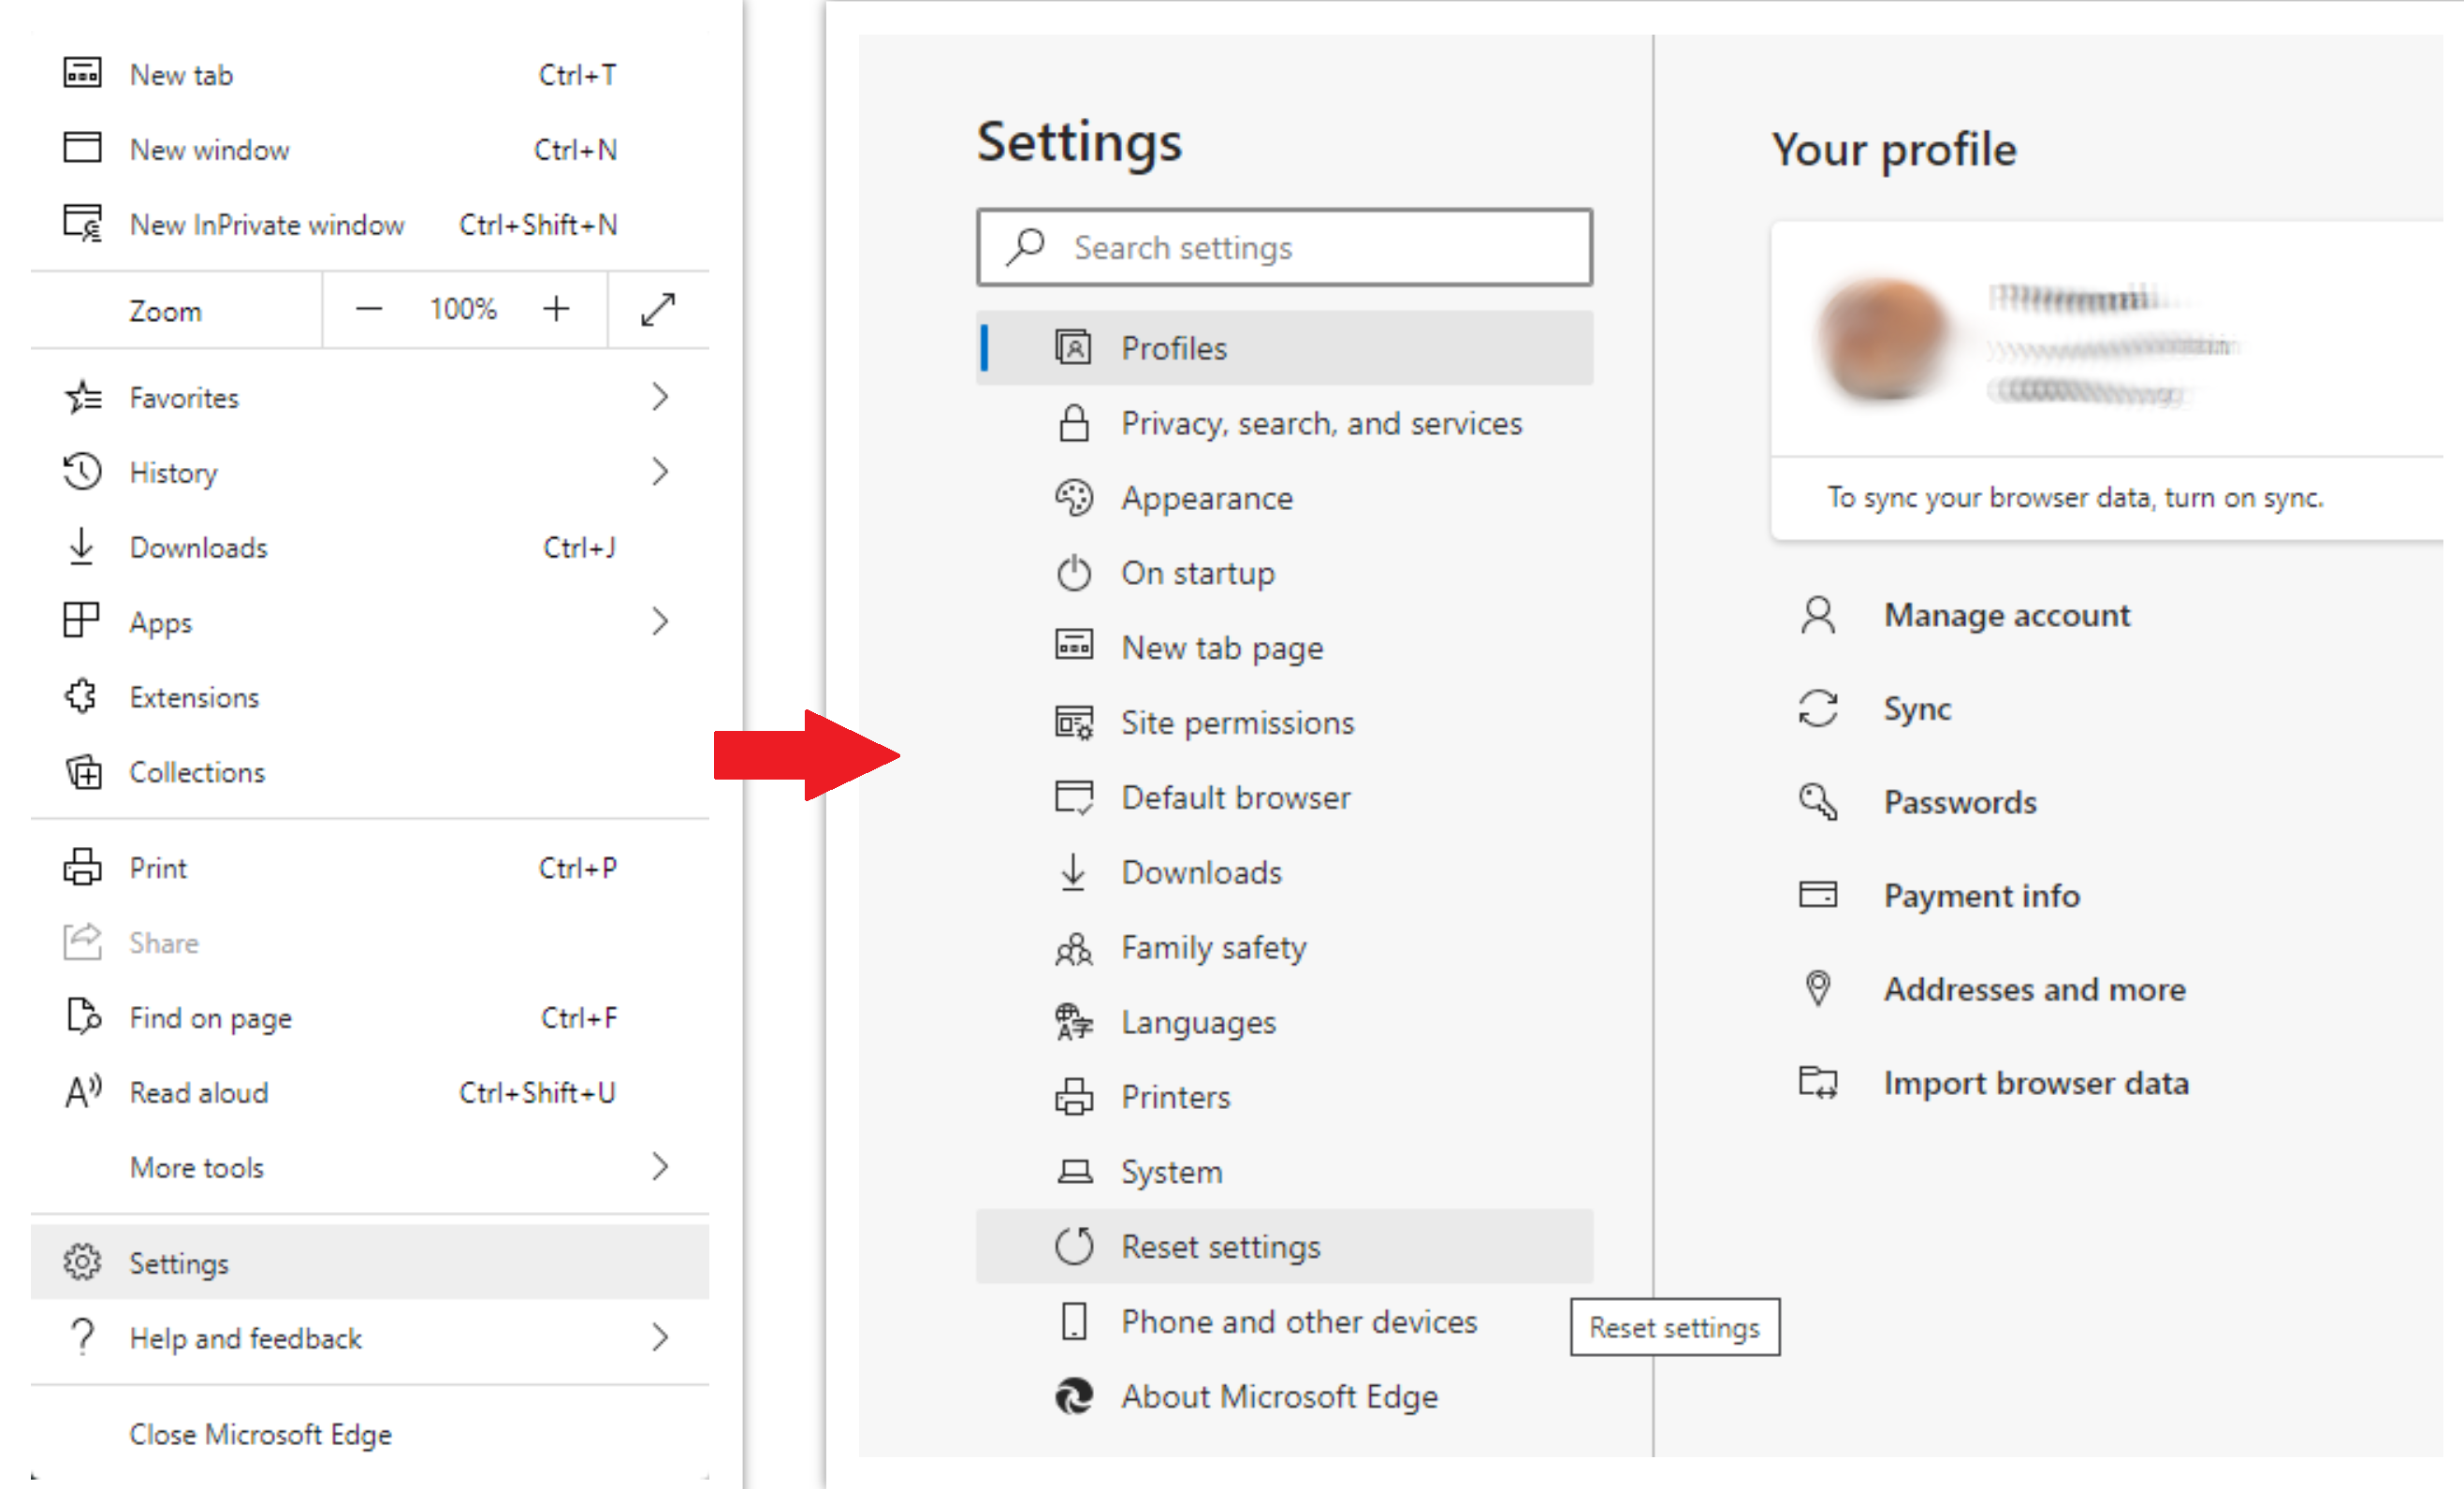
To reset Edge, do the following steps :
- Open “Settings and more” tab in upper right corner, then find here “Settings” button. In the appeared menu, choose “Reset settings” option :
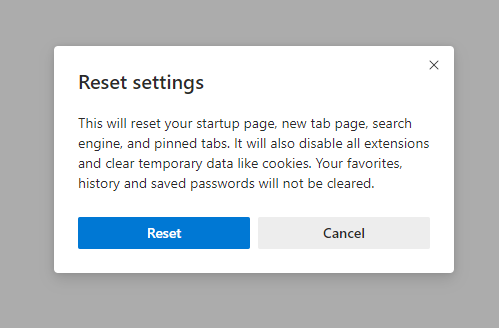
- After picking the Reset Settings option, you will see the following menu, stating about the settings which will be reverted to original :
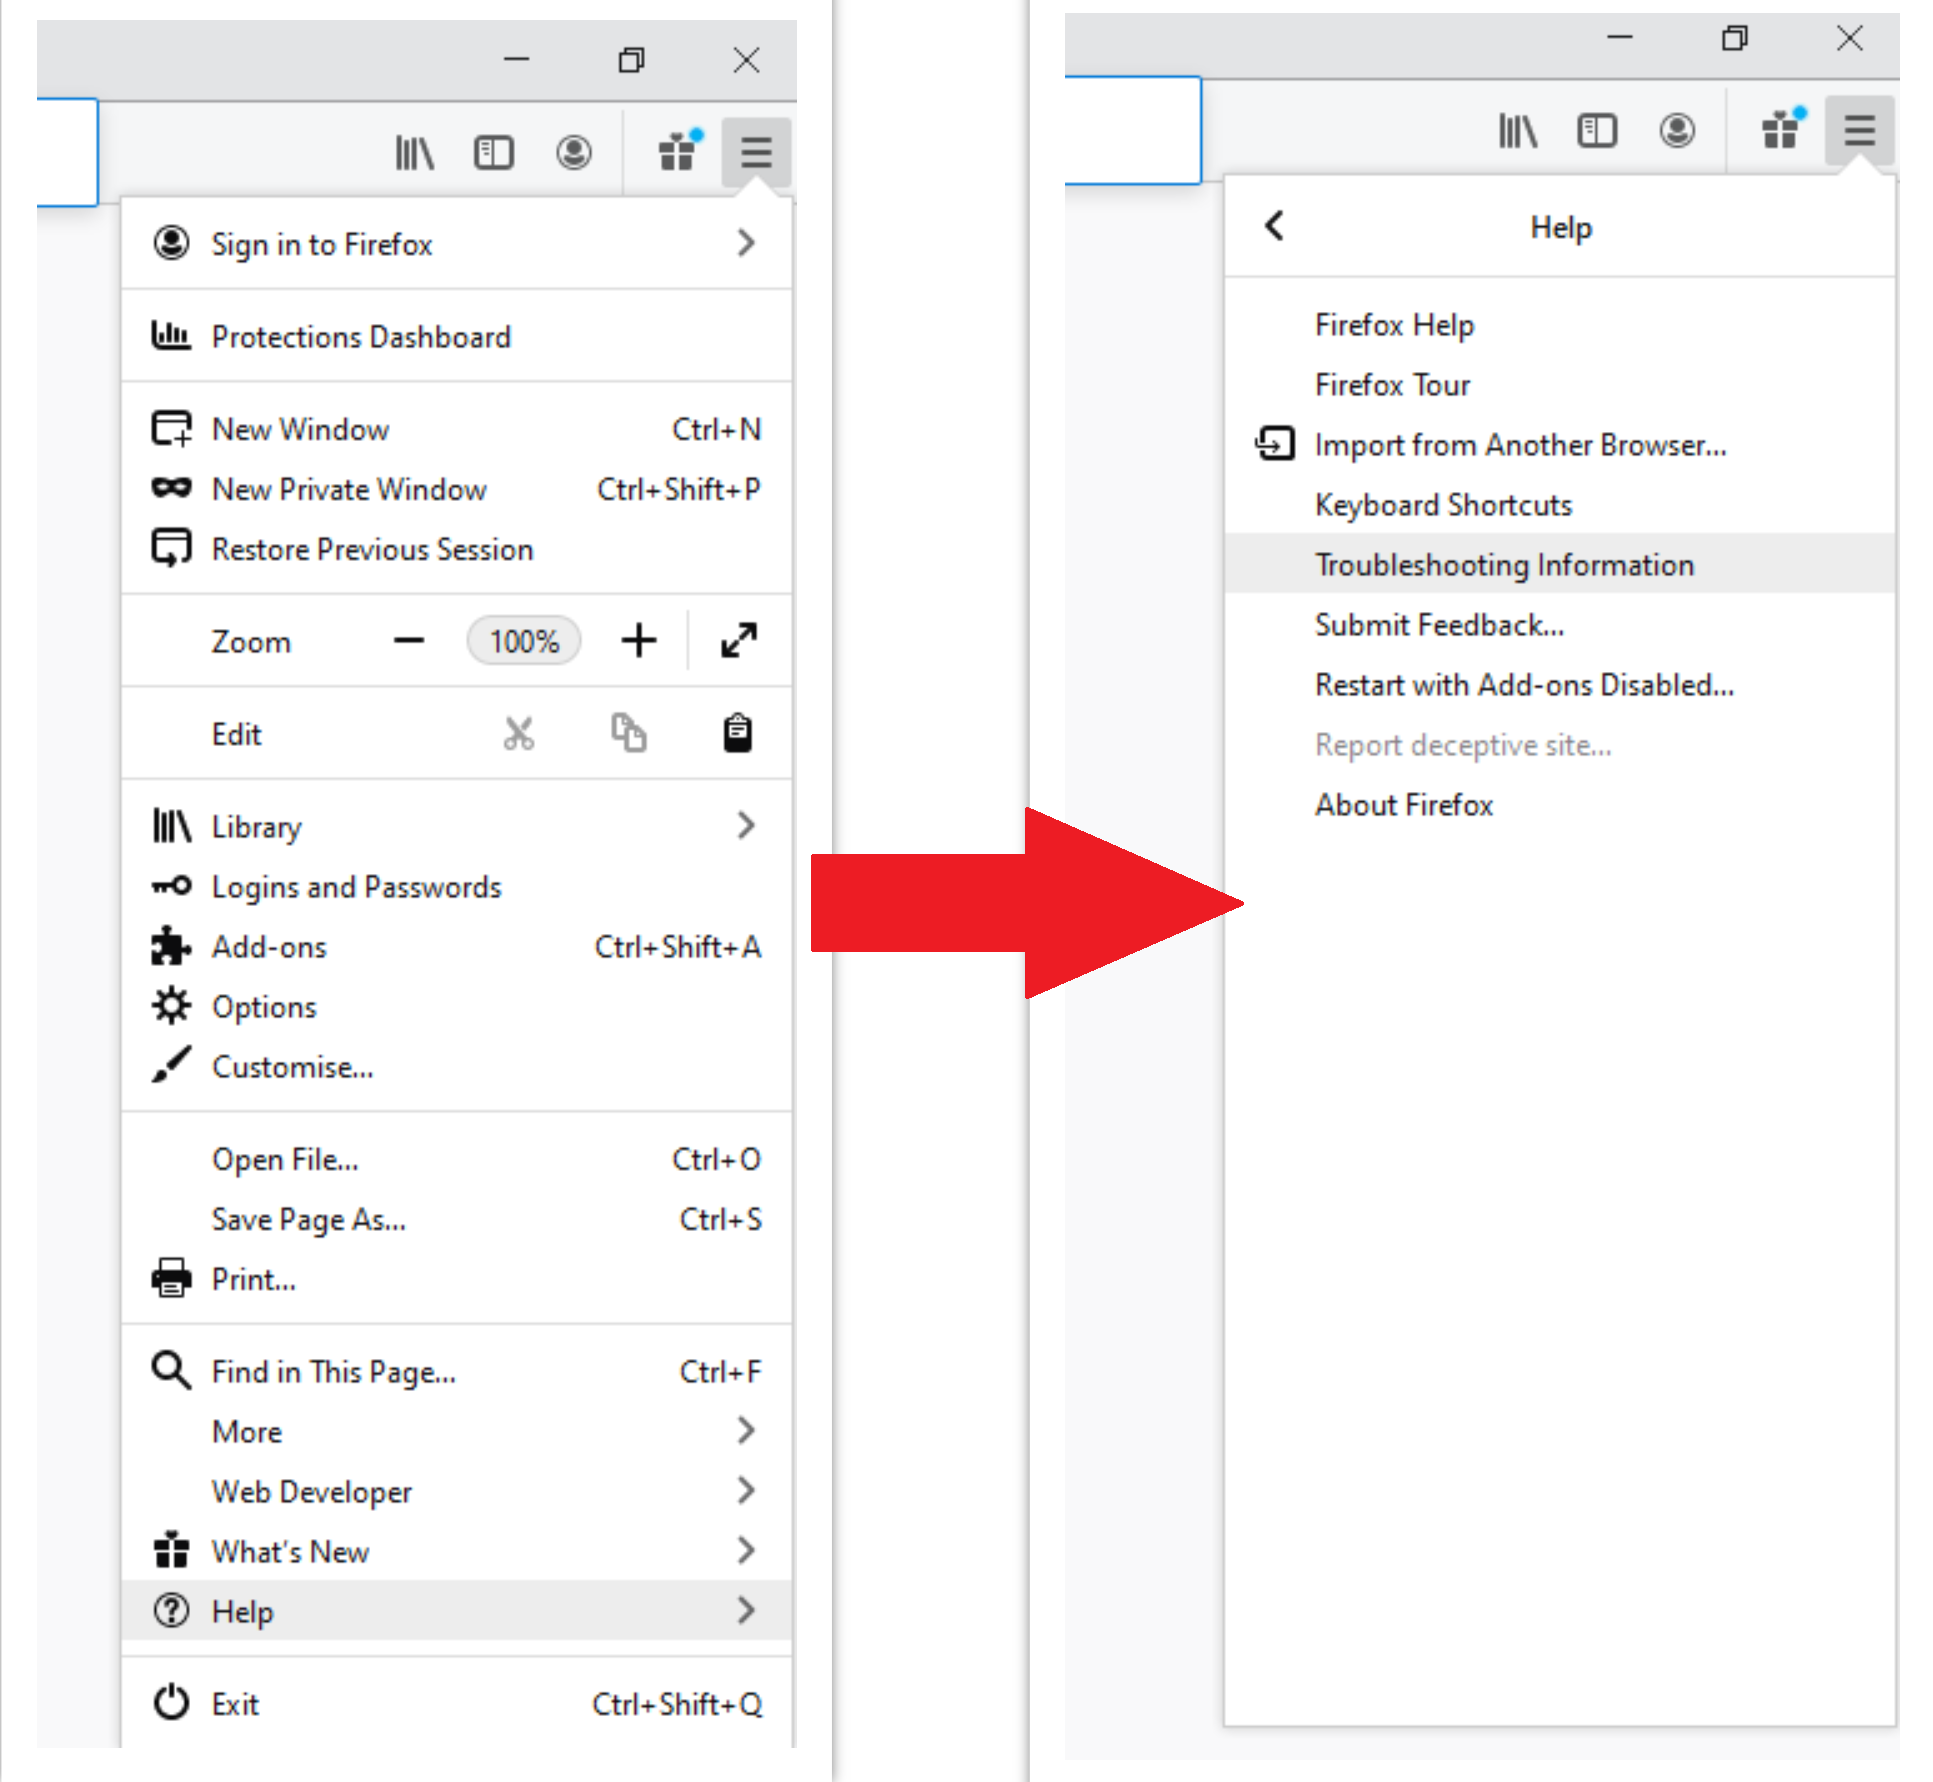
For Mozilla Firefox, do the next actions :
- Open Menu tab (three strips in upper right corner) and click the “Help” button. In the appeared menu choose “troubleshooting information” :
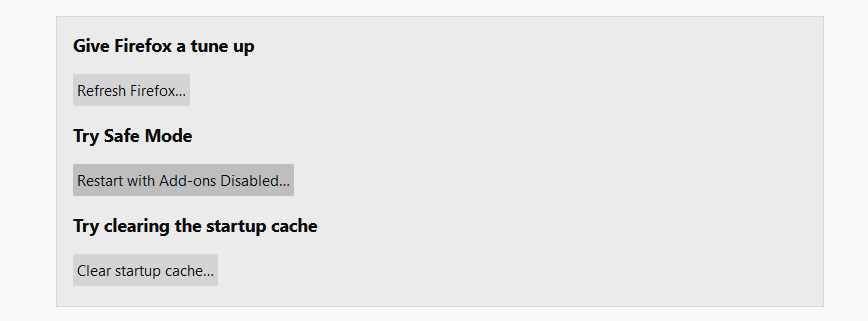
- In the next screen, find the “Refresh Firefox” option :
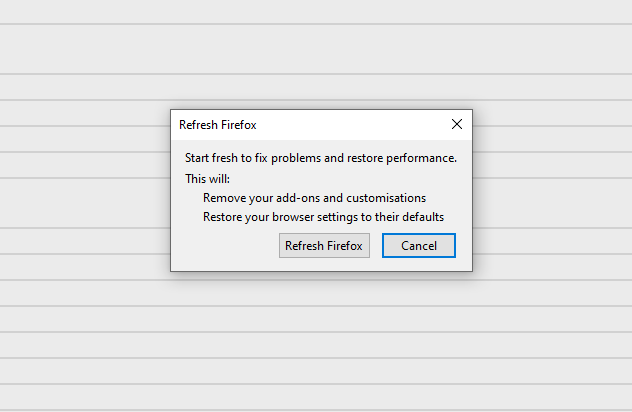
After choosing this option, you will see the next message :
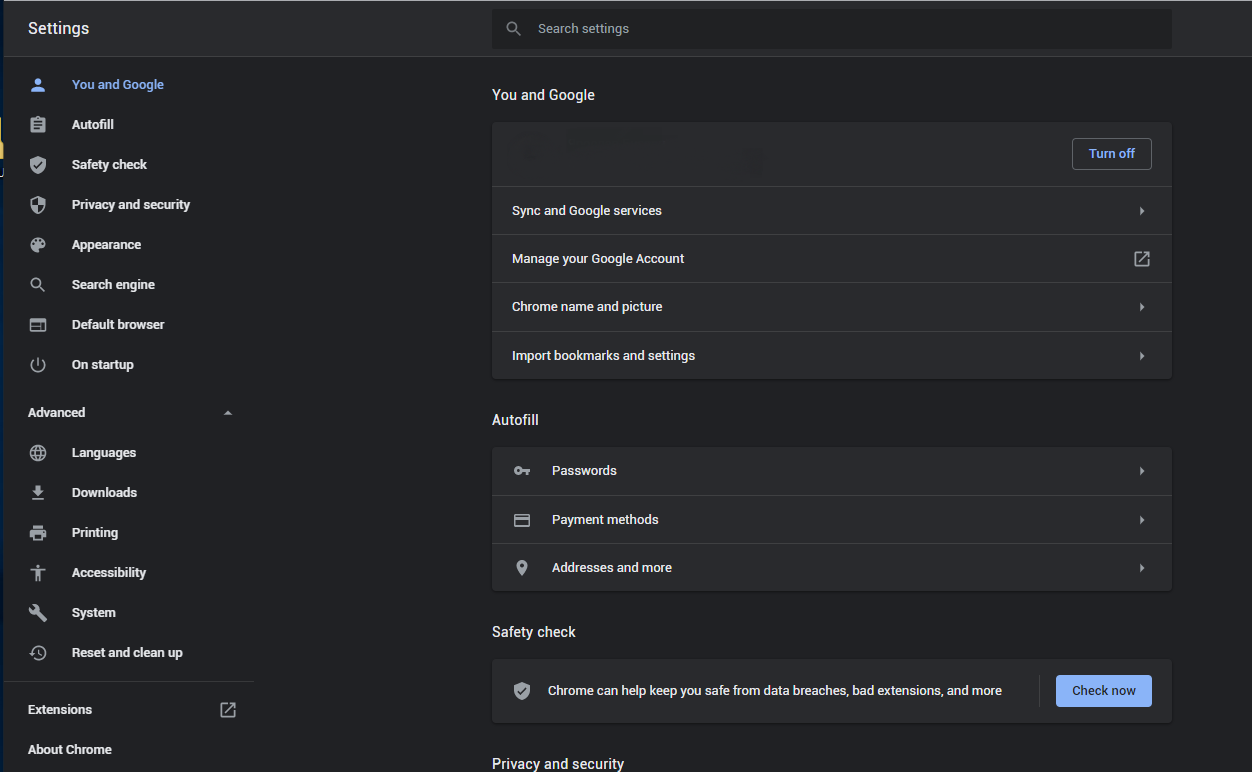
If you use Google Chrome
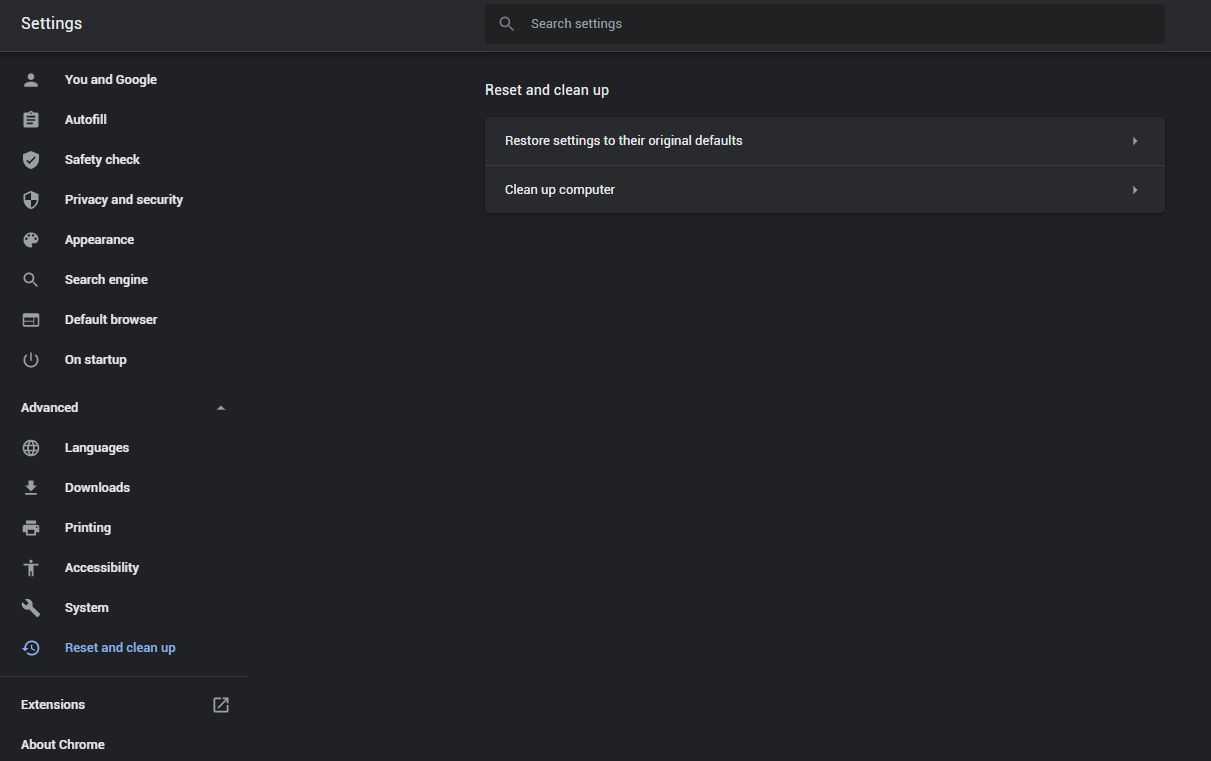
- Open Settings tab, find the “Advanced” button. In the extended tab choose the “Reset and clean up” button :
- In the appeared list, click on the “Restore settings to their original defaults” :
- Finally, you will see the window, where you can see all the settings which will be reset to default :

Opera can be reset in the next way
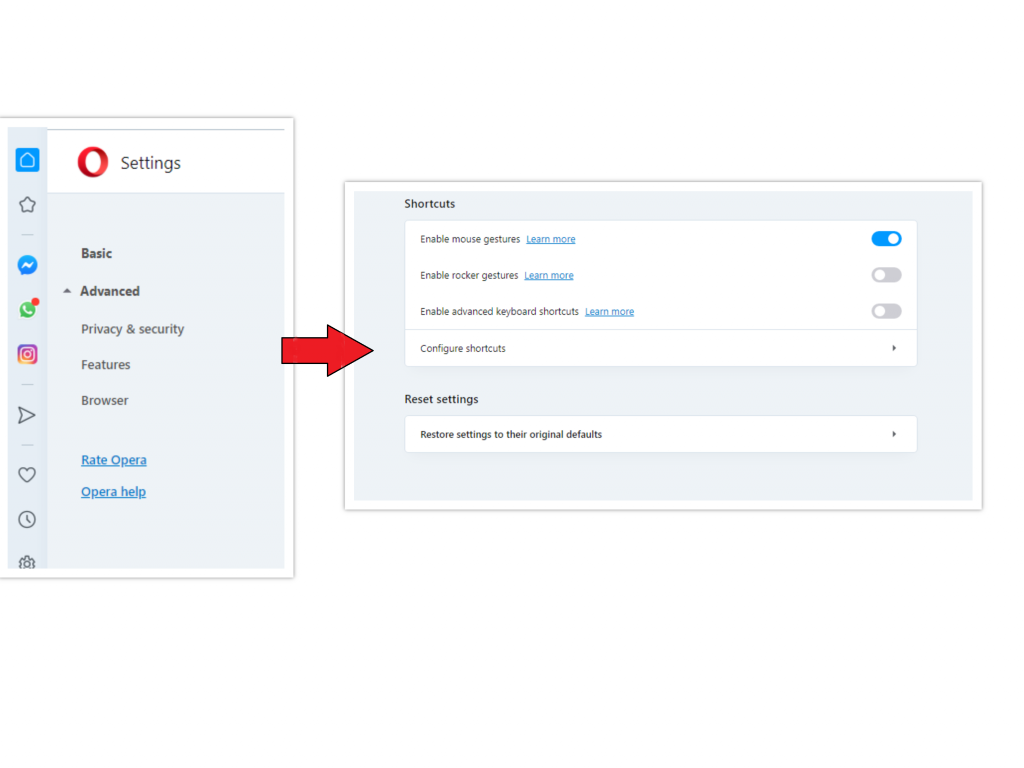
- Open Settings menu by pressing the gear icon in the toolbar (left side of the browser window), then click “Advanced” option, and choose “Browser” button in the drop-down list. Scroll down, to the bottom of the settings menu. Find there “Restore settings to their original defaults” option :
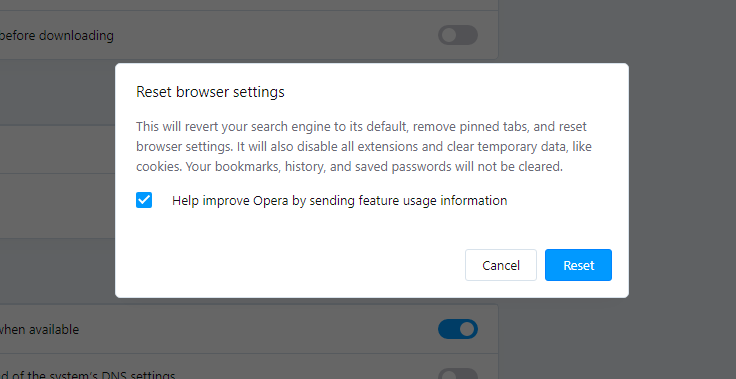
- After clicking the “Restore settings…” button, you will see the window, where all settings, which will be reset, are shown :
When the browsers are reset, you need to make sure that your browser will be connected the proper DNS while connecting to the web page you need. Make a text file named “hosts” on your desktop, after that open it and fill it with the following content2:
# Copyright (c) 1993-2006 Microsoft Corp.

#

# This is a sample HOSTS file used by Microsoft TCP/IP for Windows.

#

# This file contains the mappings of IP addresses to host names. Each

# entry should be kept on an individual line. The IP address should

# be placed in the first column followed by the corresponding host name.

# The IP address and the host name should be separated by at least one

# space.

#

# Additionally, comments (such as these) may be inserted on individual

# lines or following the machine name denoted by a '#' symbol.

#

# For example:

#

# 102.54.94.97 rhino.acme.com # source server

# 38.25.63.10 x.acme.com # x client host

# localhost name resolution is handle within DNS itself.

# 127.0.0.1 localhost

# ::1 localhost
Find the hosts.txt file in C:/Windows/System32/drivers/etc directory. Rename this file to “hosts.old.txt” (to distinguish it from the new one), and then move the file you created on the desktop to this folder. Remove the hosts.old from this folder. Now you have your hosts file as good as new.
References
- Official Microsoft guide for hosts file reset.
Leave a Comment