Microsoft has confirmed that there is a way that users with unsupported computers will be able to install Windows 11. But they will have to deal with a major security risk.
Microsoft said in June that Windows 11 would require 2nd Gen AMD Ryzen or 8th Gen Intel Core processors or newer as well as a Trusted Platform Module (TPM) 2.0 security chip.
The news comes after a significant backlash against Microsoft’s decision not to support Intel processors older than the 8th generation, or AMD processors older than Ryzen 2nd gen. Recently, Microsoft added support for the Intel Core i7 7820HK processor. Primarily because it meets the security requirements and is also used in the Surface Studio 2. In addition to this, Microsoft also added the Intel Core X and Xeon W series to its list of supported processors.
Now, Microsoft will let users with these unsupported processors install the Windows 11 update on their computers. However, the company says that this is only for “temporary use”, and that users will not be guaranteed updates – this includes even security updates.
This will leave those unsupported computers at a significant security risk. It is unclear if Microsoft will change course on this and push out security updates without any major fuss. Or if it will follow through on its warning and ban these unsupported computers from installing any updates whatsoever.
So far, the company has maintained vagueness in whether or not these unsupported computers will get any Windows 11 update.
Windows 11 minimum requirements
Microsoft also outlined some of the minimum hardware requirements to run Windows 11. This includes:
| Compatible 64-bit processor. |
| 4GB memory. |
| 64GB storage. |
| UEFI secure boot. |
| TPM 2.0 support. |
Microsoft did not specify the exact graphics requirements yet. But we will likely know more details in this regard in the coming days and weeks.
How to check if your computer is supported by Windows 11
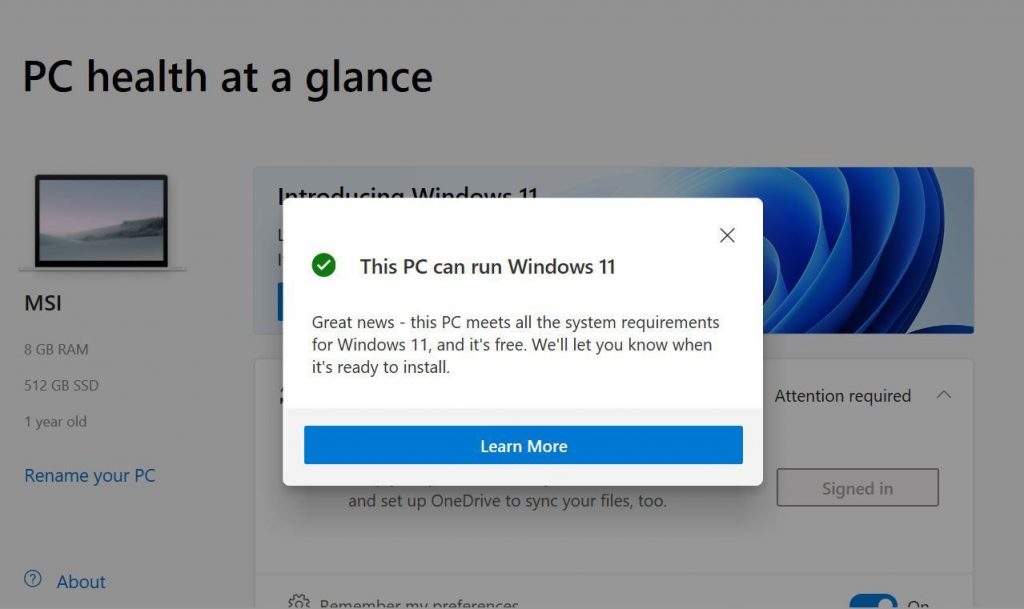
To check whether your computer or laptop is supported by Windows 11, you can download and install the PC Health Check app on your PC.
The latest PC Health Check app can be downloaded from Microsoft’s website here. Once installed, open the app and check if your computer is compatible with Windows 11 or not.
Ways to install Windows 11 on an unsupported PC
It is obvious that skilled users will just find a way to deceive the installation mechanism and get the new OS version on an old system. These ways are different, and fit for various cases. The only thing to keep in mind is that updating the non-compatible PC gives you no support from Microsoft. You will not receive any bug fixes, updates for MS Defender databases, and even major patches. Let’s have a look at each method – I am sure that you will find one that fits your needs.
Using the official Microsoft guide
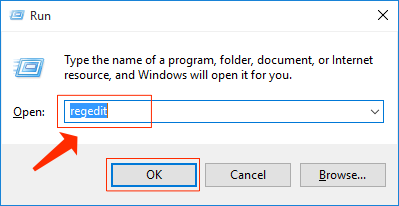
That way to install Windows 11 on an unsupported device will fit if you have TPM, but it is older than 2.0, or have a too weak CPU. Microsoft offers to change the value of a certain registry key, so the PC Health Check app will ignore the missing parameters. Press Win+R, and type “regedit.exe”:

In the appeared Registry Editor, go by the following path:
HKEY_LOCAL_MACHINE\System\Setup\MoSetup
Find the AllowUpgradesWithUnsupportedTPMOrCPU key in that folder. Note, that it sometimes appears only after installing and running the Health Check app. If you run the Health Check, and the key did not appear – create it manually. It must have parameters of REG_DWORD (32-bit) and the value of 1. When it is present, just change its value to 1 (it is set to 0 by default). After these manipulations, just launch the PC Health Check once again, and try to update your system just as usual.
Cheating on the system ISO files
Microsoft offers disk images of their new OS version on their website. Originally, these ISO files are about to be used for a clean installation. But with the help of some street magick, you can easily counterfeit the original installer with one from Windows 10 ISO. After that trick, Windows 11 will get installed, ignoring all possible hardware requirements, besides Secure Boot and TPM module presence. That thing will fit when your CPU is too weak, or your TPM module version is below 2.0.
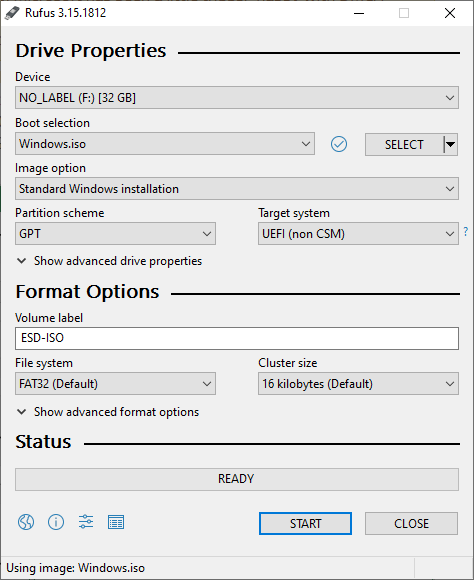
First, download the Windows 11 ISO from the Microsoft site. When you got the system image, you need to burn it on the USB drive. It must be clean and have at least 16GB of storage space. To burn the image, you must use special software – like Rufus, for example. It is 100% free, so you may just download it and use it. Just specify the elements like on the screenshot below and press the READY button. Do the same thing with Windows 10 ISO – but using the Media creation tool. It will be faster and easier, but unfortunately, Microsoft does not offer such a tool for Windows 11.

After the USB drive burning, you will be able to see the contents of the ISO image you have burned. Open one with Windows 10 inside. You need to find the install.wim file (or install.esd) in a sources folder – this thing is responsible for compatibility checkup. The plan is to substitute the Windows 11 install file with one from Windows 10 installator. Rename the install.wim to something like “install1.wim” (or “install1.esd” – the extension is very important) and move it to the folder you like (and don’t forget the exact place 😀).

Open the drive with Windows 11 image onboard. Find the same “install.wim” or “install.esd” file in the same folder. If the format (.esd or .wim) repeats one you have copied from Windows 10 ISO, you are good to go: just substitute the original “install..” file of Windows 11 with one from Windows 10.
What if the files’ extensions don’t match?
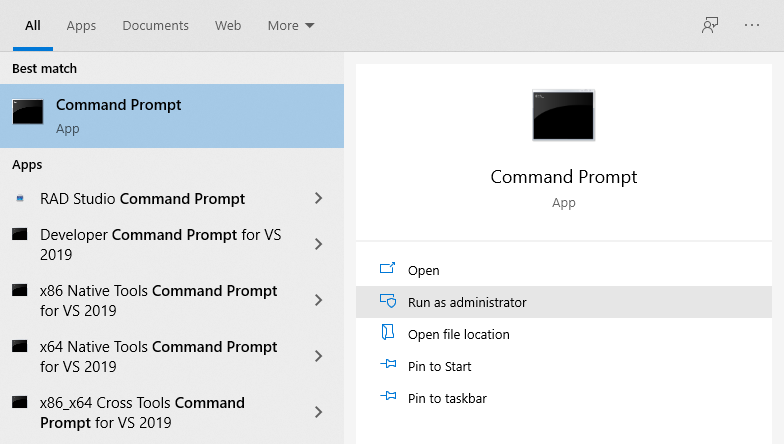
In the cases when one installator has .esd format, and the other – .wim, you must perform the conversion operation. It is not as easy as other operations, since requires long commands in the console. Note – there is no matter which one is .wim and which is .esd. You just need to convert them into a single format. Copy the install.wim (exactly .wim, there is no way to convert .esd) to the easy-to-access place – Desktop, for example. Then, run the Command Prompt as administrator.

In the Command Prompt, type the following command. The *path* value is, exactly, the path for the install.wim file.
dism /Get-WimInfo /WimFile:C:\*path*\install.wim
The result of this command will give you the INDEX value. Remember it – you will need it to perform the next command.
dism /Export-Image /SourceImageFile:*path*\install.wim /SourceIndex:*INDEX* /DestinationImageFile:*path*\install.esd /Compress:recovery /CheckIntegrity.
While executing this command, your computer may start roaring with heat sink fans or even freeze for a second. Transforming the file formats is a pretty resource-demanding operation, so it is better to just spectate and not to use the PC. When the action is over, exchange the files. Once again: the one which was in the Windows 10 ISO must be placed into the Windows 11 ISO, and the original “install..” file is about to be removed. Finally, you may reboot and use this USB drive as a boot device.


How to simply install Windows 11 from under Windows 10 unsupported hardware?
1. Download iso from Microsoft website
2. Extract contents of iso to any folder
3. Go to [your folder] -> sources
4. Remove appraiserres.dll
5. turn off internet
6. Run setup.exe
P.S. If it requires a product key and you don’t have one.
In the sources folder create a test document ei.cfg with the following content:”
[Channel]
Retail
“