
Redirect Path pop-up notifications appear when you do not expect, detracting and annoying you. However, that is way more than simple pop-up ads – their origins is surely malicious, and they may install other malicious stuff to your computer. In this post, I will guide you on how to remove Redirect Path pop-up notifications and explain how to avoid them in the future.
Any time you interact with Redirect Path push notifications will be useless at best. At worst, the web pages it can open may introduce malware to your system. These pop-up notifications may also promote fake shopping sites which will take your money and payment info. The latter generally ends up with losing all the money you have on the exposed card.
What are Redirect Path pop-up advertisements?
Brief summary of the Redirect-path.com pop-up ads:
| Name | Redirect-path.com |
| Hosting | AS22612 Namecheap, Inc. United States, Los Angeles |
| IP Address | 192.64.119.244 |
| Malware type | Adware1 |
| Effect | Unwanted pop-up advertisements |
| Hazard level | Medium |
| Malware source | Apps from third-party websites, ads on dubious websites |
| Similar behavior | Rusticsnoop, Djpjwf, News |
| Removal method |
To remove possible virus infections, try to scan your PC
|
Redirect Path pop-ups, as opposed, are related to untrustworthy sites. You will commonly witness the proposition to enable them after a redirection from another site. It’s OK to see redirects unless it throws you to such a questionable place. At that point, turning on pop-ups is served as the anti-DDoS check. Alternatively, the sites can deny showing you the content unless you apply these pop-up advertisements. These theses should already raise suspicion, as websites generally have a different anti-bot mechanism. Spectating this requirement should be the reason to skip the site doubtlessly. In some cases, even after clicking “Allow”, you will not get to the website – it has only a landing page with the offer to turn on the push notifications.
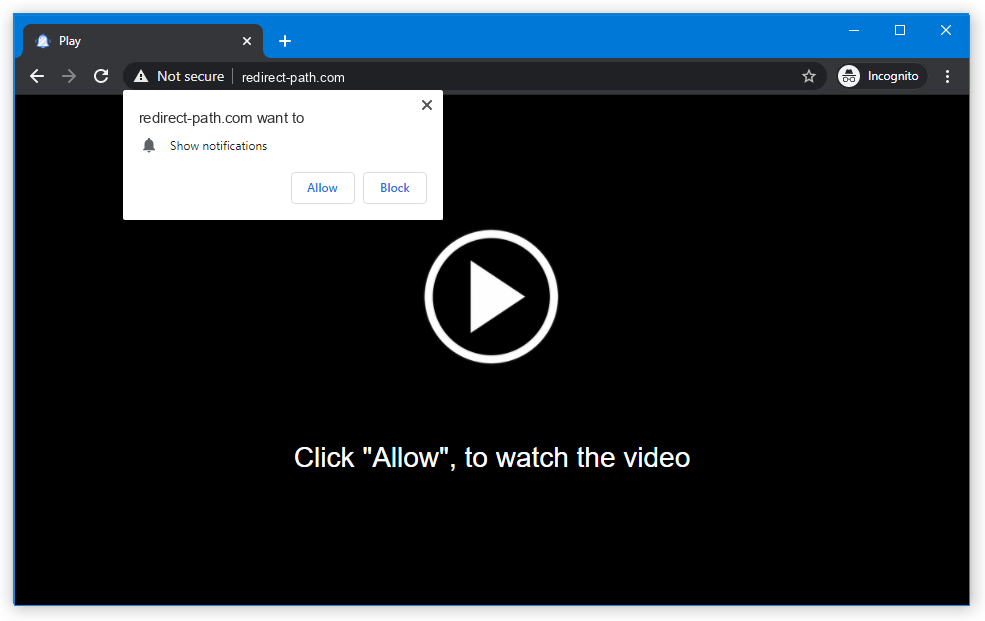
Redirect Path push notification.
How does this work?
Most of web browsers support enabling push notifications from sites. Sites, on the other hand, can send notifications with the content they like. It may be a promotion of the product or a page listed for sale on this particular site, as well as a promotion of the page of their partner. As a result, you can see the push notification from site X, but interacting with it will direct you to site Y – because a link to the latter was added.
The ads these rascals show are paid under the pay-per-view model. It usually provides a negligible pay for one person, but when you can send ads to a huge number of victims and make it hundreds of times every day – that is a much bigger sum. Even though most of these ads giving no result at all, it may still give all the parties a lot of money.
Are Redirect Path pop-up advertisements dangerous?
Yes, they are. At the surface, they may look safe – just a blinking pop-up that appears from time to time. However, the things this window promotes differ drastically from what you generally see in pop-ups. Redirect-path.com web page is ruled by crooks, who deliberately throw hundreds and thousands of irrelevant ads in pop-ups. They also don’t follow any common sense and can make sporadic pop-ups into a storm of promotions. For weak computers, that may be enough to make the system slower. But problems are not over at this point.
How to remove Redirect Path pop-ups?
First and foremost, you should reset your browser settings. It is possible to accomplish in manual or automated way. The former, obviously, takes more time to complete and can be somewhat complicated if you have never done that. Automated supposes the use of anti-malware programs that can reset all browser settings at once.
Reset your browsers manually
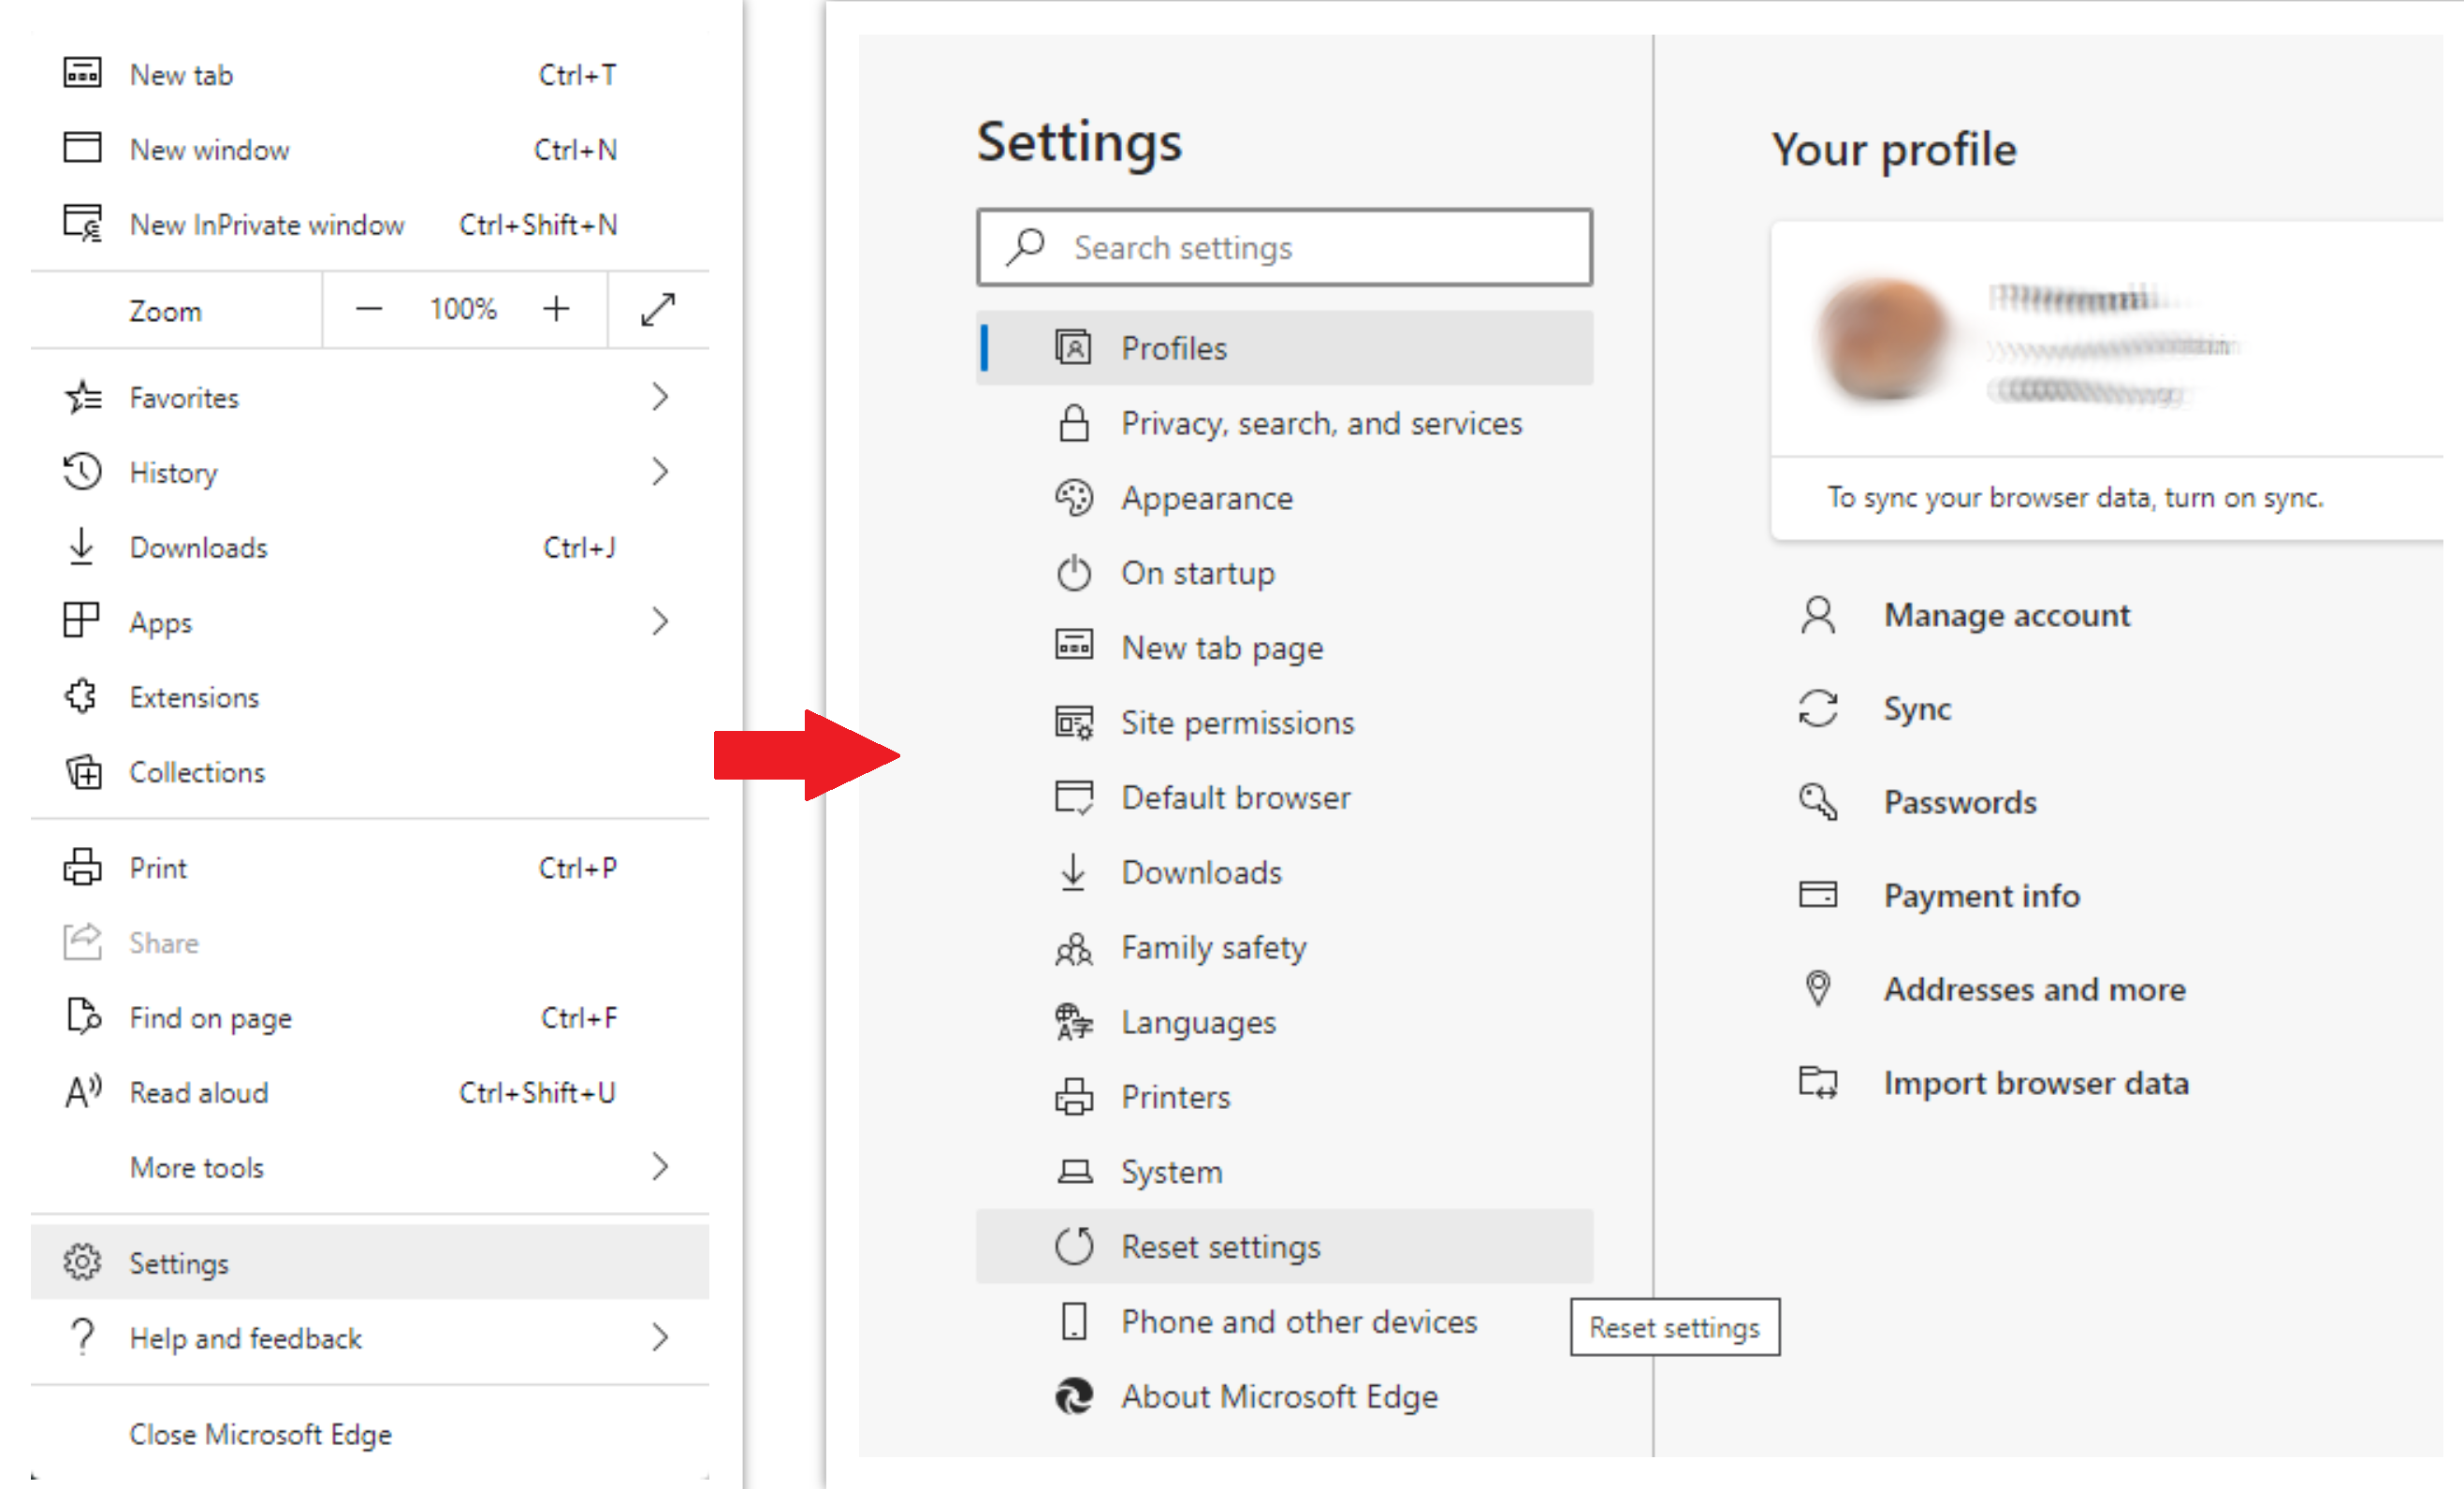
To reset Edge, do the following steps:
- Open “Settings and more” tab in upper right corner, then find here “Settings” button. In the appeared menu, choose “Reset settings” option:
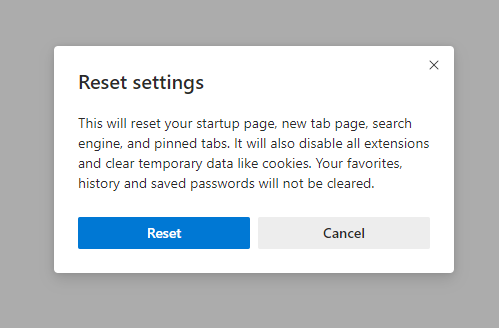
- After picking the Reset Settings option, you will see the following menu, stating about the settings which will be reverted to original:
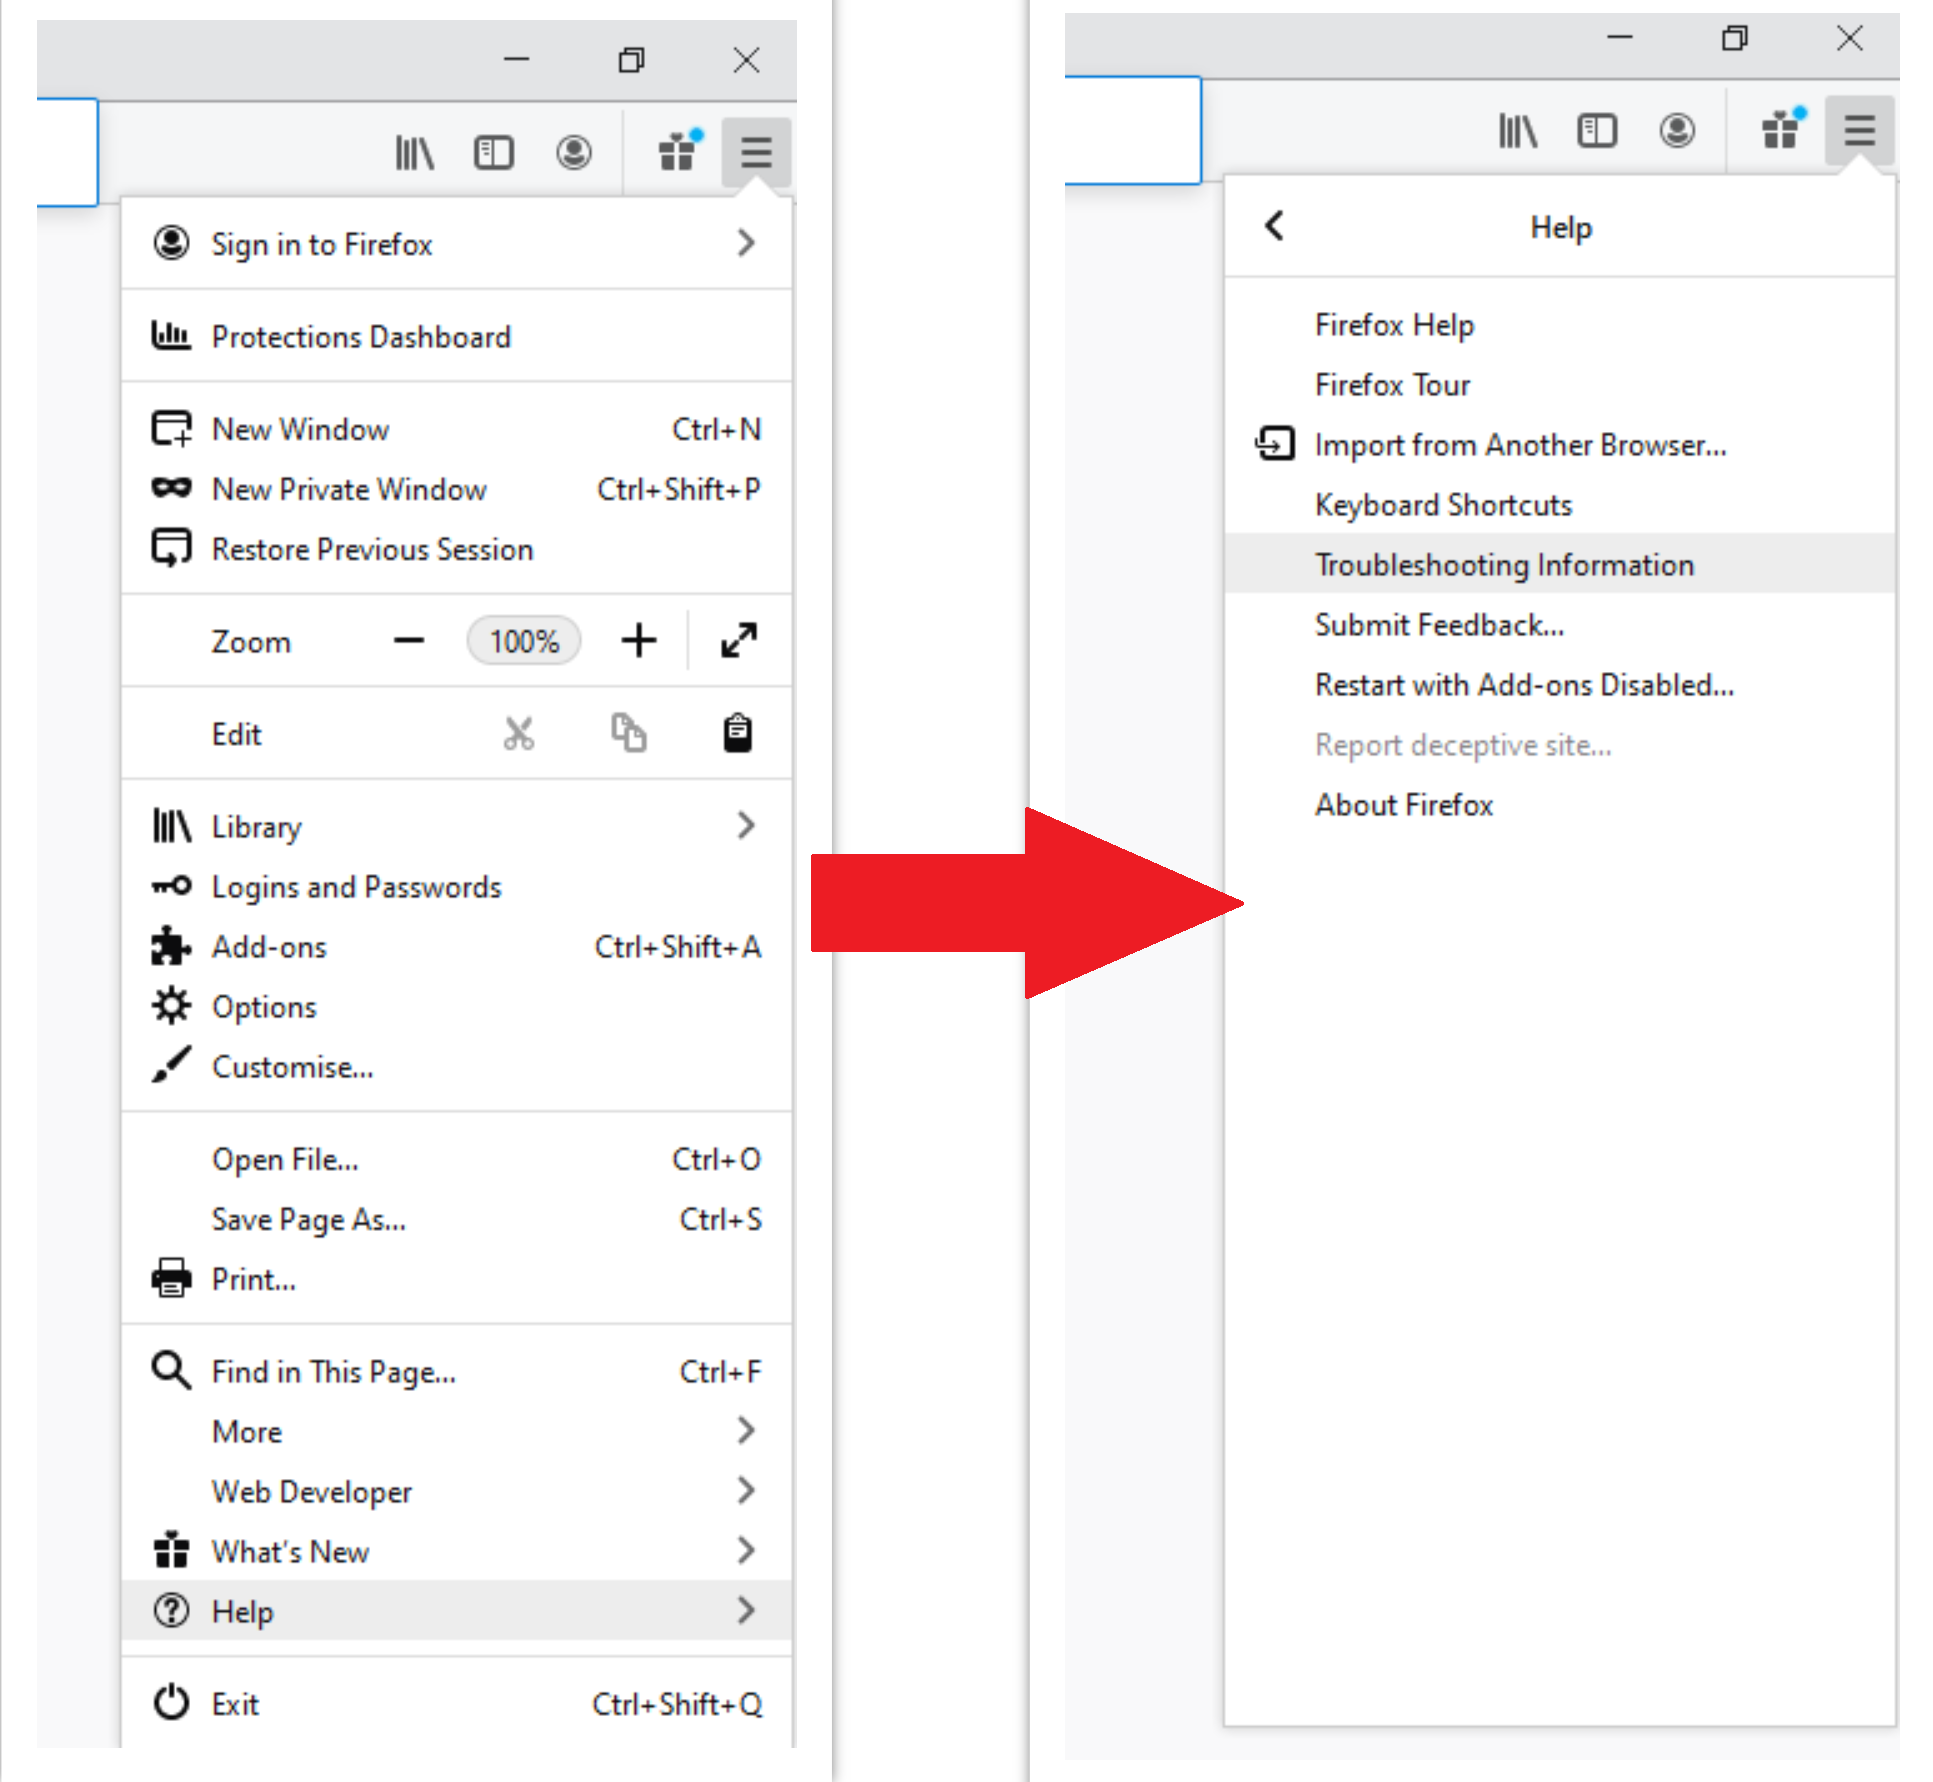
For Mozilla Firefox, do the next actions:
- Open Menu tab (three strips in upper right corner) and click the “Help” button. In the appeared menu choose “troubleshooting information”:
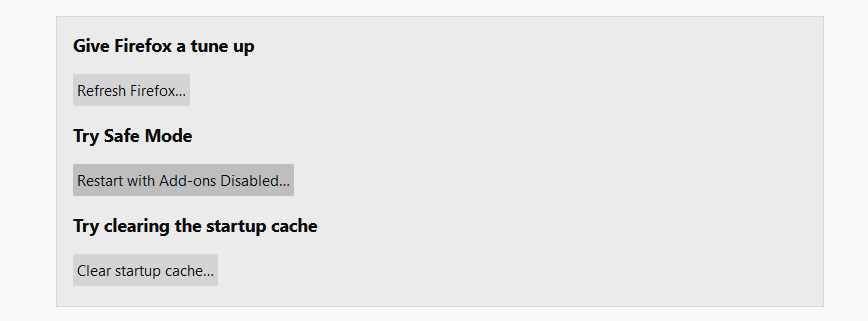
- In the next screen, find the “Refresh Firefox” option:
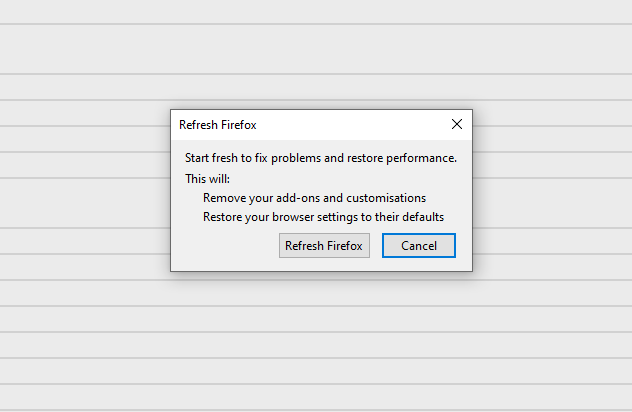
After choosing this option, you will see the next message:
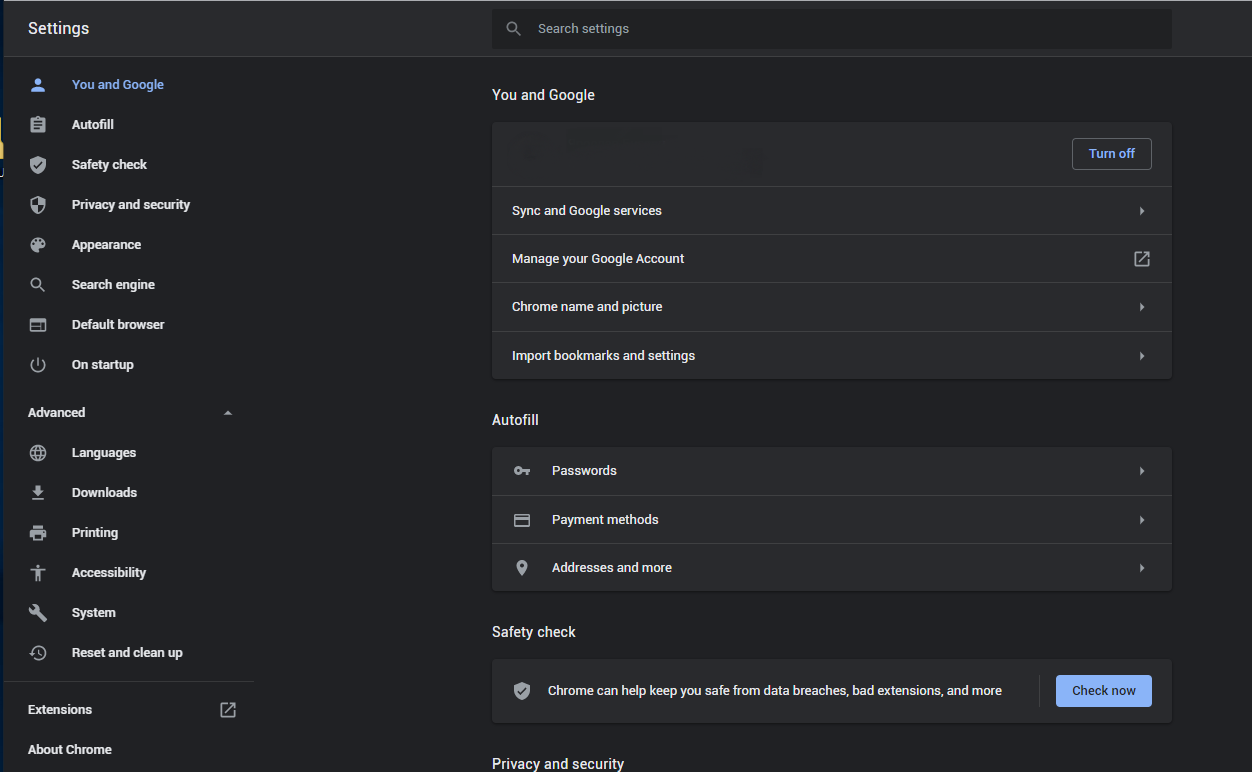
If you use Google Chrome
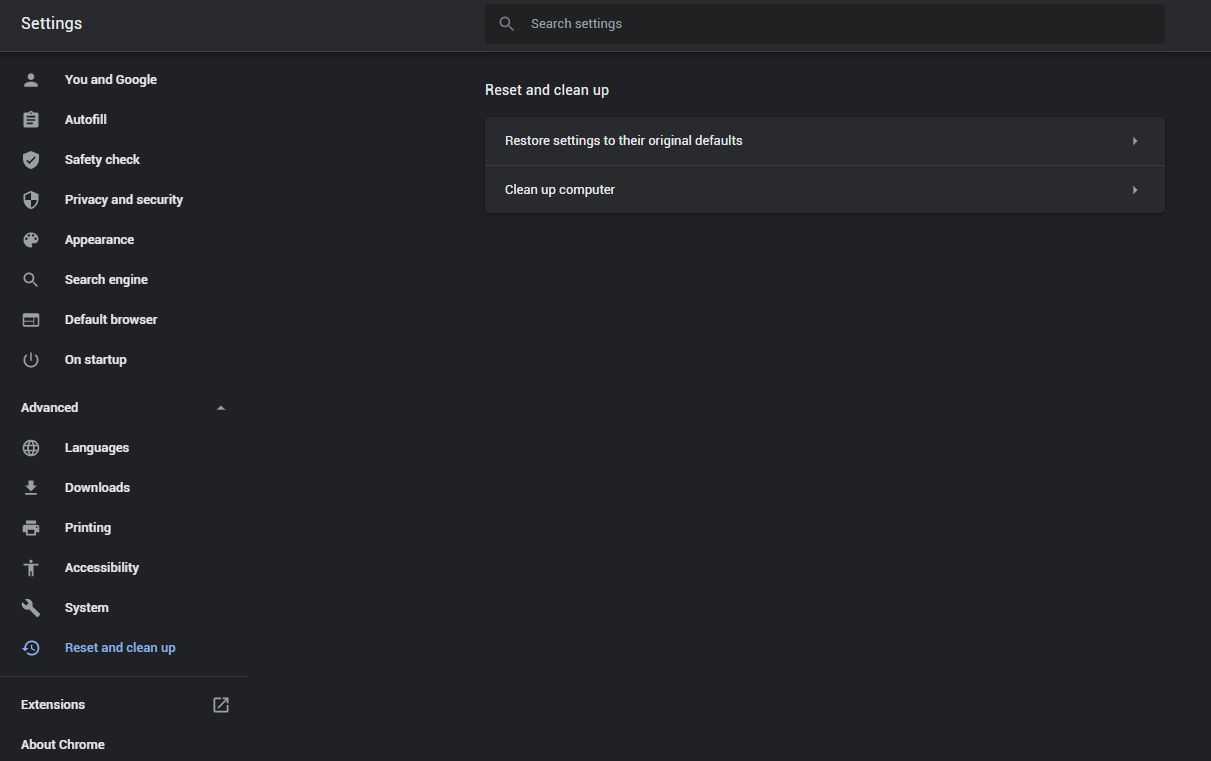
- Open Settings tab, find the “Advanced” button. In the extended tab choose the “Reset and clean up” button:
- In the appeared list, click on the “Restore settings to their original defaults”:
- Finally, you will see the window, where you can see all the settings which will be reset to default:

Opera can be reset in the next way
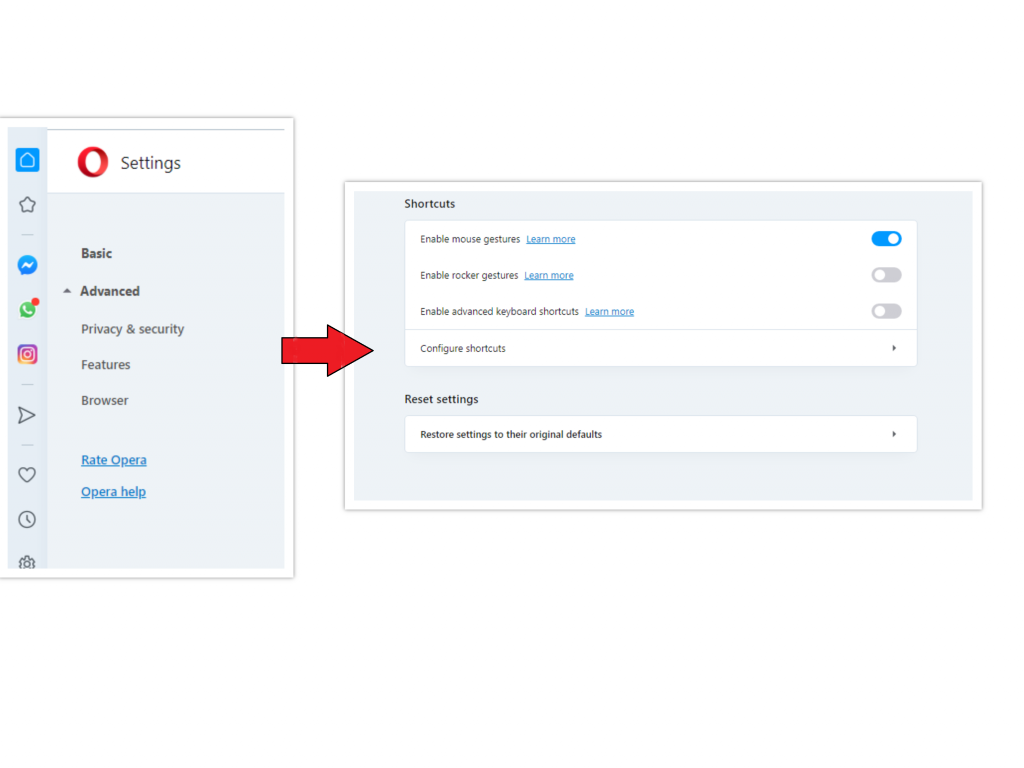
- Open Settings menu by pressing the gear icon in the toolbar (left side of the browser window), then click “Advanced” option, and choose “Browser” button in the drop-down list. Scroll down, to the bottom of the settings menu. Find there “Restore settings to their original defaults” option:
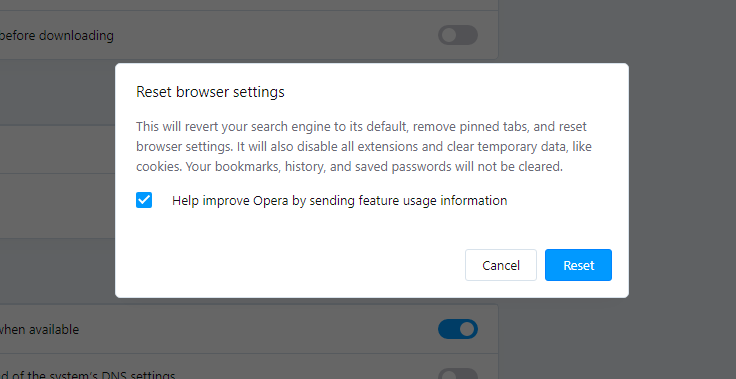
- After clicking the “Restore settings…” button, you will see the window, where all settings, which will be reset, are shown:
When the browsers are reset, you need to ensure that your browser will connect the right DNS while connecting to the web page you need. Create a text file titled “hosts” on your pc’s desktop, then open it and fill it with the following lines2:
# Copyright (c) 1993-2006 Microsoft Corp.

#

# This is a sample HOSTS file used by Microsoft TCP/IP for Windows.

#

# This file contains the mappings of IP addresses to host names. Each

# entry should be kept on an individual line. The IP address should

# be placed in the first column followed by the corresponding host name.

# The IP address and the host name should be separated by at least one

# space.

#

# Additionally, comments (such as these) may be inserted on individual

# lines or following the machine name denoted by a '#' symbol.

#

# For example:

#

# 102.54.94.97 rhino.acme.com # source server

# 38.25.63.10 x.acme.com # x client host

# localhost name resolution is handle within DNS itself.

# 127.0.0.1 localhost

# ::1 localhost
Find the hosts.txt file in C:/Windows/System32/drivers/etc directory. Rename this file to “hosts.old.txt” (to distinguish it from the new one), and then move the file you created on the desktop to this folder. Remove the hosts.old from this folder. Now you have your hosts file as good as new.
Scan your system for possible viruses
Once the scan is complete, you will see the detections or a notification about a clean system. Proceed with pressing the Clean Up button (or OK when nothing is detected).
References
- Official Microsoft guide for hosts file reset.
Leave a Comment