Many folks recommend disabling Windows Defender to speed up your PC, but the actual steps aren’t always clear. And with Windows 11, it’s become a bit more complicated. Let’s walk through how to disable Windows Defender on both Windows 10 and 11 and think about whether it’s really necessary for a faster computer.
How to Disable Windows Defender in Windows 10 and 11?
Despite the significant changes in Windows 11, Microsoft Defender remains relatively the same. So, whether you’re on Windows 10 or 11, the methods to stop the program are consistent. There are two ways to “disable” Windows Defender. The first, recommended by Microsoft, means disabling background scans. The second, often preferred by users, entails stopping the antivirus tool altogether.
To halt background scans, head to the tray, click the Windows Defender icon, and choose Virus & Threat Protection → Manage settings.
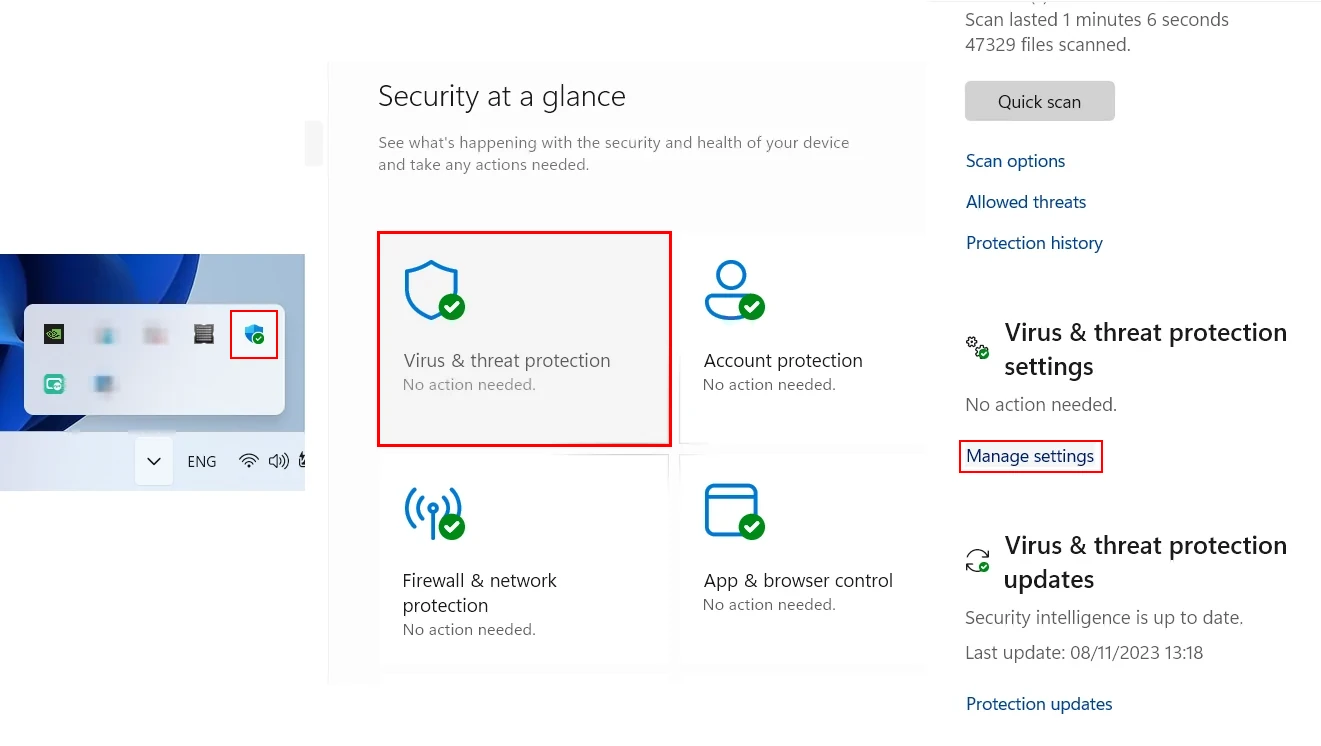
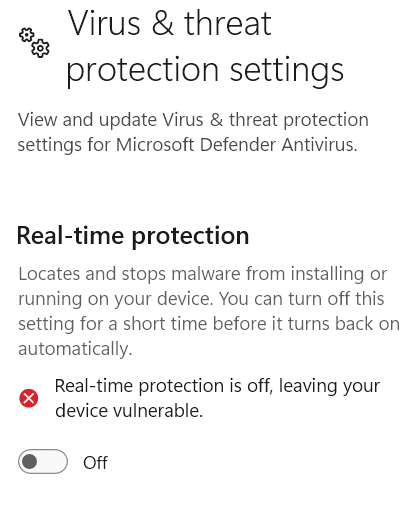
This action will disable the Real-time protection option. Simply put, it will halt background scans, but you can still execute on-demand or scheduled scans whenever needed.
You’ll need to take steps to disable Windows Defender entirely on Windows 10 or 11. Begin by accessing the same menu, navigating to the Virus & Threat Protection tab, and selecting Manage Settings. Please scroll down to the Tamper Protection option and turn it off. This mandatory action will allow you to execute all the following steps.
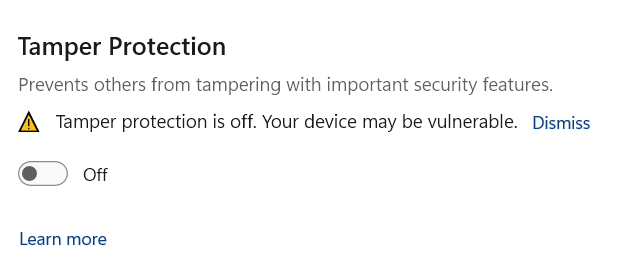
When Tamper Protection is disabled, press the Win + R combination to initiate a system search. Next, type “gpedit.msc” and hit Enter to open the Group Policy Editor.

When the Group Policies Editor is open, follow this path:
Computer Configuration > Administrative Templates > Windows Components > Microsoft Defender Antivirus.
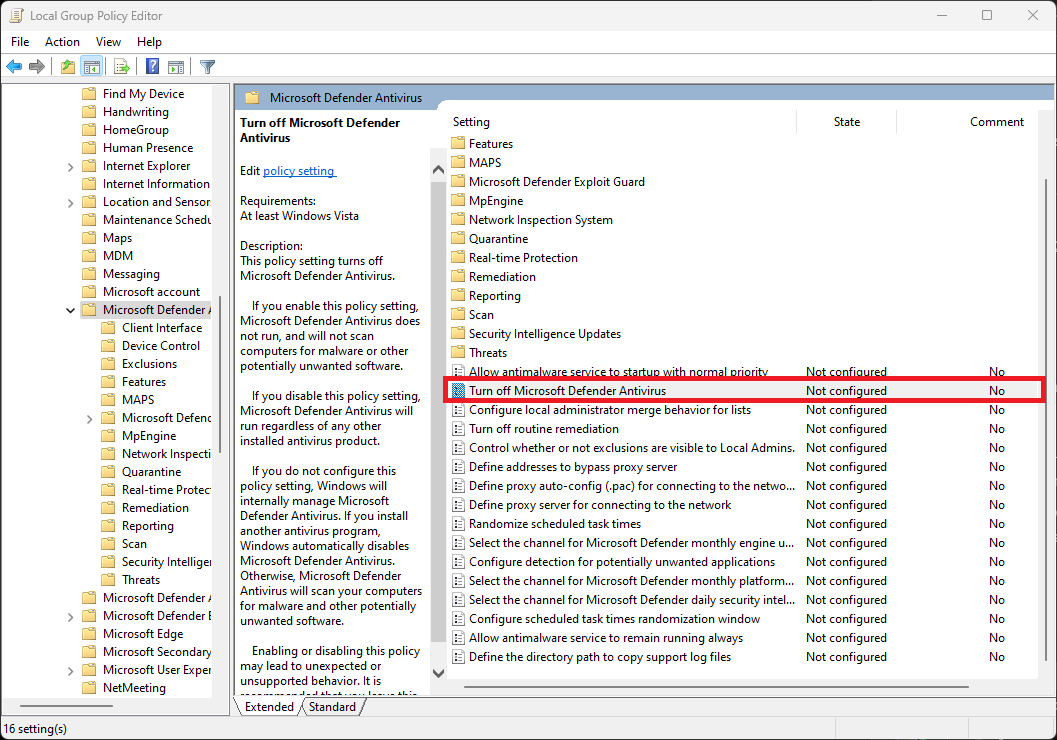
Find and double-click the “Turn Off Microsoft Defender Antivirus” configuration file. Once the window opens, set its value to Enabled. Click Apply and then OK to disable Windows Defender.
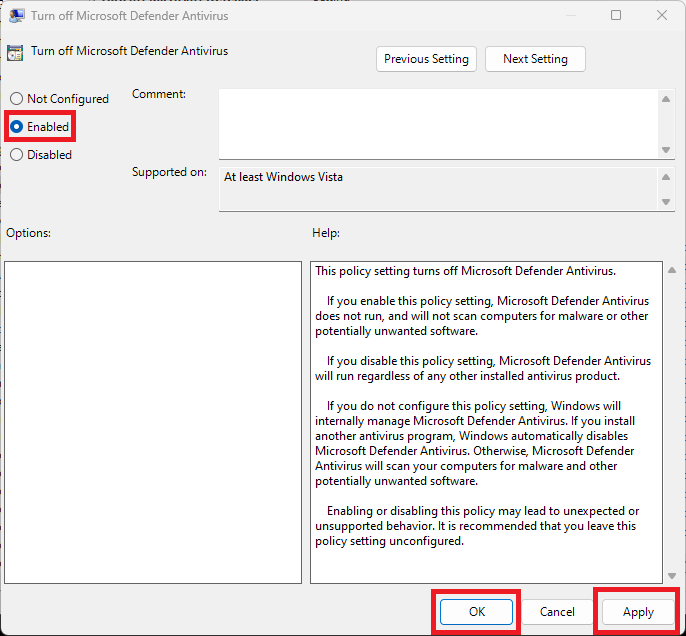
Although, after following these steps, you might still see the Defender shield icon in the tray, it’s merely a remnant.
Disabling Windows Defender With Regedit
When you using Windows 11 Home, the access to the Group Policy Editor is restricted. However, you can use the Registry Editor as an alternative method.
Press the Win + R combination, then type “regedit.” In the window that appears, follow the next path:
Computer\HKEY_LOCAL_MACHINE\SOFTWARE\Policies\Microsoft\Windows Defender
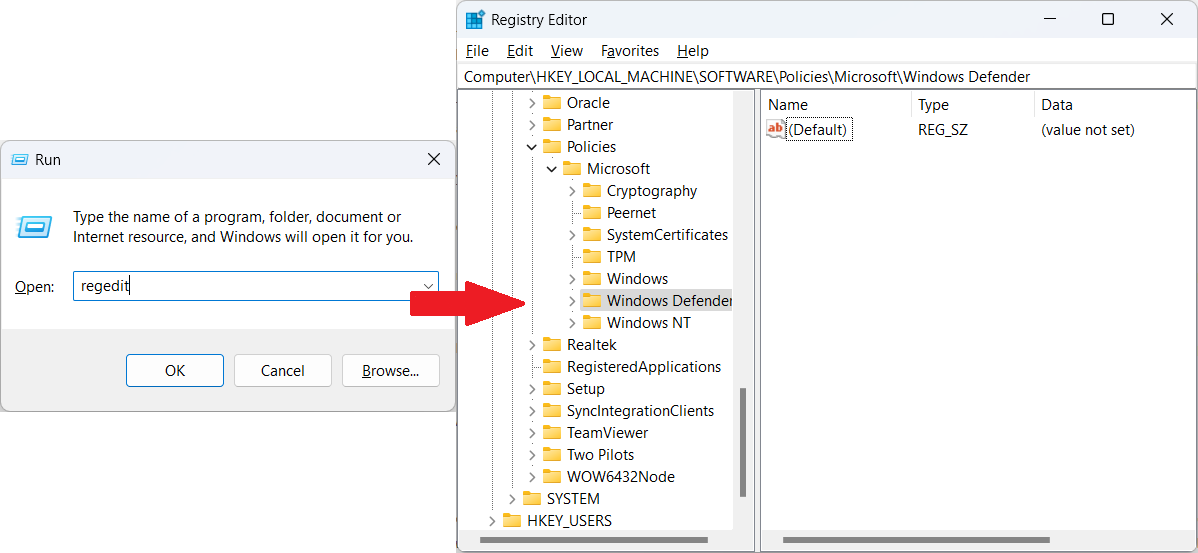
Create a new DWORD (32-bit) Value by right-clicking the menu and selecting the corresponding option. Name it DisableAntiSpyware, set the value data to 1, and the Base value to Hexadecimal.
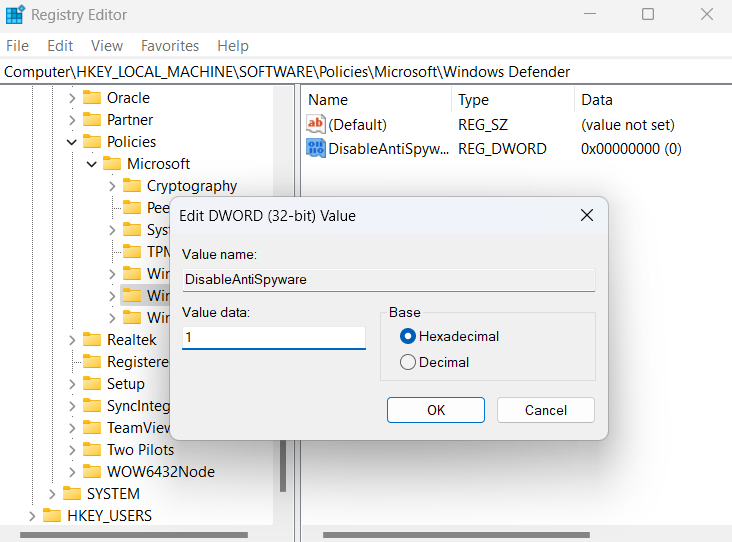
Then, click “Ok” to save the new entry. Please reboot the PC to apply the changes.
Disable Microsoft Defender with Command Prompt
Besides manipulating system elements, you can make Defender disappear using a command prompt. First, launch its instance with admin privileges: open Search, type cmd, and choose the “Run as Administrator” option.
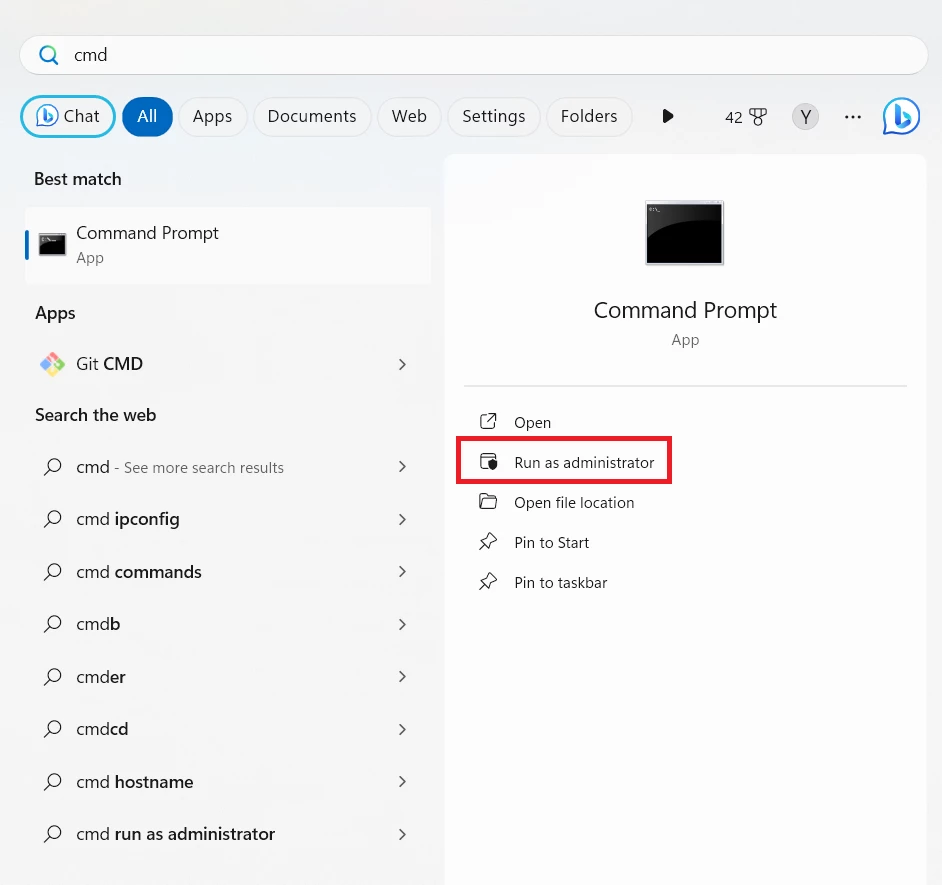
Next, paste the following command and press Enter:
reg add “HKEY_LOCAL_MACHINE\SOFTWARE\Policies\Microsoft\Microsoft Defender” /v DisableAntiSpyware /t REG_DWORD /d 1 /f

This command repeats your actions when working with the Registry Editor. So, you can close the command prompt and reboot the computer to apply the changes.
Should you disable the Defender?
Microsoft has a lengthy track record of striving to enhance Windows security, with its central instrument being the built-in antivirus. Over time, this tool has undergone name changes. It is now officially designated as Microsoft Defender, though the community has historically referred to it by different names.
Despite past shortcomings in Microsoft’s security products, the effectiveness of the modern Microsoft Defender is noteworthy. It is oriented for home users and has zero-trust security and sandboxing. Moreover, being an integral part of the default Windows package allows users to utilize it immediately.
However, the positives mentioned come with potential drawbacks. Although Windows Defender performs well in routine tasks and on contemporary systems, it may pose challenges in different scenarios. I’ve compiled a list of situations where Microsoft’s antivirus could lead to issues.
Key Reasons to Disable Microsoft Defender
Low-end CPU. When it uses sandboxing and implements the zero-trust policy, your system may experience slower performance due to its weak processor. This is especially noticeable in outdated CPUs or those with dual-core processors. However, the overall performance may not be significantly impacted.
HDD as a system disk. Using HDD disks in your system may also lead to slower performance as they have limited read/write speeds. This poses a challenge for Windows Defender’s “silent” background scans, as the slow spinny disks cannot provide sufficient data exchange speed.
Working with malware samples. As someone who works with malware samples frequently, you may have encountered a problem with antivirus software deleting samples. Malware analysts used to prevent this by putting the samples in password-protected archives. However, the extensive use of AI in Windows Defender has made this ineffective, and the AI detects default password-protected archives like “infected.”
Concerns about confidentiality. If you have privacy concerns regarding Microsoft software, you may have reservations about the telemetrics in operating systems. Windows Defender has access to all files on your disk, and it may even be able to pick up passwords for encrypted folders from what you type. While many users may not be bothered by this behavior, those who prioritize privacy may view Windows Defender as an enemy.
