
Gudupp pop-up notices may show up out of the blue, covering the post of the site you explored or opening your browser when you don’t need it to be opened.
Clicking the Gudupp promotion can result in the injection of various malware or unwanted programs. In this guide, you will see the manual of Gudupp popups removal in various manners, and also inspecting your system for additional malware existence.
What are Gudupp pop-ups?
Gudupp popups are an outcome of adware activity. Adware is a sort of malware that shows you the pay-per-view of pay-per-click promotions, which creates a massive amount of revenue for adware representatives. These advertisements might contain sometimes shocking content, or have a web link to malicious content/website, since adware maintainers have no purpose to check the goodness of the material they are going to reveal – their single target is cash.
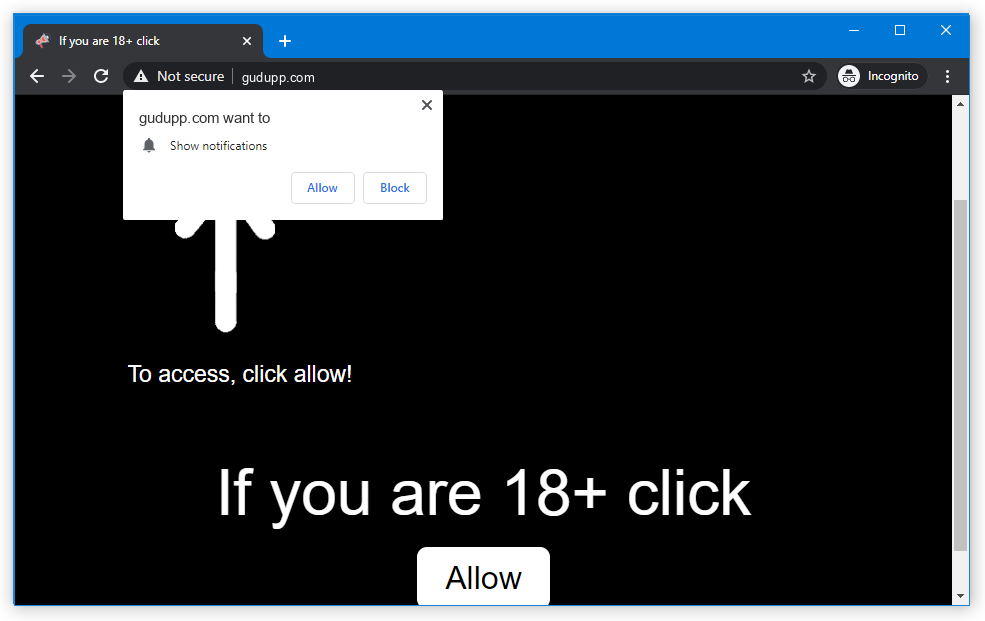
Gudupp push notification.
Pop-up marketing itself is a good, affordable and very successful advertising solution1. It allows the seller to attach the buyers’ interest to their site, as well as the buyers to get the dynamic updates on the goods they wish to buy. When the consumer will get a pop-up alert that the TV set he wishes to purchase is available at the online store he/she saw earlier with a 15% price cut, one will certainly use this possibility and purchase it. Taking into consideration the very low cost for the popups and their targeting, such an advertising tool is a favorite thing among the marketing departments of large internet sellers.
Nonetheless, such a profitable strategy could not be missed by virus developers. Option to demonstrate the popup ads by force to the victims of malware attack is a great basis for malevolent tricks with the popup ads. And Gudupp.com promotions is just one of hundreds that are “employed” in this scheme.
Here is a short info for the Gudupp site
| Site | Gudupp.com |
| Hosting | AS13335 Cloudflare, Inc. United States, San Francisco |
| Infection Type | Adware, Push notifications, Unwanted Ads, Pop-up Ads |
| IP Address | 188.114.96.3 |
| Symptoms | Annoying pop-up ads in the right corner. |
| Similar behavior | Comfortykive, Manageoriginalsupertheproduct, Reserve |
| Fix Tool |
To remove possible virus infections, try to scan your PC
|
How have I got the Gudupp virus?
There are a lot of methods of getting contaminated by the adware that lead to the Gudupp popups tornado. A lion’s part of this malware instances is after the free software or cracked programs, that are distributed on the peering networks. Free software can likewise be downloaded from the main site, and the adware is provided as a legal bundled program.
There is no need to blame yourself. A huge amount of users regularly make use of the dubious programs from untrusted sources: abandonware, different apps that are free, or perhaps hacked programs. All of these sorts of software are unsafe, because it is very easy to include a Gudupp malware under the guise of part of the license hacking script, or as a part of the self-made algoritm inside of the Windows optimization tool.
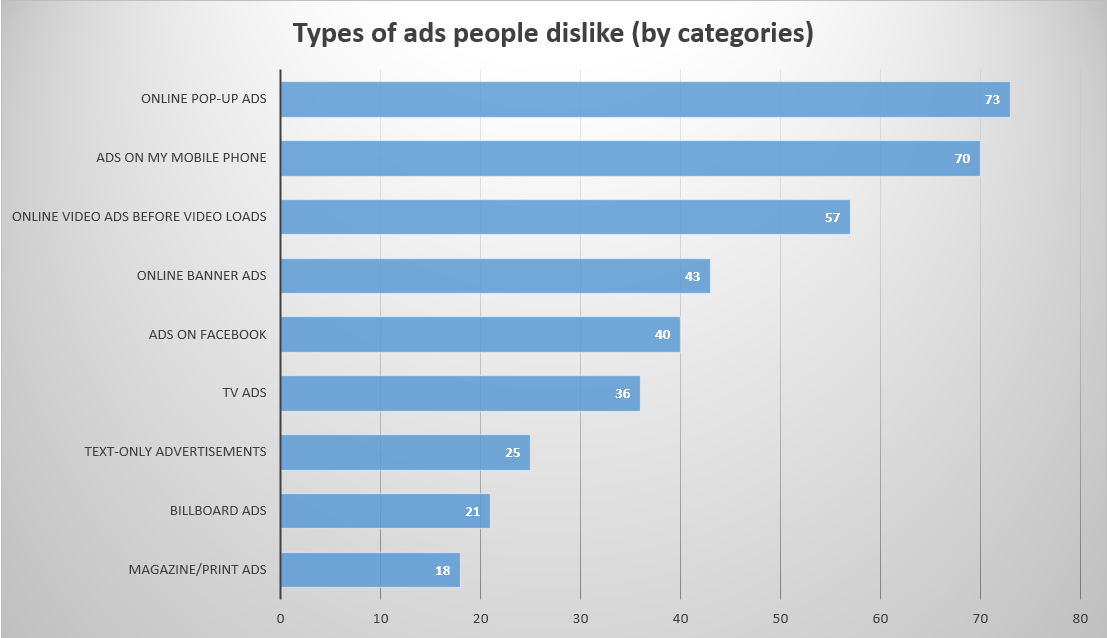
The statistic shows that people dislike popup advertising more than other types of promotions
How can I get rid of Gudupp pop-up advertisements?
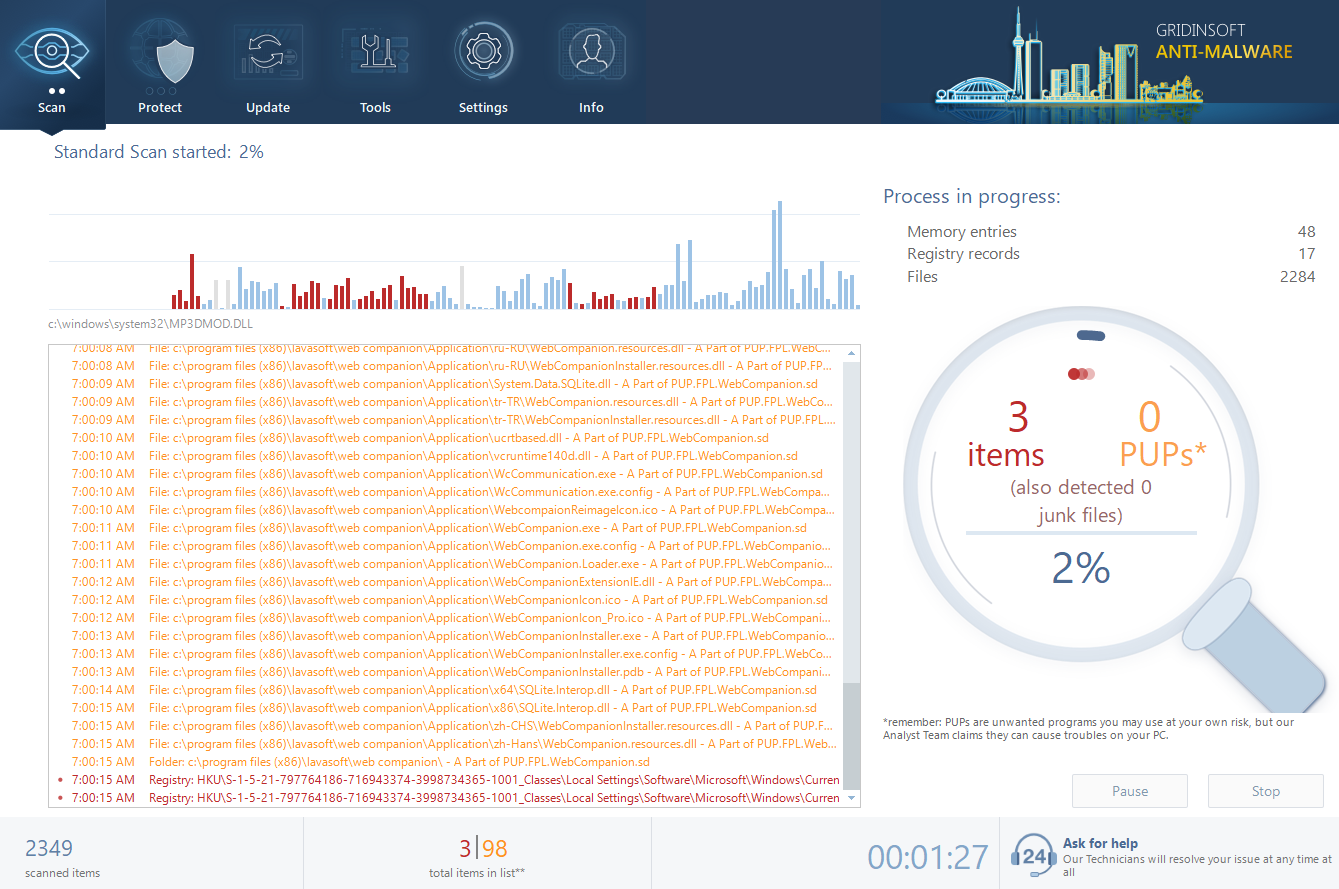
The guide of Gudupp adware elimination consists of 2 sections. Initially, we need to remove the malware, and after that deal with the results of its activity. The elimination process is really simple, due to the fact that it may be performed even with using Microsoft Defender – security tool that is available on all computers with Windows 8/10. However, as a result of its huge resources utilization, as well as some errors that can be critical for some types of users, Defender is frequently disabled by the users, so its utilization is most likely impossible. Furthermore, a wide range of trojan viruses have the ability to turn off the embedded antivirus. It is better to use the separated program that will not have such vulnerabilities.
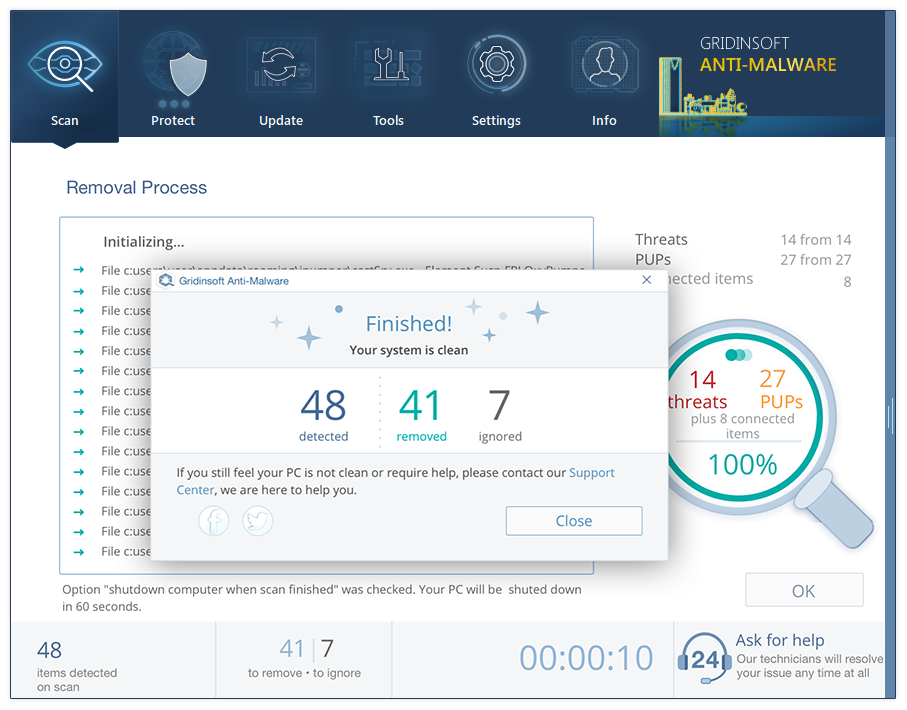
- Standard scan checks the logical disk where the system files are stored, together with the files of programs you have already installed. The scan lasts up to 6 minutes.
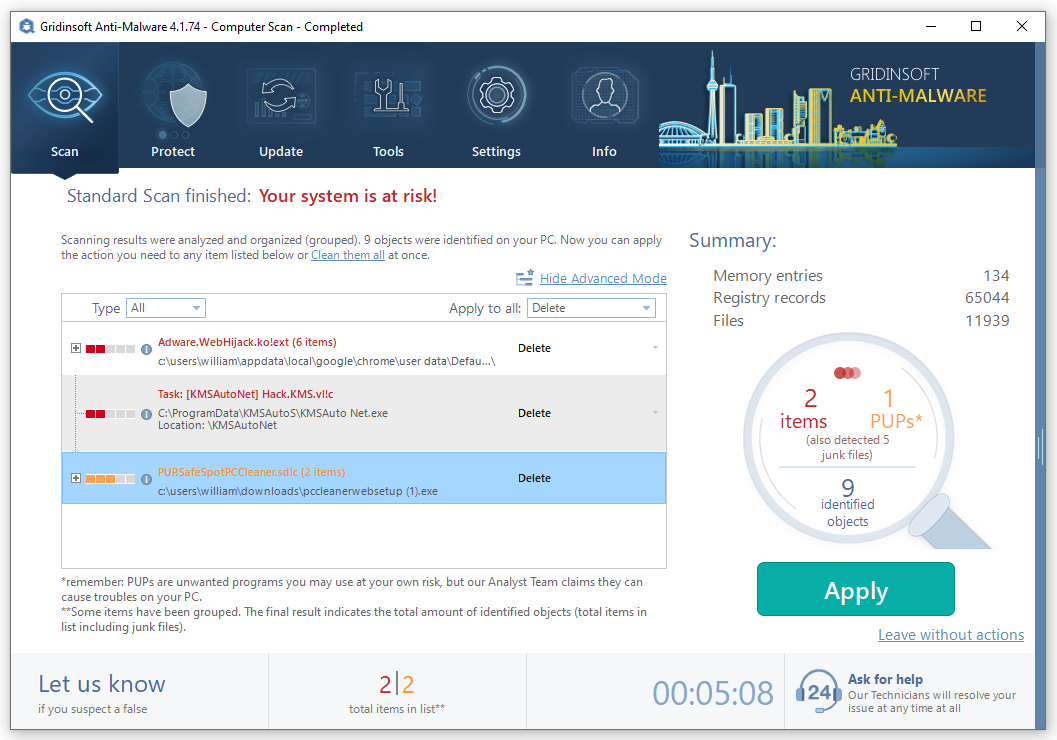
- When the scan is over, you may choose the action for each detected virus. For all files of Gudupp malware the default option is “Delete”. Press “Apply” to finish the malware removal.
Reset browser settings to default
Manual method of browser reset
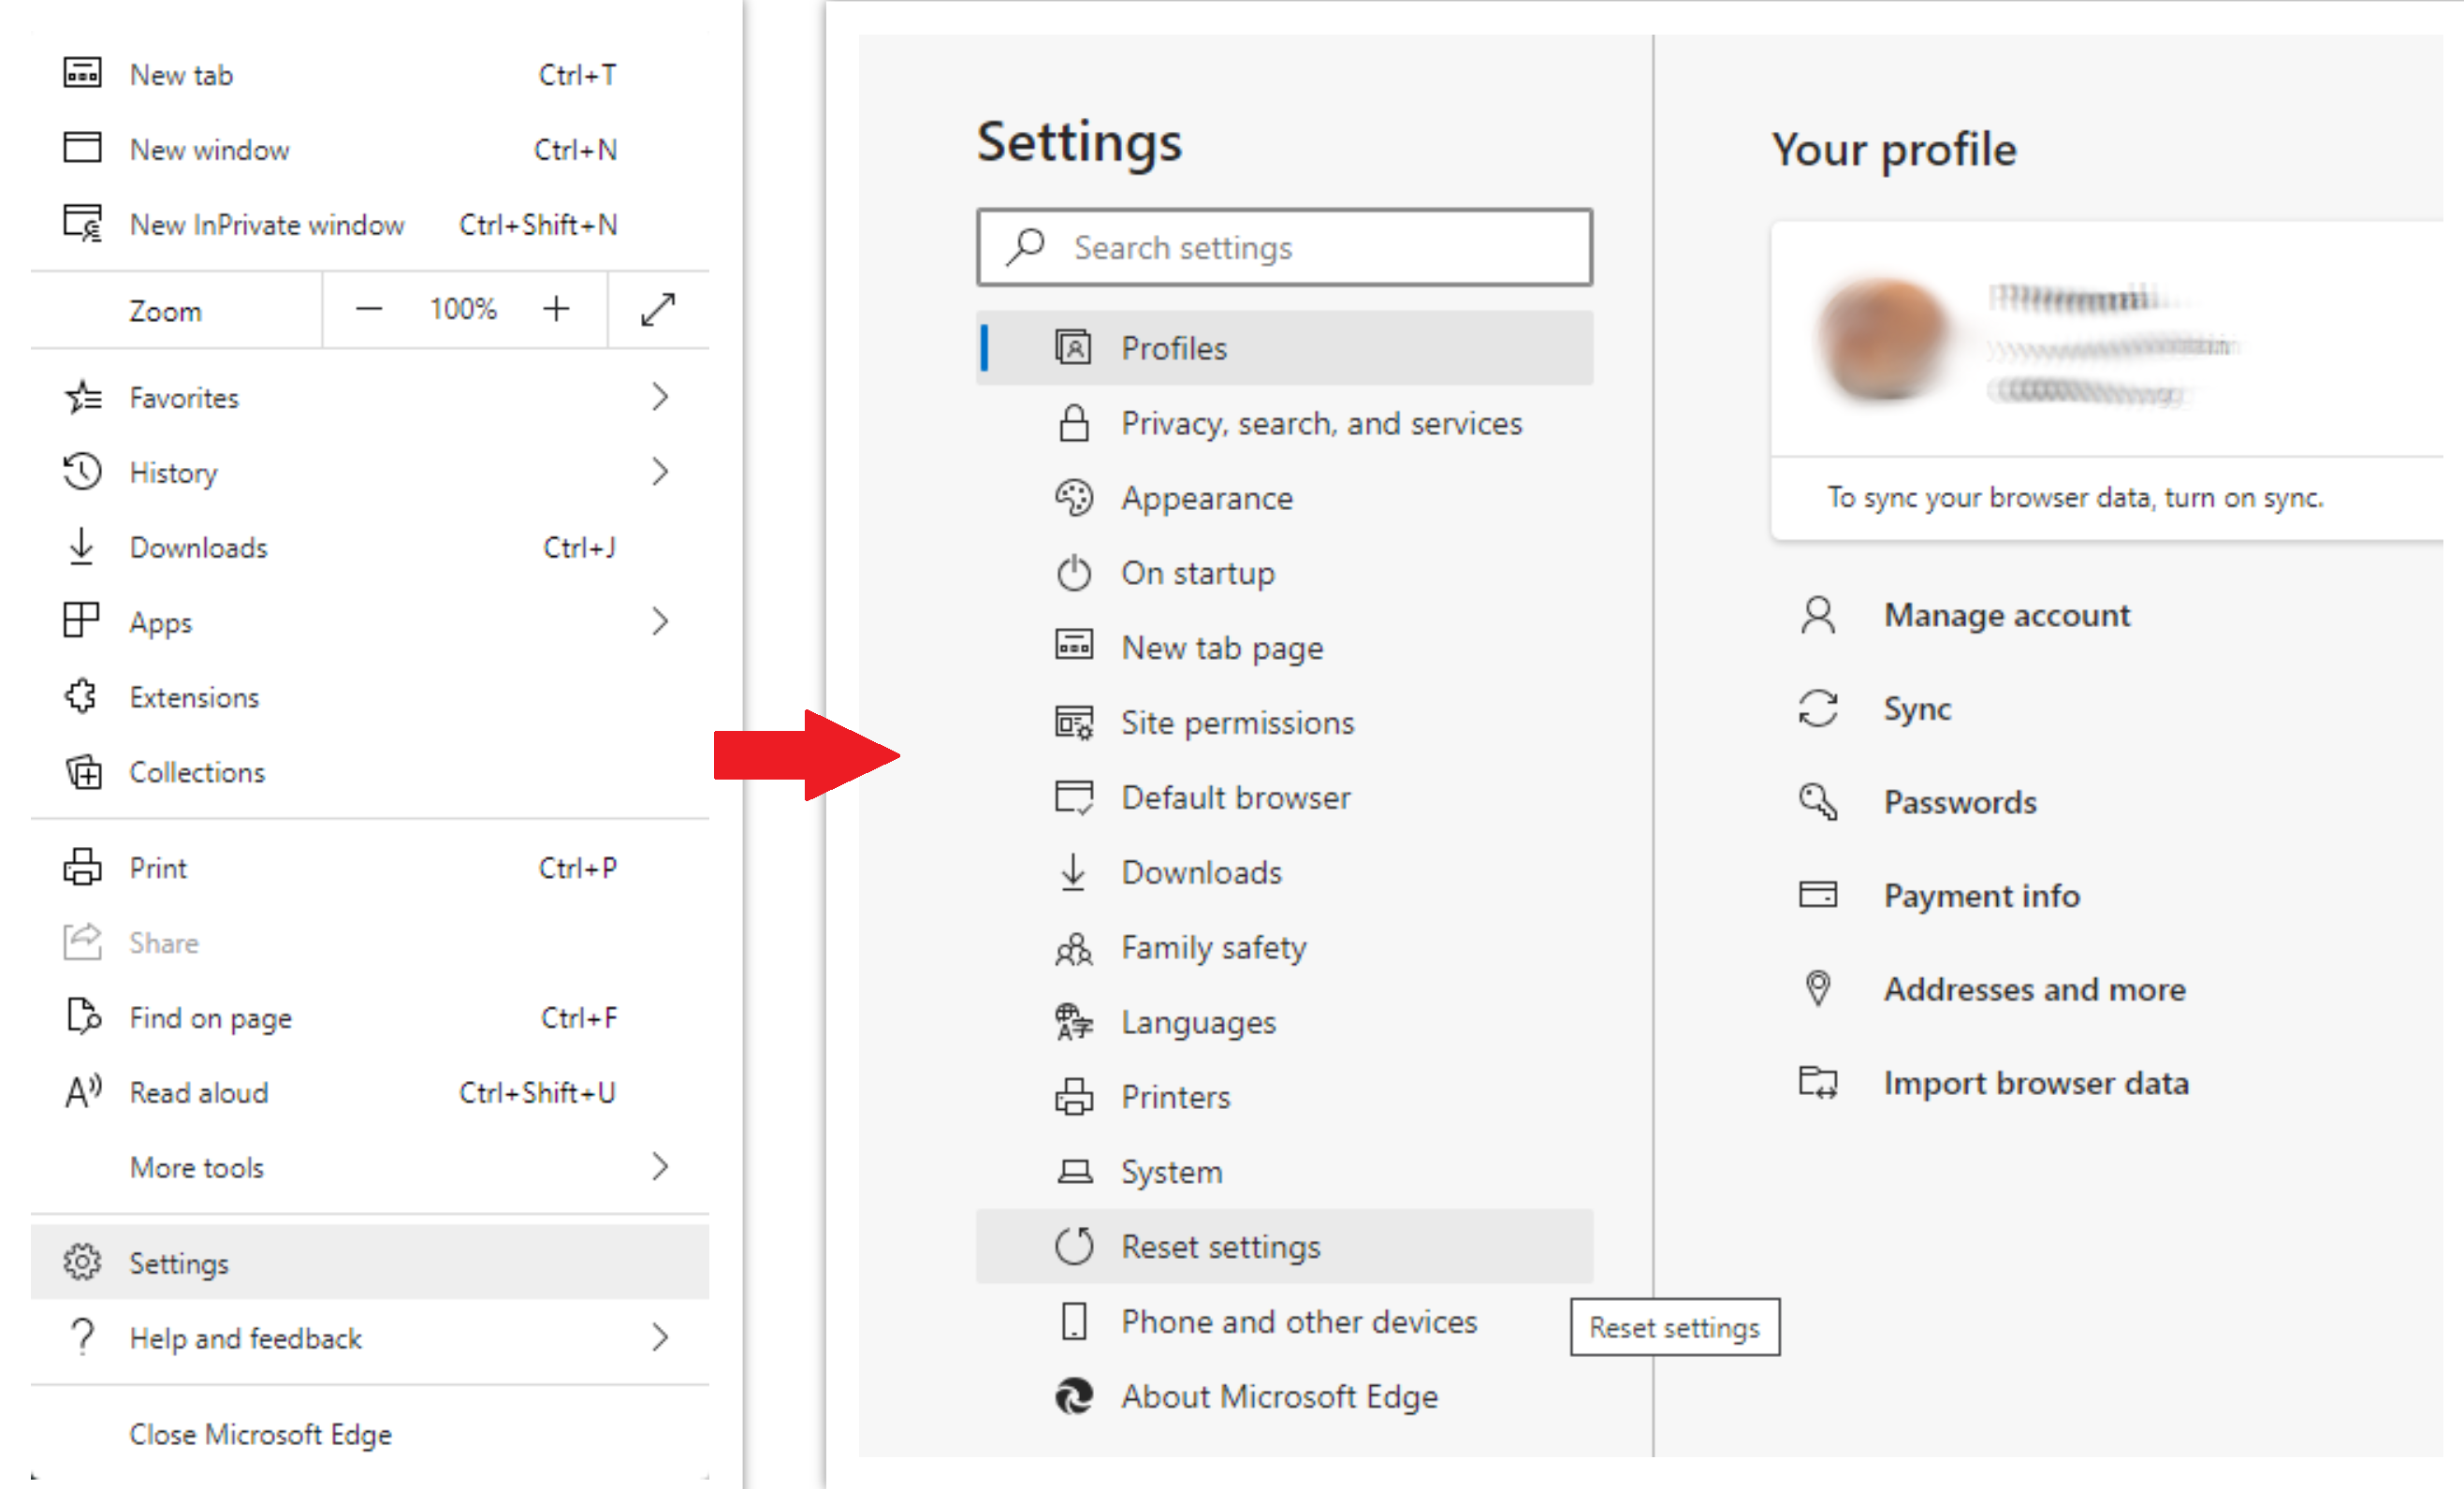
To reset Edge, do the following steps :
- Open “Settings and more” tab in upper right corner, then find here “Settings” button. In the appeared menu, choose “Reset settings” option :
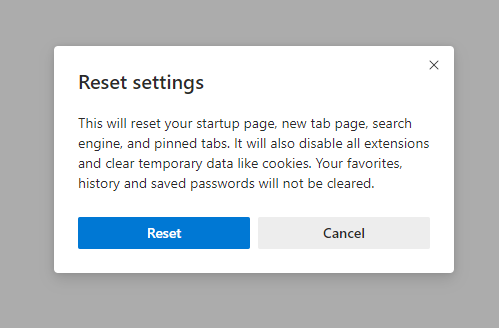
- After picking the Reset Settings option, you will see the following menu, stating about the settings which will be reverted to original :
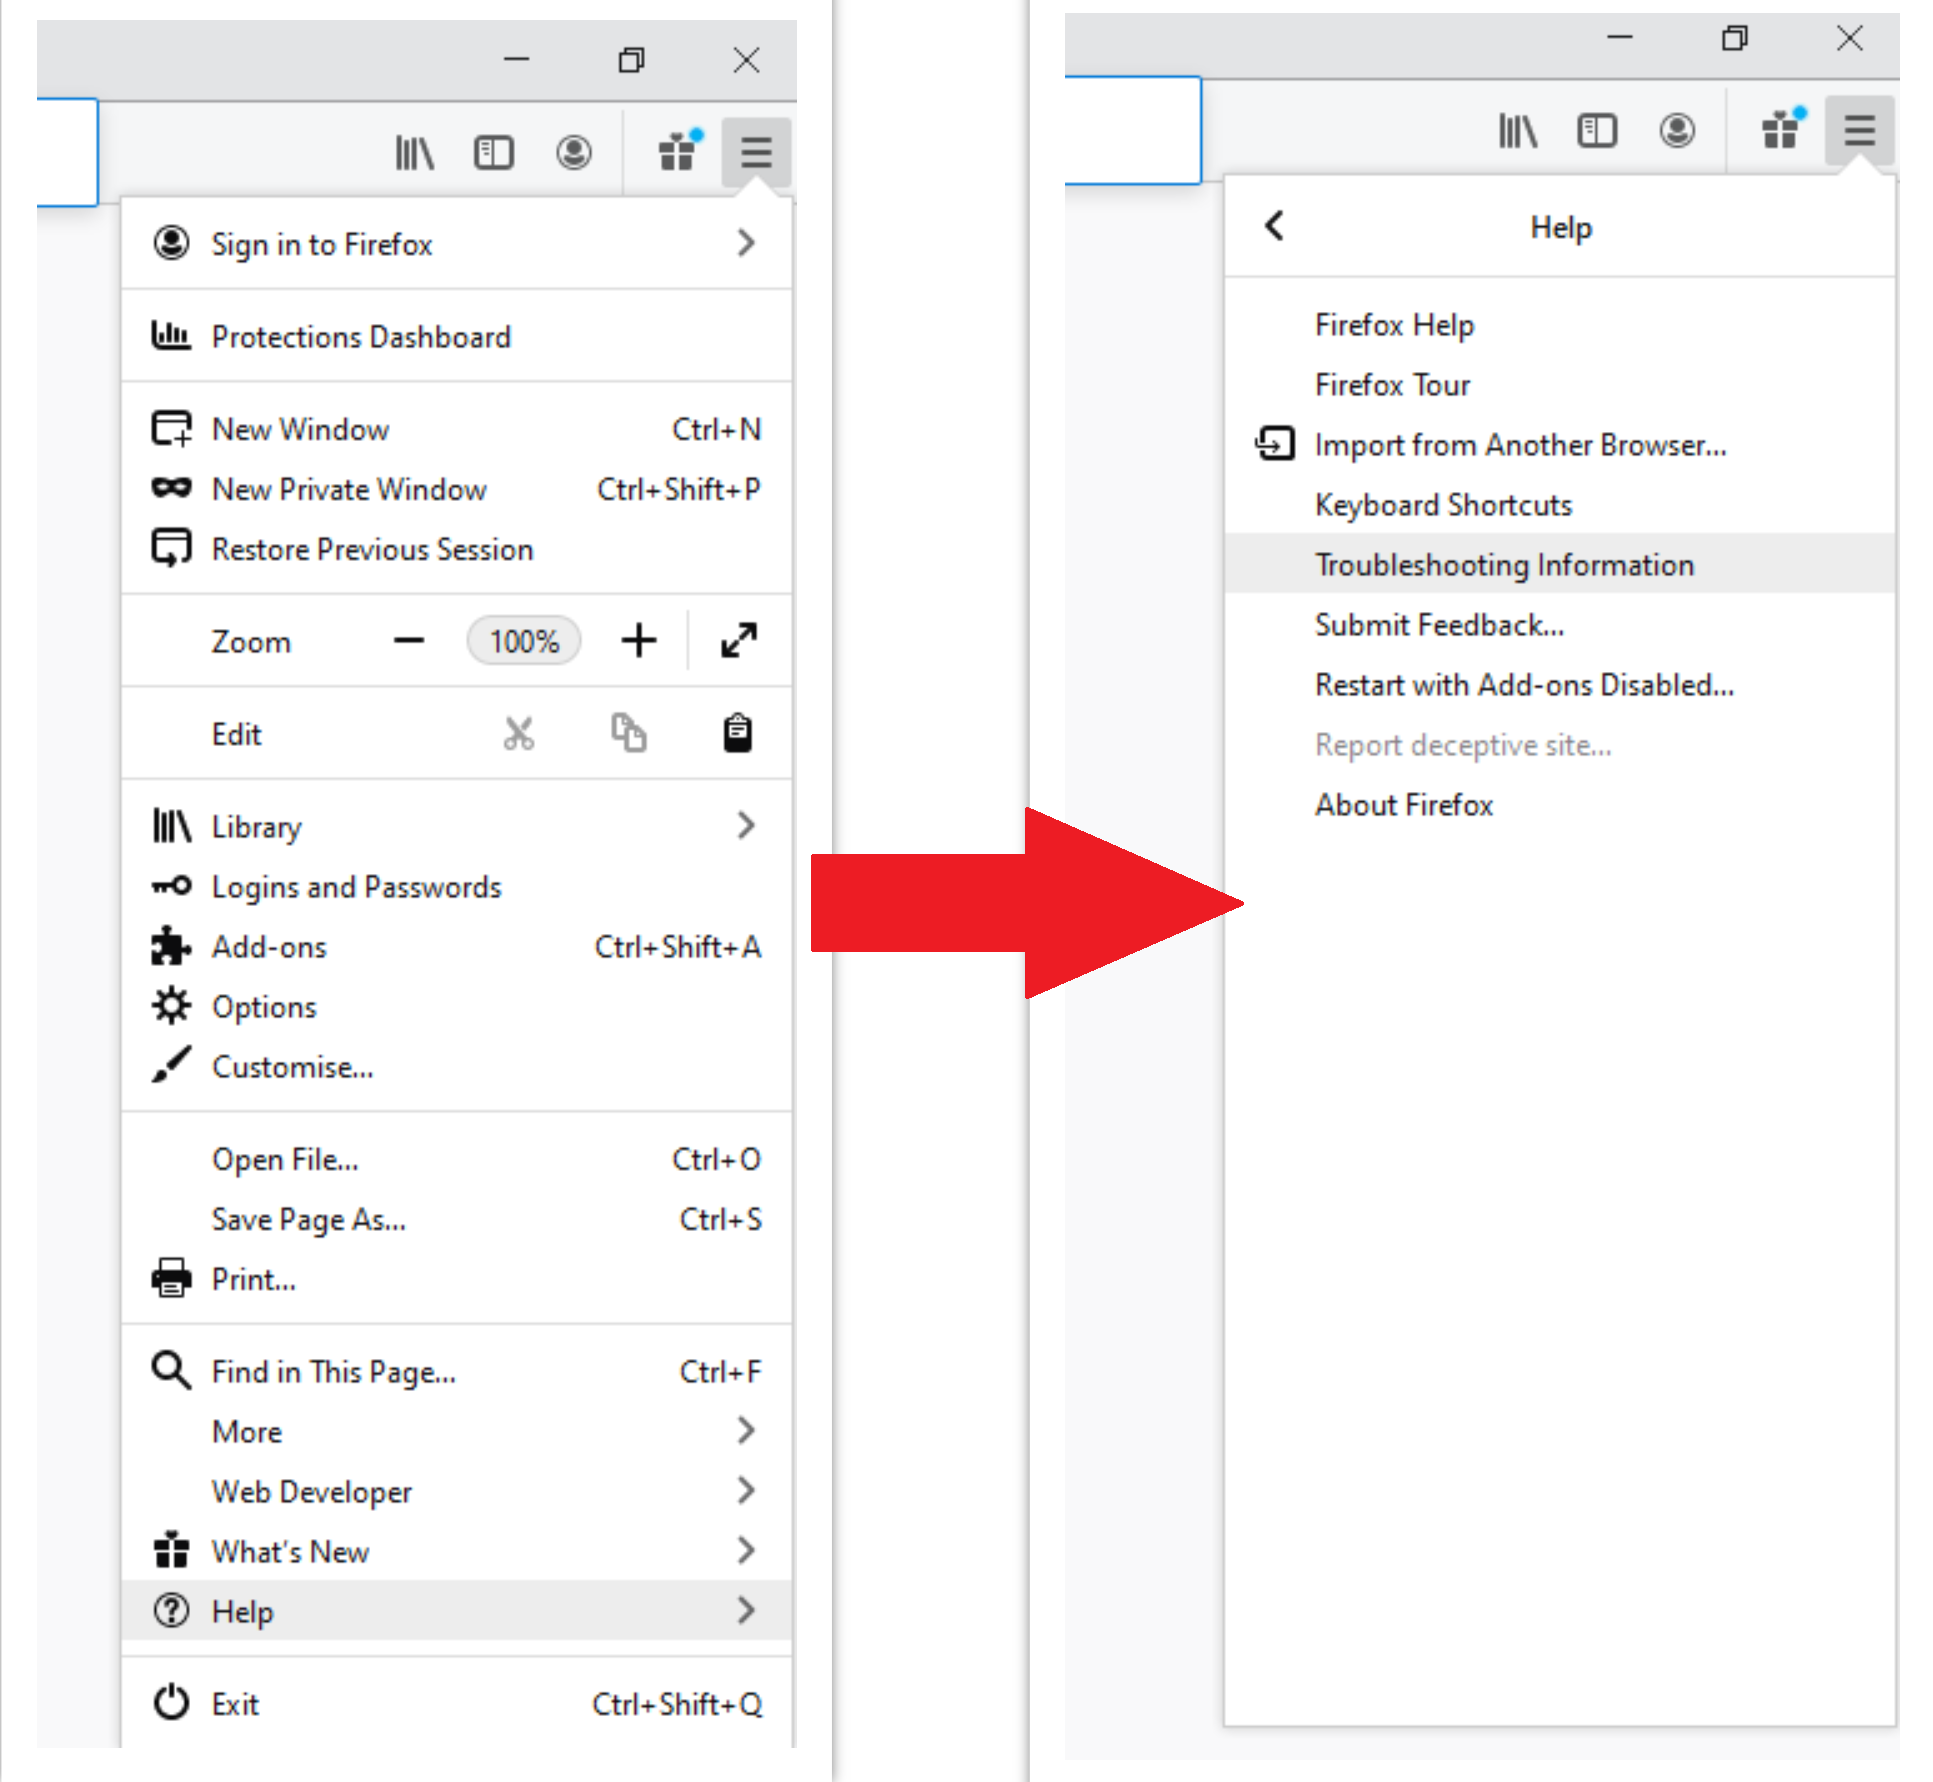
For Mozilla Firefox, do the next actions :
- Open Menu tab (three strips in upper right corner) and click the “Help” button. In the appeared menu choose “troubleshooting information” :
- In the next screen, find the “Refresh Firefox” option :
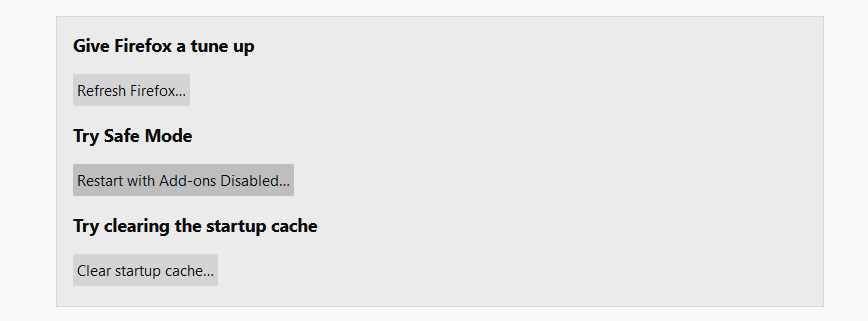
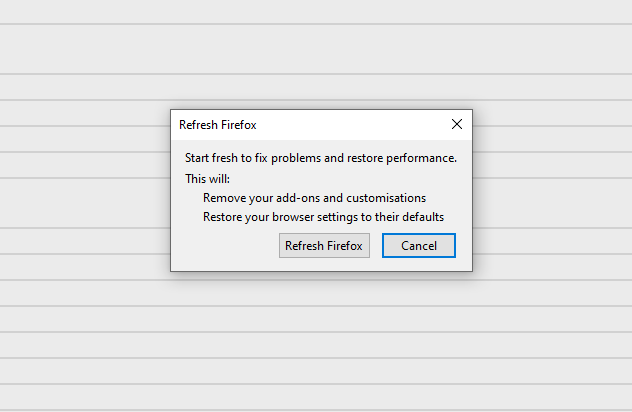
After choosing this option, you will see the next message :
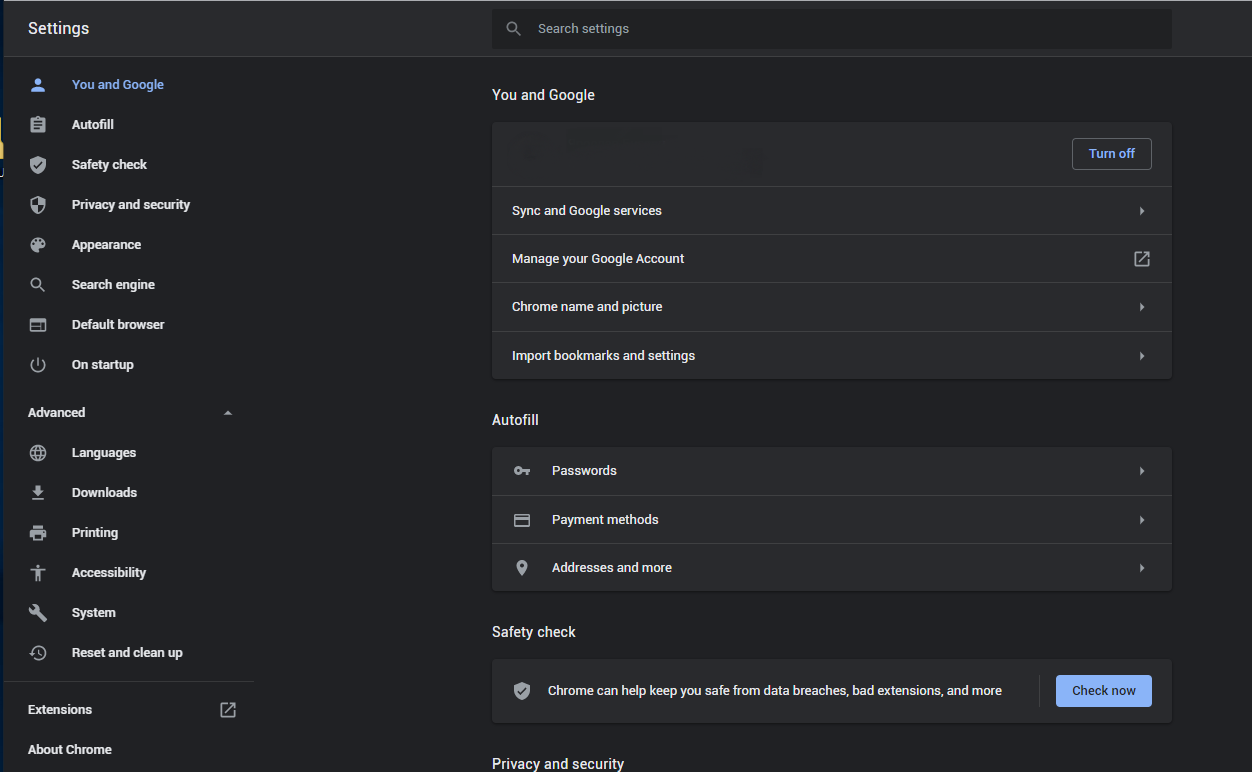
If you use Google Chrome
- Open Settings tab, find the “Advanced” button. In the extended tab choose the “Reset and clean up” button :
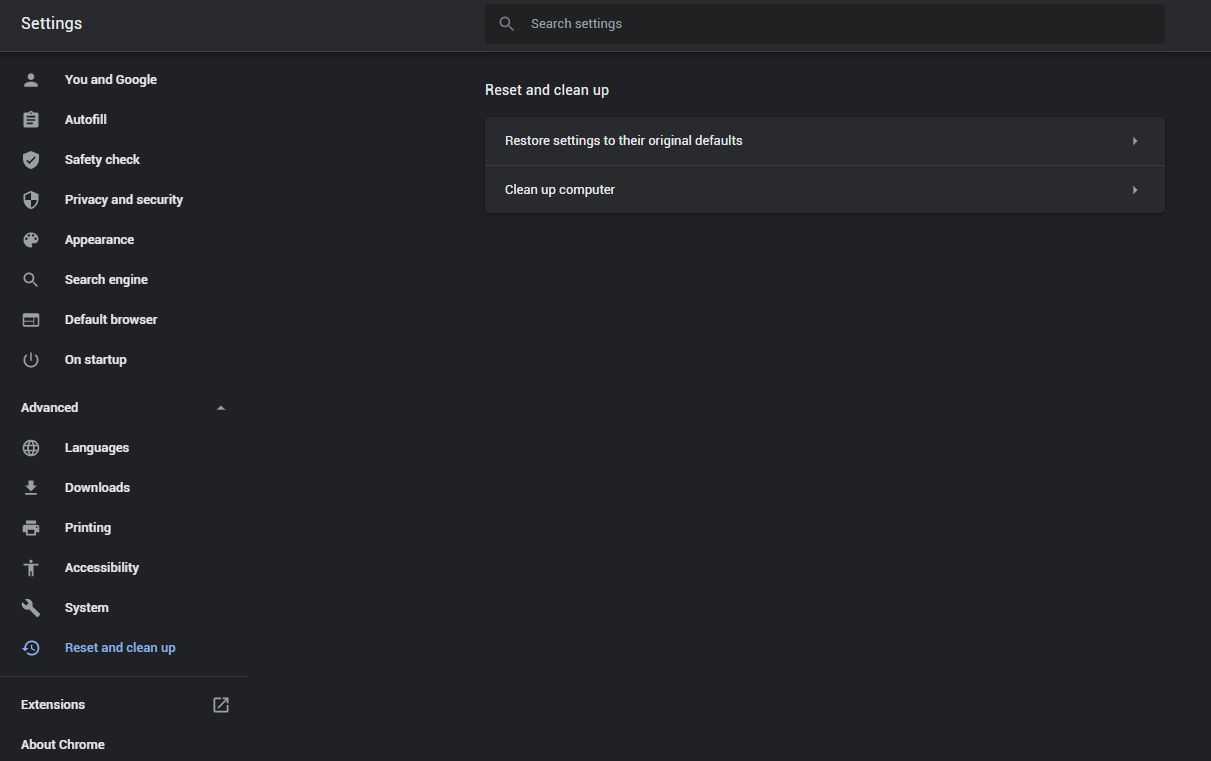
- In the appeared list, click on the “Restore settings to their original defaults” :
- Finally, you will see the window, where you can see all the settings which will be reset to default :

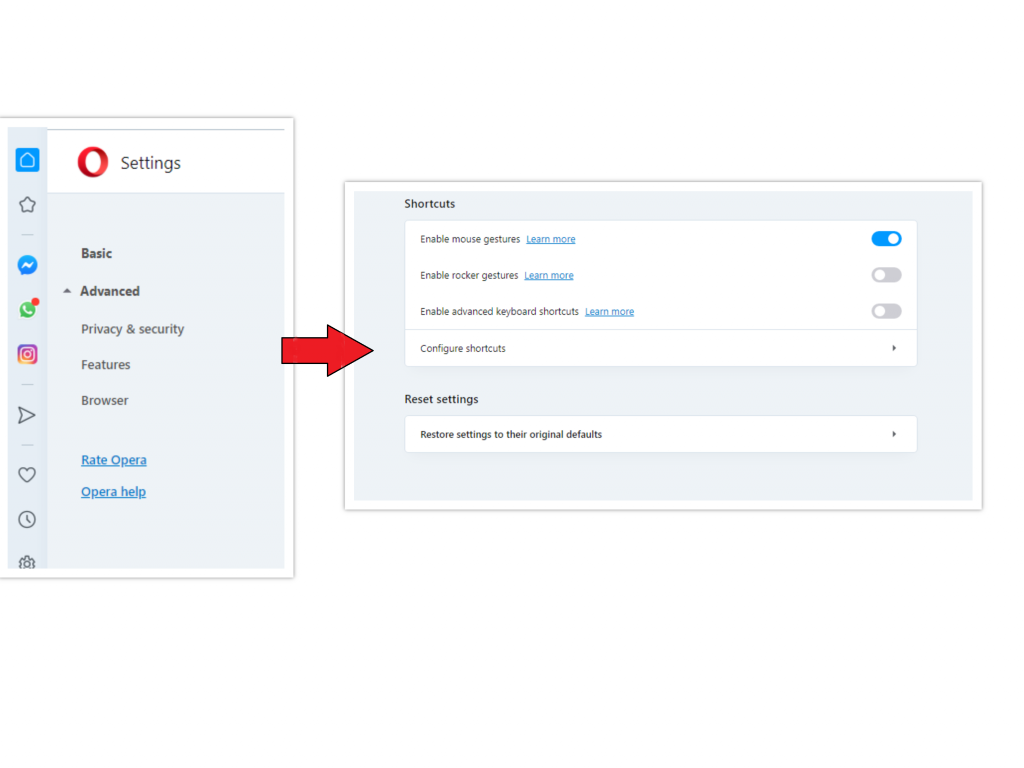
Opera can be reset in the next way
- Open Settings menu by pressing the gear icon in the toolbar (left side of the browser window), then click “Advanced” option, and choose “Browser” button in the drop-down list. Scroll down, to the bottom of the settings menu. Find there “Restore settings to their original defaults” option :
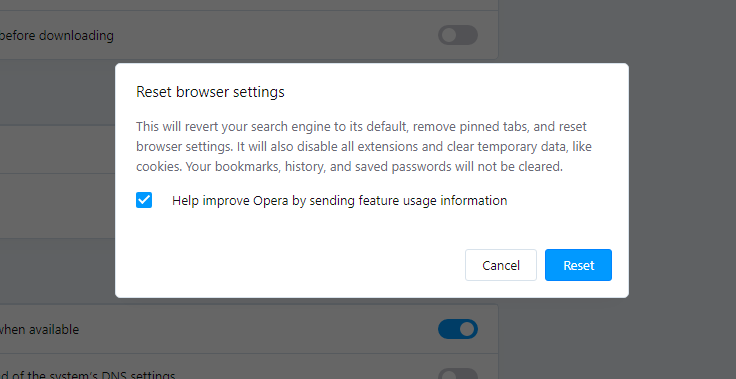
- After clicking the “Restore settings…” button, you will see the window, where all settings, which will be reset, are shown :
When the browsers are reset, you need to ensure that your browser will connect the accurate DNS while connecting to the site you need. Create a text file titled “hosts” on your pc’s desktop, then open it and fill it with the following lines3:
#
# This is a sample HOSTS file used by Microsoft TCP/IP for Windows.
#
# This file contains the mappings of IP addresses to host names. Each
# entry should be kept on an individual line. The IP address should
# be placed in the first column followed by the corresponding host name.
# The IP address and the host name should be separated by at least one
# space.
#
# Additionally, comments (such as these) may be inserted on individual
# lines or following the machine name denoted by a ‘#’ symbol.
#
# For example:
#
# 102.54.94.97 rhino.acme.com # source server
# 38.25.63.10 x.acme.com # x client host
# localhost name resolution is handle within DNS itself.
# 127.0.0.1 localhost
# ::1 localhost
Find the hosts.txt file in C:/Windows/System32/drivers/etc directory. Rename this file to “hosts.old.txt” (to distinguish it from the new one), and then move the file you created on the desktop to this folder. Remove the hosts.old from this folder. Now you have your hosts file as good as new.
However, there is one issue that makes the things much more difficult to restore, particularly without the anti-malware software. The majority of adware variations that are utilized to show you the Gudupp pop-up ads are altering the deep browser setups, disabling an access to the settings tab. So, if you try to fix your browser settings after your system was penetrated by pop-up-related malware, your browser will crash quickly. In certain cases, you will see no crash, however, huge lag spike after pushing the “settings” key. Browser will stop responding for ~ 30 seconds, and afterwards it will be back to the typical, until you try to open settings once again.
References
- More about pop-up advertisements on Wikipedia.
- Official Microsoft guide for hosts file reset.
Leave a Comment