
When you see Trojan.MSIL.Bladabindi suspicious malware detection detection means that your system is in danger. This malware can correctly be named ransomware, which encrypts your files and asks you to pay for their decryption.
Trojan.MSIL.Bladabindi is a dangerous malware known for its widespread distribution through phishing emails and malicious websites. This Trojan’s ability to compromise a victim’s computer and extort money makes it a significant threat in the cybersecurity landscape.
Trojan.MSIL.Bladabindi actions
- The malware creates Read, Write, Execute (RWX) memory, allowing attackers to load and execute malicious code;
- It reads sensitive data from the victim’s computer, potentially compromising confidential information like passwords and financial data;
- Trojan.MSIL.Bladabindi can download and execute other malware when an internet connection becomes available;
- It uses built-in Windows utilities for basic functionality;
- Encrypting the documents located on the target’s drives — so the victim cannot check these documents;
- It blocks normal access to the victim’s computer until a ransom is paid, similar to locker viruses.
- The Trojan can create copies of itself, making it challenging to remove.
How to remove Trojan.MSIL.Bladabindi ransomware?
Manual Trojan.MSIL.Bladabindi Removal
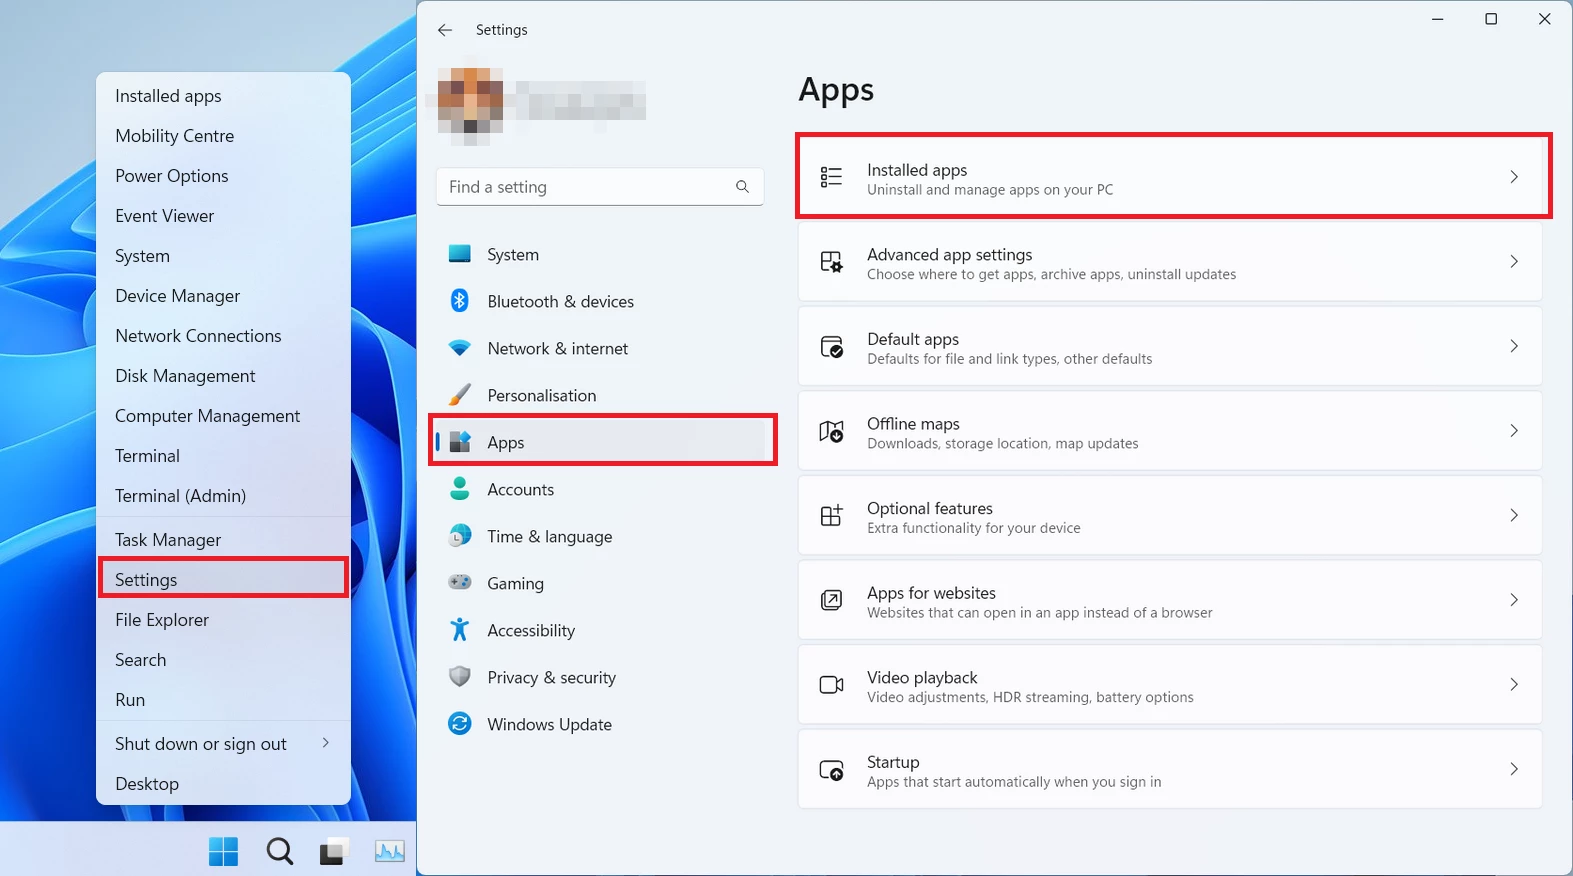
You can remove Trojan.MSIL.Bladabindi manually, through the system Settings app. Click the Windows button with the right mouse button and find Settings in the appeared list. In Settings, go to Apps → Installed Apps menu.
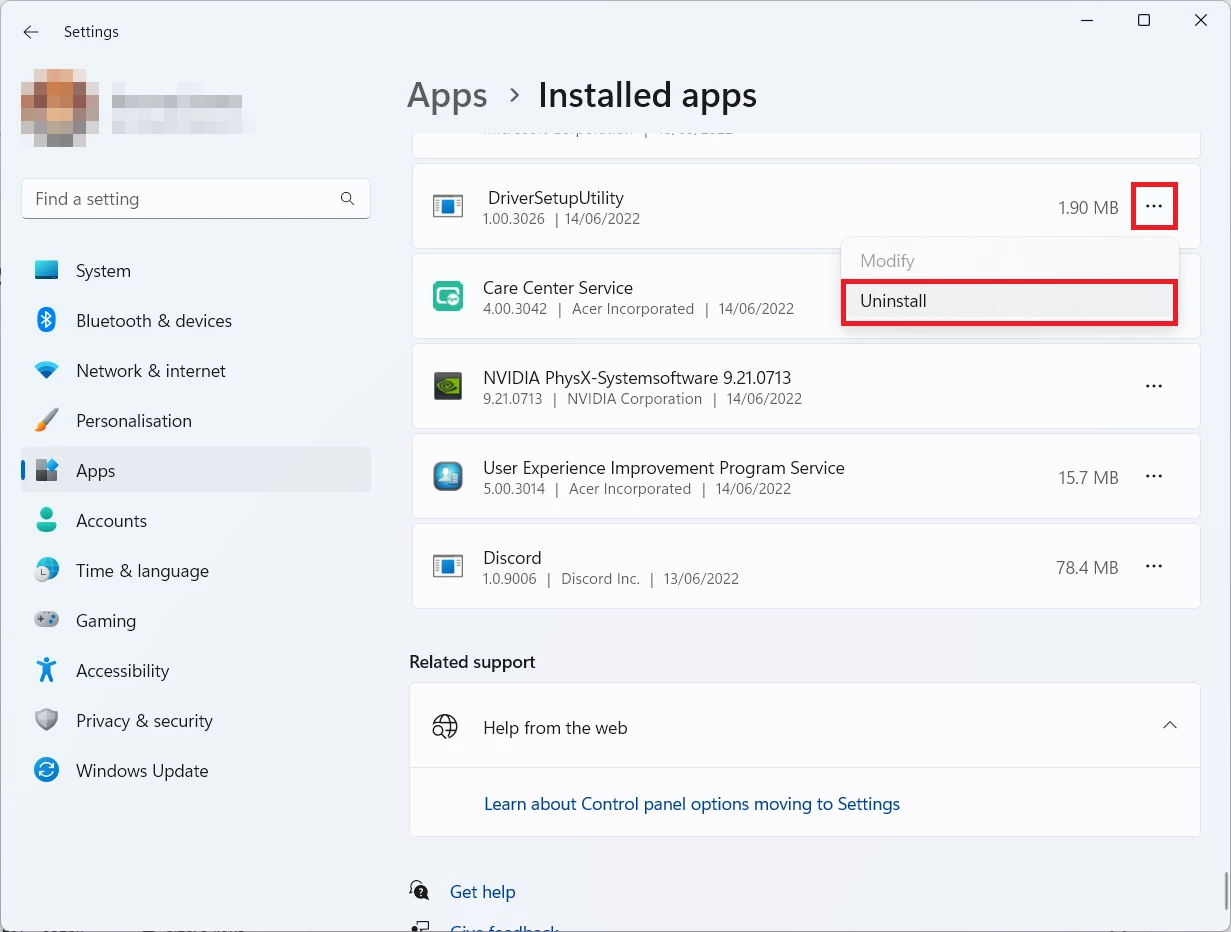
There, find the apps you do not remember installing. If you know a specific one that Avast/AVG is complaining on with the Win32/Uwamson detection, seek for them. Click the three-dot symbol to the right, and then choose “Uninstall”.
Reset your browser settings
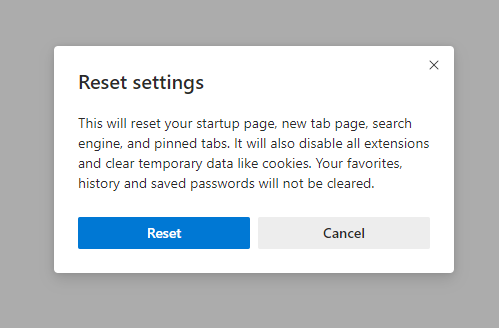
You may see the list of options for each browser. By default, they are set up in a manner that fits the majority of users. Press the “Reset” button (lower right corner). In a minute your browser will be as good as new.
Reset your browsers manually
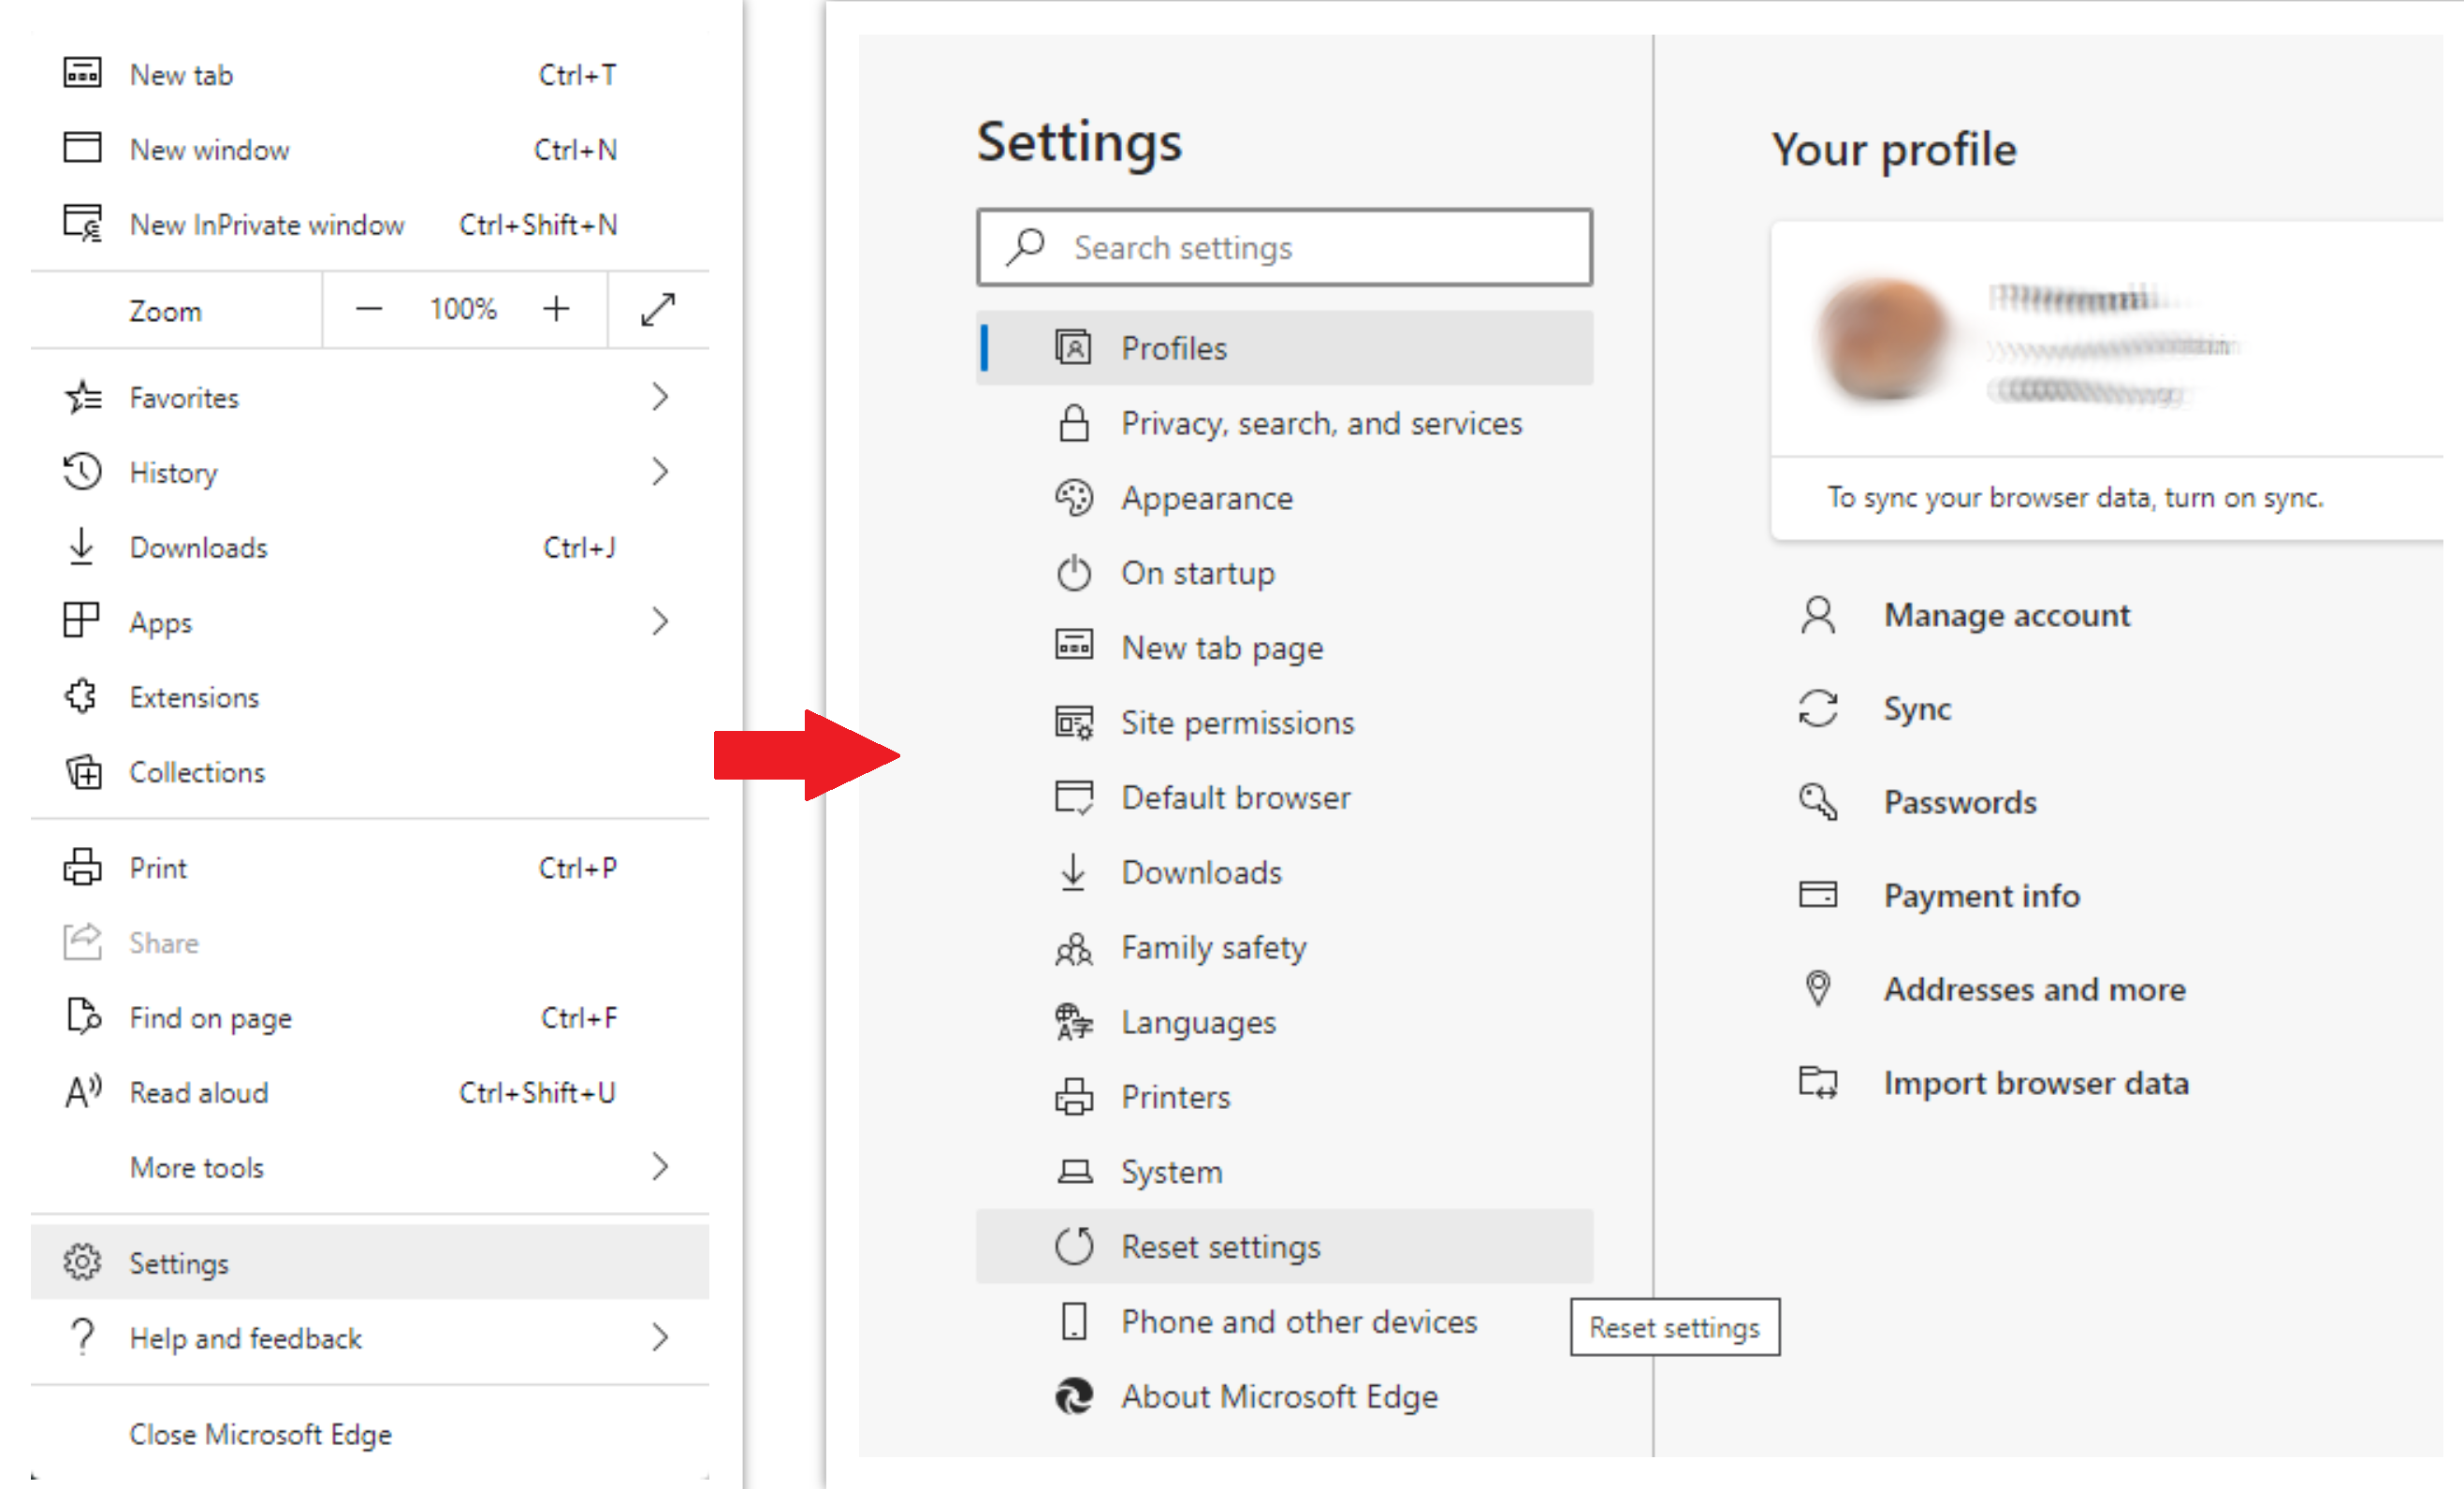
To reset Edge, do the following steps:
- Open “Settings and more” tab in upper right corner, then find here “Settings” button. In the appeared menu, choose “Reset settings” option:
- After picking the Reset Settings option, you will see the following menu, stating about the settings which will be reverted to original:
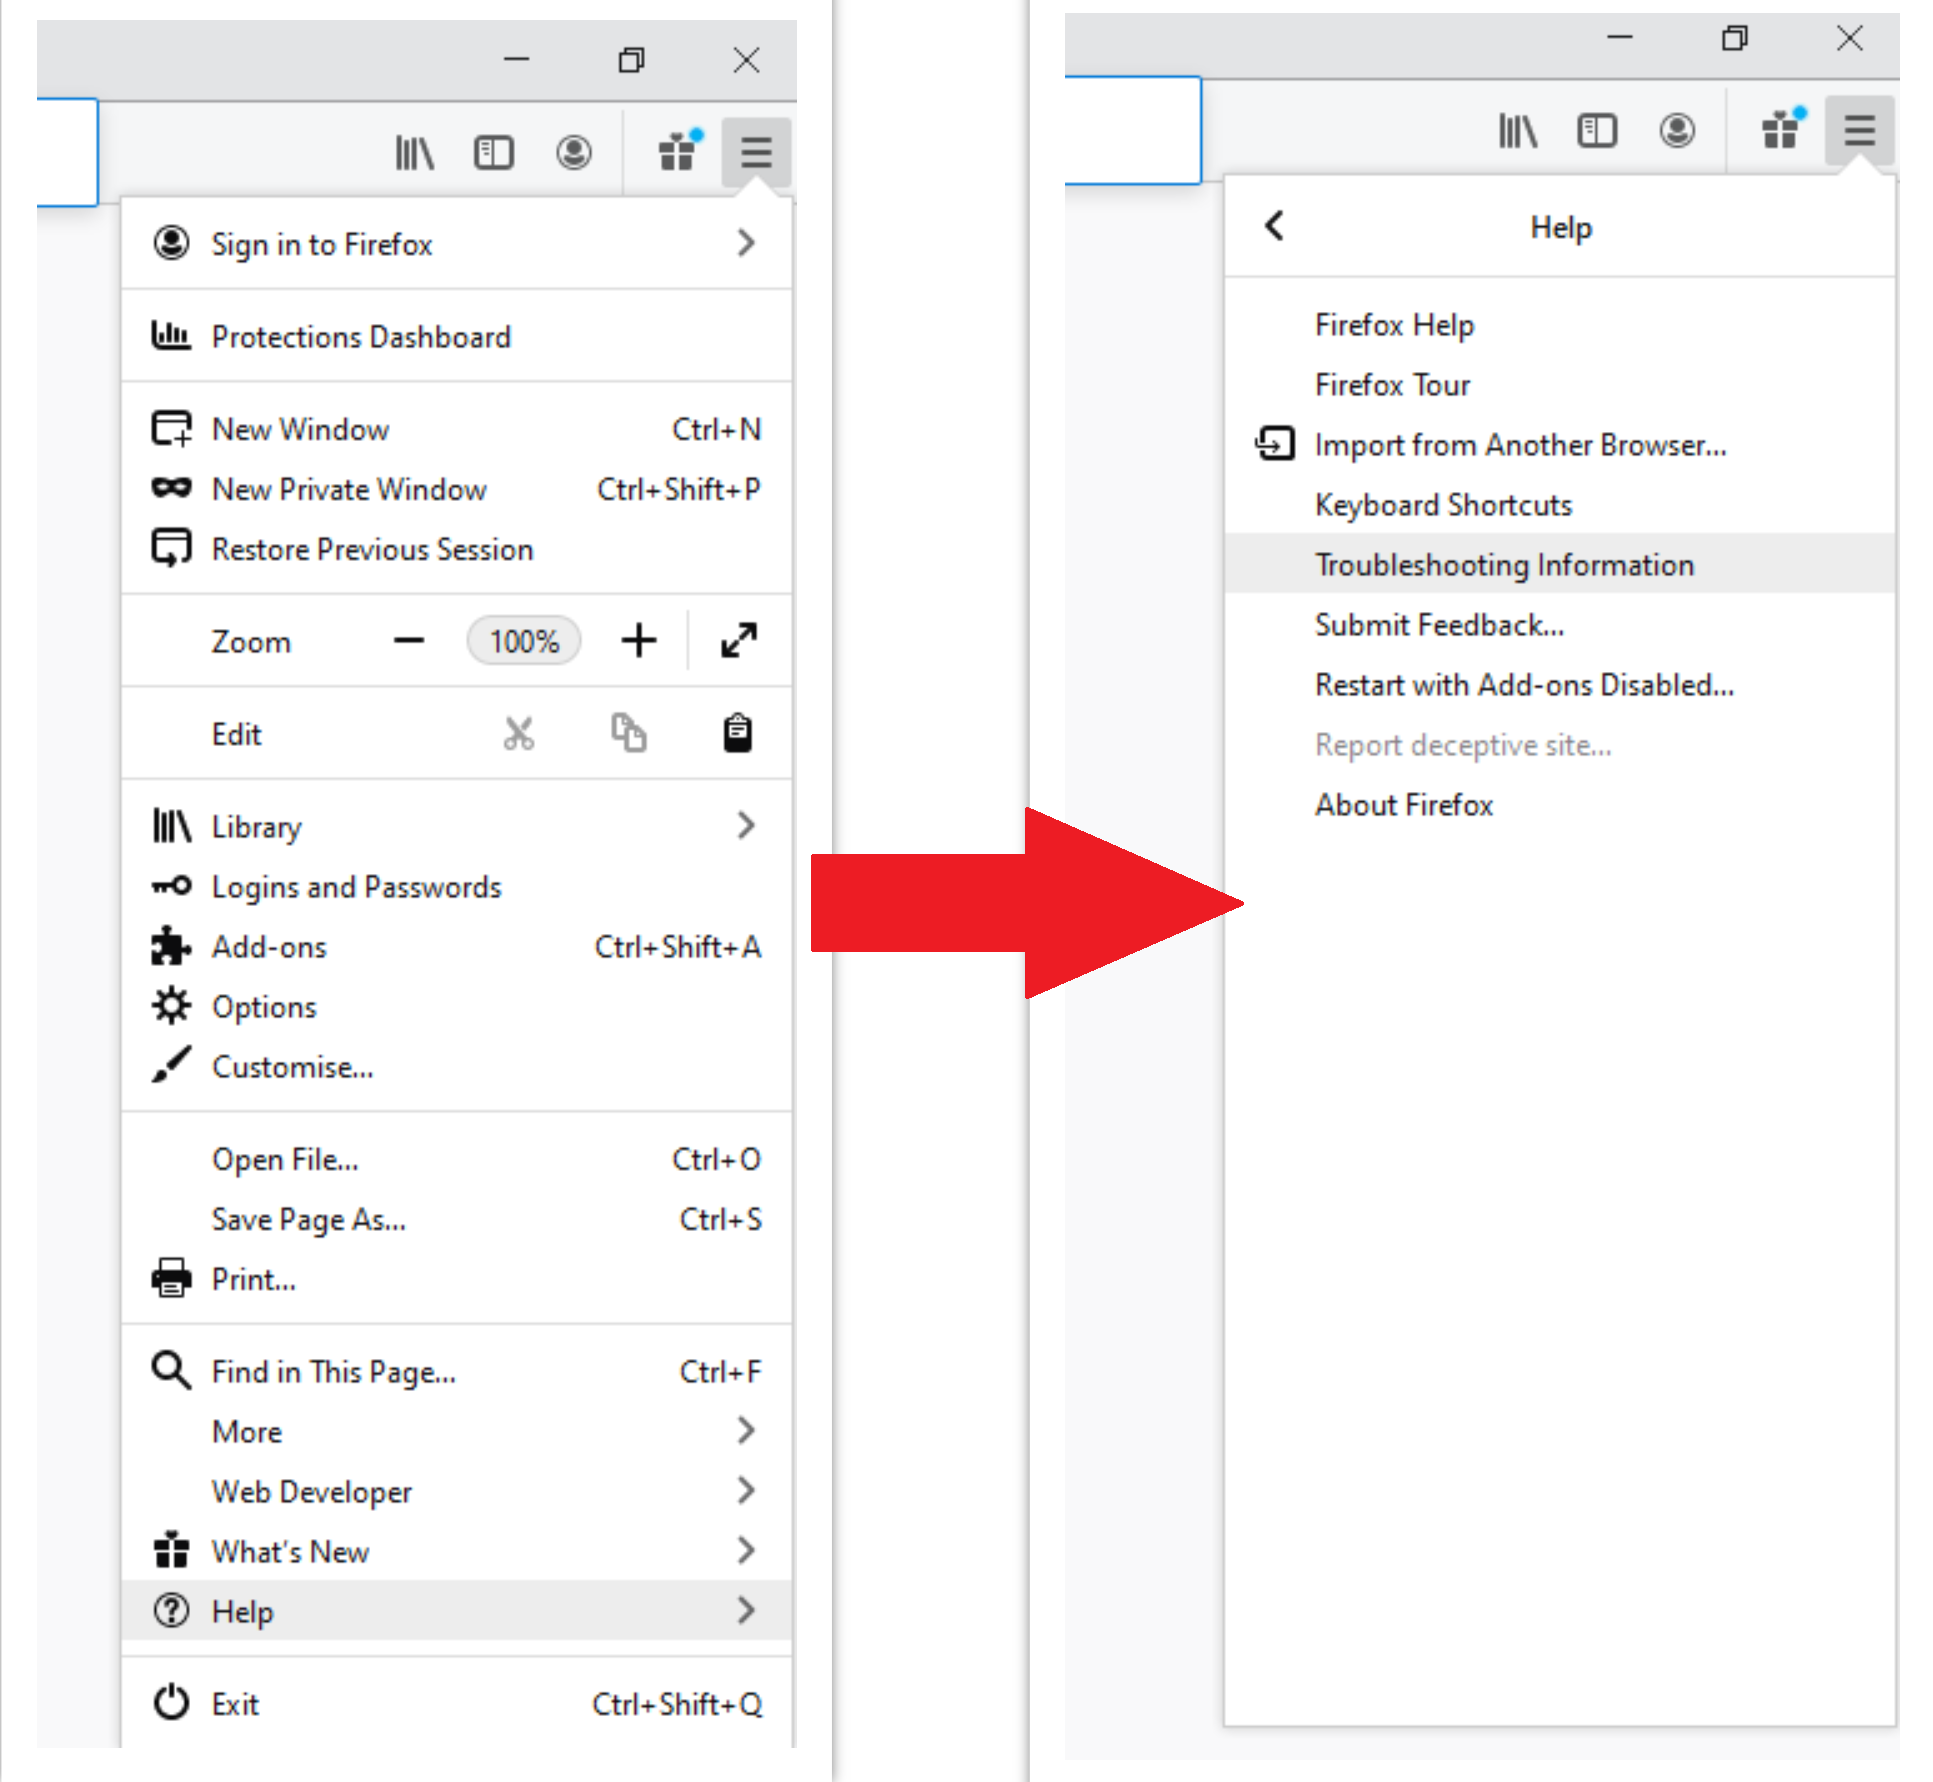
For Mozilla Firefox, do the next actions:
- Open Menu tab (three strips in upper right corner) and click the “Help” button. In the appeared menu choose “troubleshooting information”:
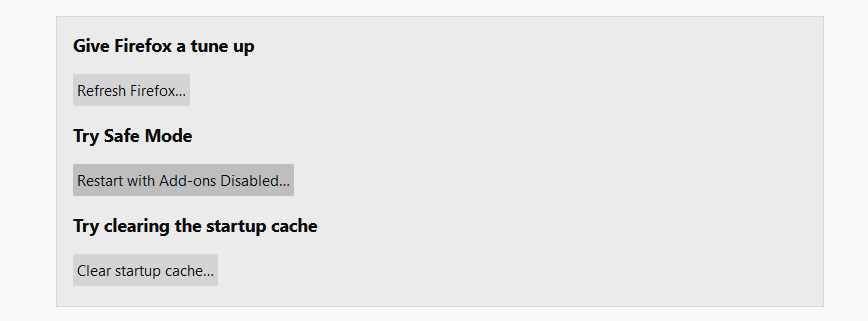
- In the next screen, find the “Refresh Firefox” option:
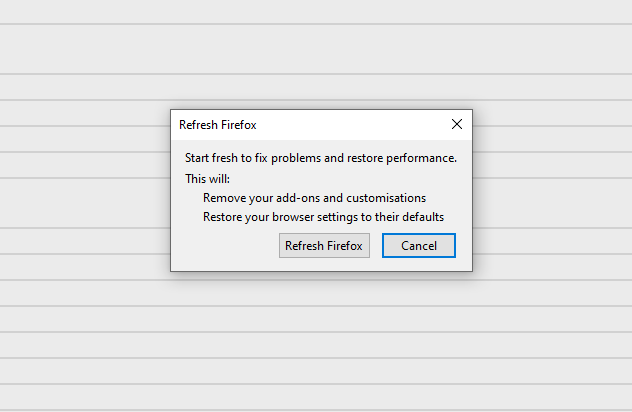
After choosing this option, you will see the next message:
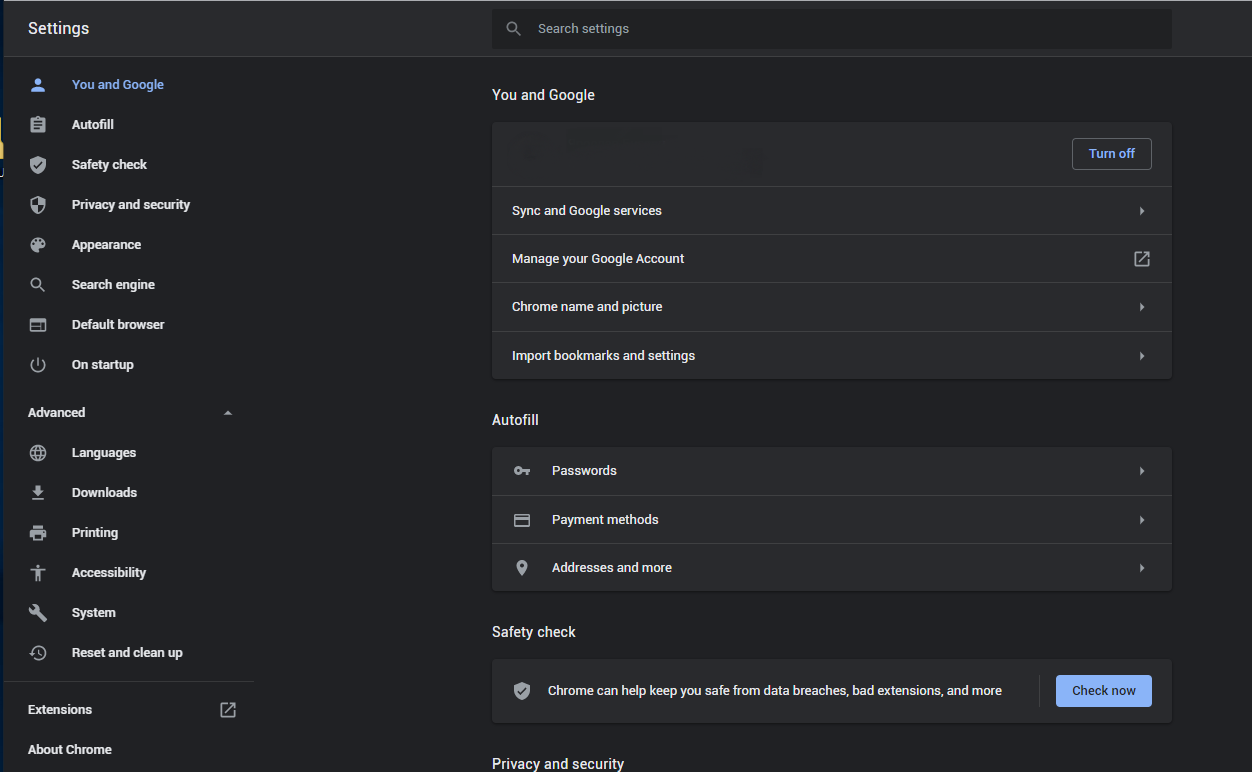
If you use Google Chrome
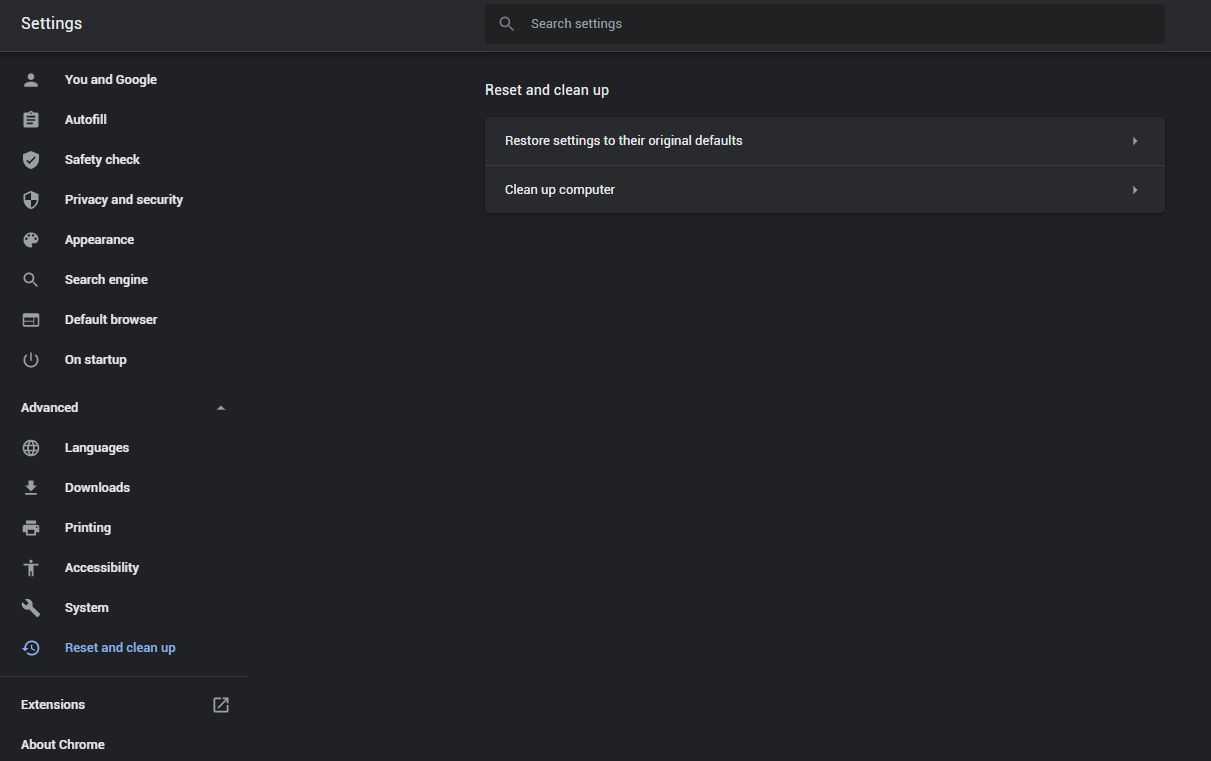
- Open Settings tab, find the “Advanced” button. In the extended tab choose the “Reset and clean up” button:
- In the appeared list, click on the “Restore settings to their original defaults”:
- Finally, you will see the window, where you can see all the settings which will be reset to default:

Opera can be reset in the next way
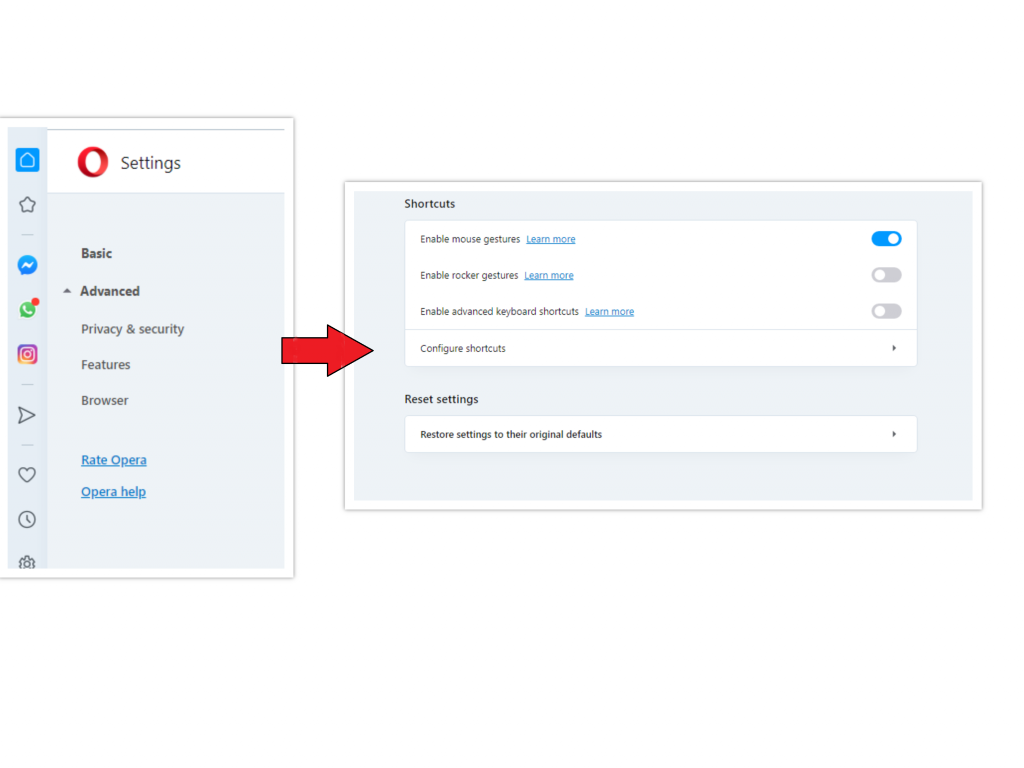
- Open Settings menu by pressing the gear icon in the toolbar (left side of the browser window), then click “Advanced” option, and choose “Browser” button in the drop-down list. Scroll down, to the bottom of the settings menu. Find there “Restore settings to their original defaults” option:
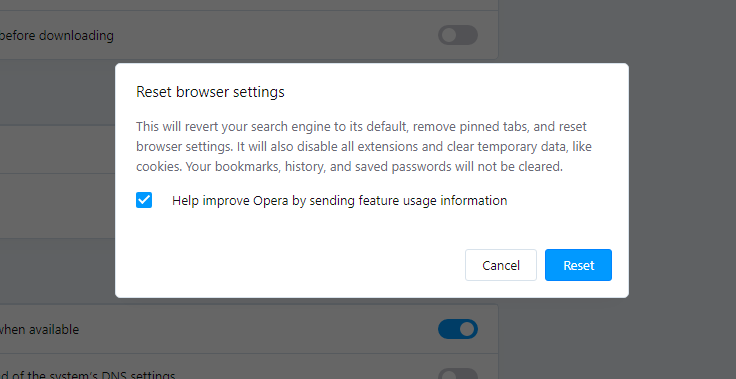
- After clicking the “Restore settings…” button, you will see the window, where all settings, which will be reset, are shown:
When the browsers are reset, you need to ensure that your browser will connect the right DNS while connecting to the web page you need. Create a text file titled “hosts” on your pc’s desktop, then open it and fill it with the following lines1:
# Copyright (c) 1993-2006 Microsoft Corp.

#

# This is a sample HOSTS file used by Microsoft TCP/IP for Windows.

#

# This file contains the mappings of IP addresses to host names. Each

# entry should be kept on an individual line. The IP address should

# be placed in the first column followed by the corresponding host name.

# The IP address and the host name should be separated by at least one

# space.

#

# Additionally, comments (such as these) may be inserted on individual

# lines or following the machine name denoted by a '#' symbol.

#

# For example:

#

# 102.54.94.97 rhino.acme.com # source server

# 38.25.63.10 x.acme.com # x client host

# localhost name resolution is handle within DNS itself.

# 127.0.0.1 localhost

# ::1 localhost
References
- Official Microsoft guide for hosts file reset.
Leave a Comment