The simple truth about malware removal is that it must be conducted with antivirus software. But before starting the scanning, it is important to suspend the malware activity. Viruses keep getting stronger, and the most developed ones can counteract you in your attempts to remove them.
What is Malware?
Malware (malicious software) is a general term for viruses, spyware, ransomware, trojan, worms, and other threats.
Designed to damage the system, create havoc and steal data, malware is dangerous and ever-evolving. Depending on the type of malware, its severity is defined. Some spread through drive-by downloads, others via phishing attacks, command-and-control servers, and systems.
Malware developers are doing their best to make their “product” more effective and sustainable. At the beginning of the ‘10s, almost all malware had a low ability to prevent its removal. The only virus that could do so was the so-called Winlocker – the predecessor of ransomware. That malware did that in a pretty rude manner – just blocking all system functions and demonstrating the scary banner with ransom payment instructions to you. Some ransomware variants, especially ones that can infect the UEFI/BIOS, are doing the same thing nowadays.
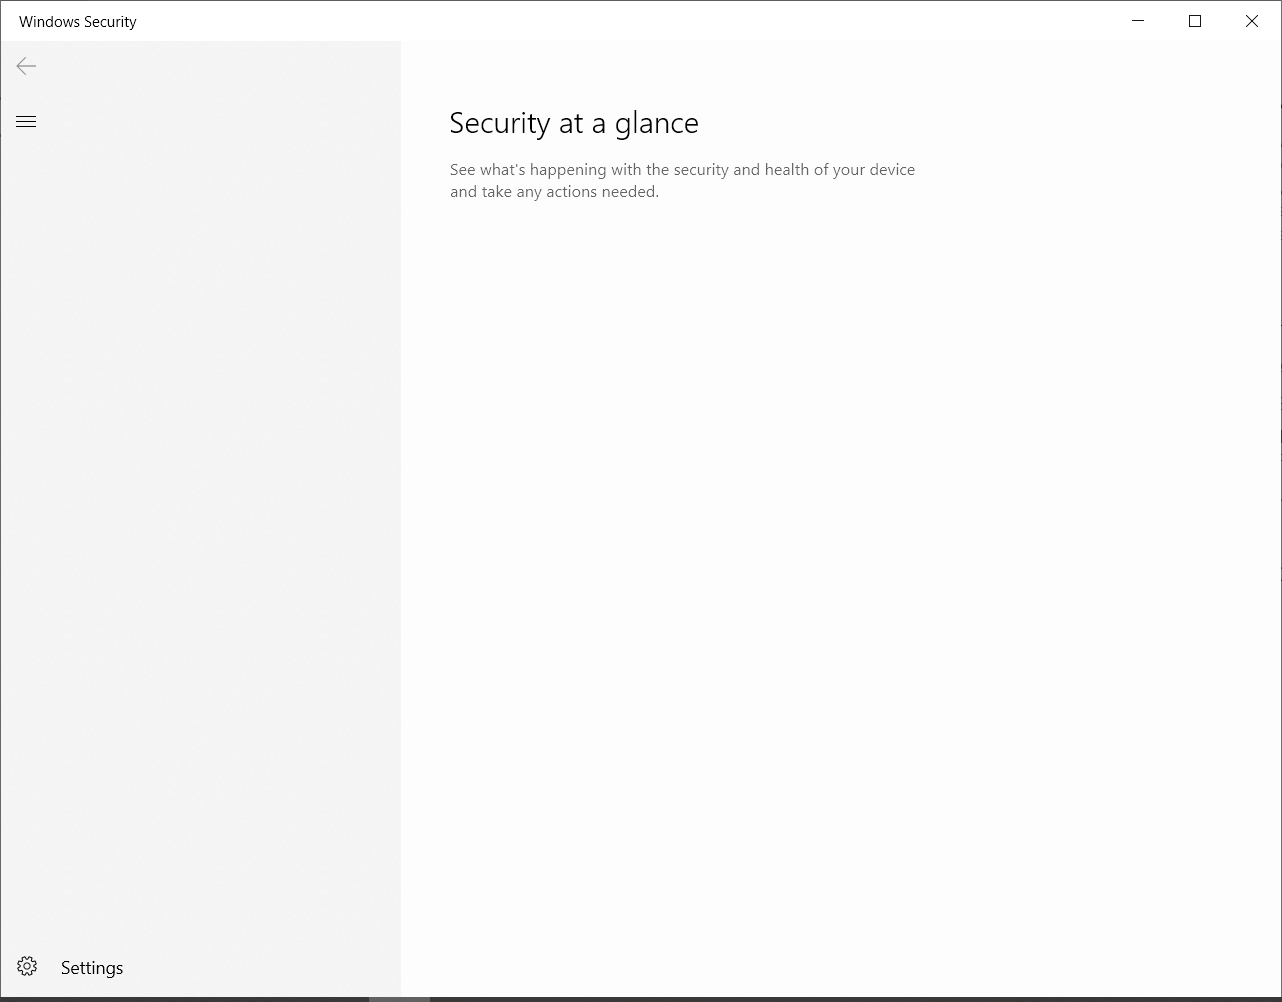
That’s how the window of Windows Defender looks after the malware attack.
However, the viruses which must stay stealthy to conduct their activity use other tactics. Spyware and stealers adjust the system settings in a particular way, so you can no longer use your anti-malware software. Even if you are not using Microsoft Defender, known for its vulnerabilities and possibility of stopping through the Group Policies, malware can still manage to stop the third-party antivirus programs from running.
Initial step: reboot your PC into Safe Mode
A lot of malware of different classes carry several additional programs in their package. They may be 100% legit, but in that case, they are used for malicious purposes. Crooks may use different apps like CCleaner after the malware injection to remove your antivirus. And until you have your Windows running in Safe Mode, malware can remove not only present antivirus but also ones you will install after the virus injection. Could you not give it a chance!
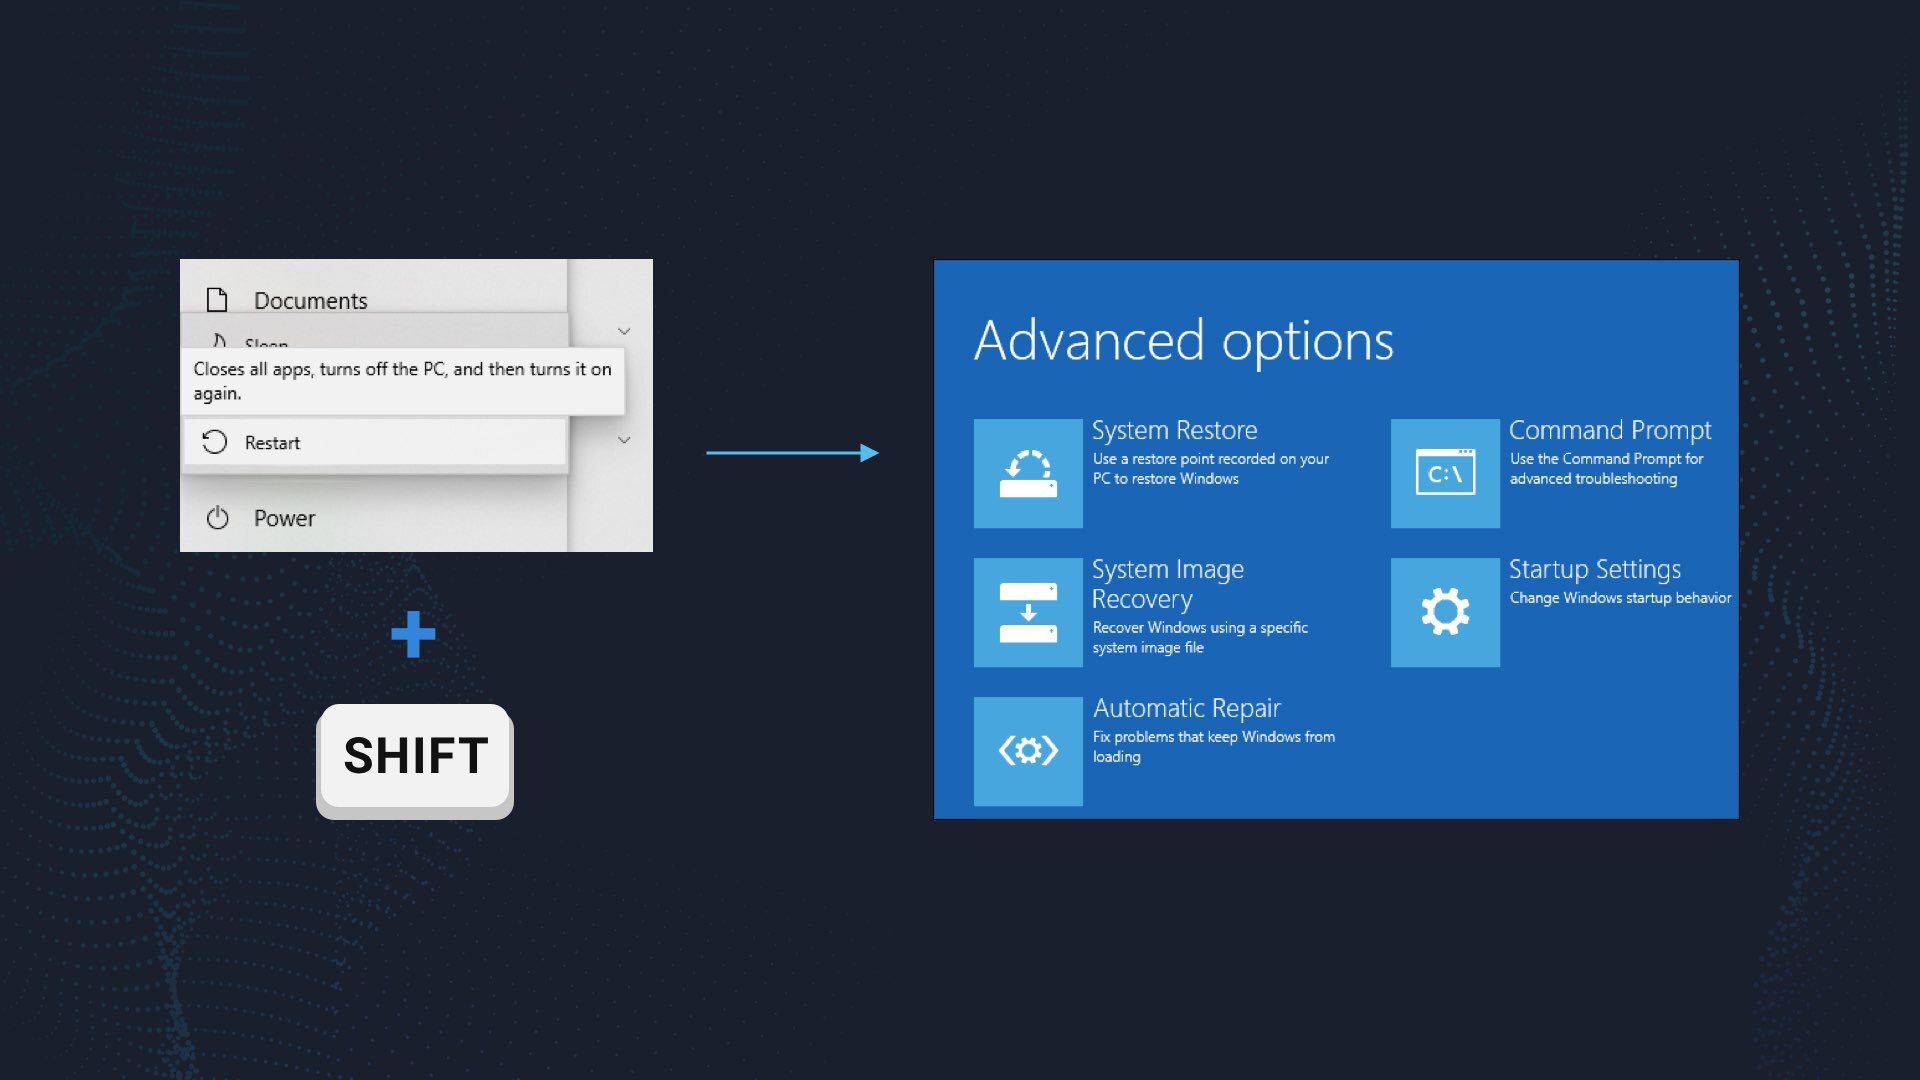
Safe Mode in Windows 10 can be turned on through the following steps. Press the Start button→ Power, hold the Shift key on your keyboard and press the Reboot option. Your computer will show you the boot menu, where you must choose the “Boot the system in the Safe Mode” option. There are several options; the most optimal is Safe Mode with Networking. This will allow you to connect to the Internet and download the anti-malware software.
Step 2. Install GridinSoft Anti-Malware
GridinSoft Anti-Malware provides high-rated security features that will help you remove any virus and restore the system after the attack. Besides the malware removal abilities, this security tool can also offer you the function to reset your browser settings in just several clicks – without opening each browser and looking for the browser reset button.
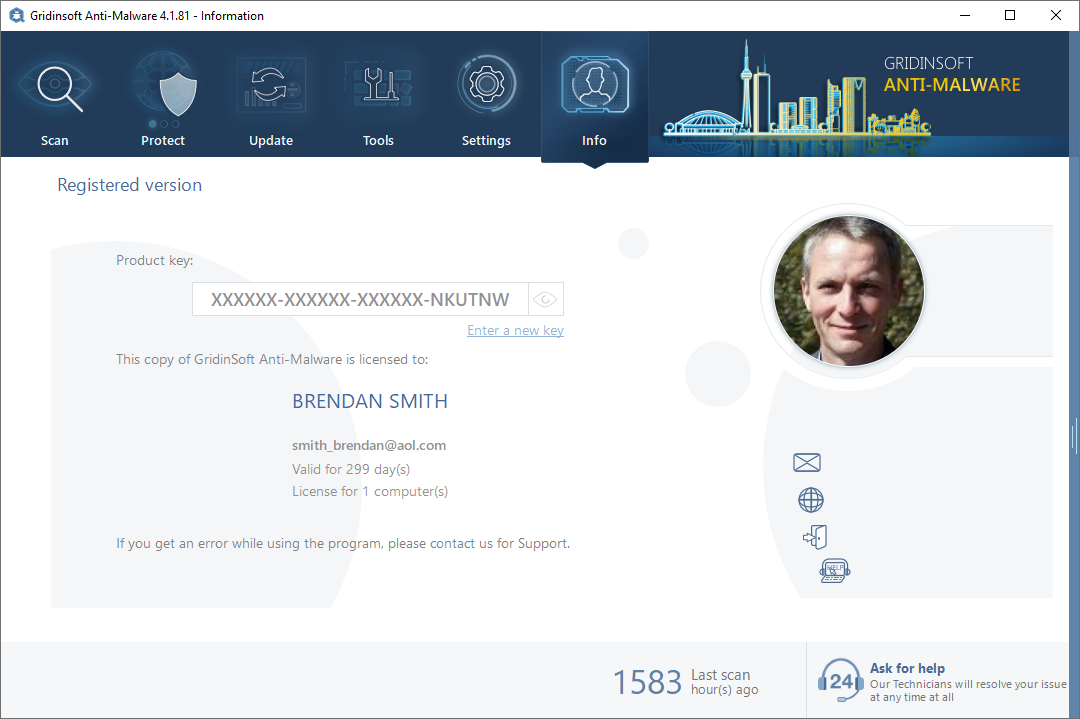
After the GridinSoft Anti-Malware installation, you will see the offer to activate a 6-day free trial. During the free trial, the program has its full functionality, so you will surely remove all viruses from your computer. Just specify your email, and you will get a free trial key on it.
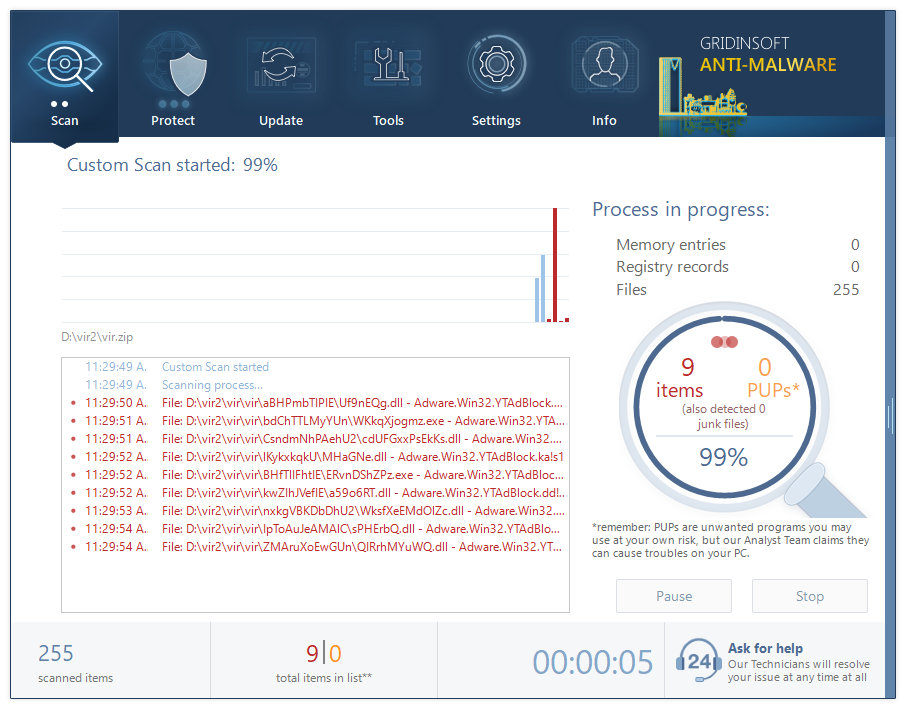
After the activation, launch the full scan of your system. It will take about 5-10 minutes, so you will not wait for a long time. When the scan is complete, press the “Clean up” button to deal with all malware that is present on your PC.
When the computer is cleaned of viruses, it’s time to deal with the consequences of malware activity in your web browser.
Step 3. Reset your web browser
Web browsers, in particular, and all networking generally, is one of the most damaged system elements during the malware attack. Viruses aim at your networking configurations to provide themselves access to their servers. If you don’t remove these changes, there is a high chance that you will suffer from random network errors or other unwanted issues.
You can do this step manually, as well as with the use of GridinSoft Anti-Malware. The last option is better, in my opinion, since you can reset all web browsers in just three clicks.
Manual method of browser reset
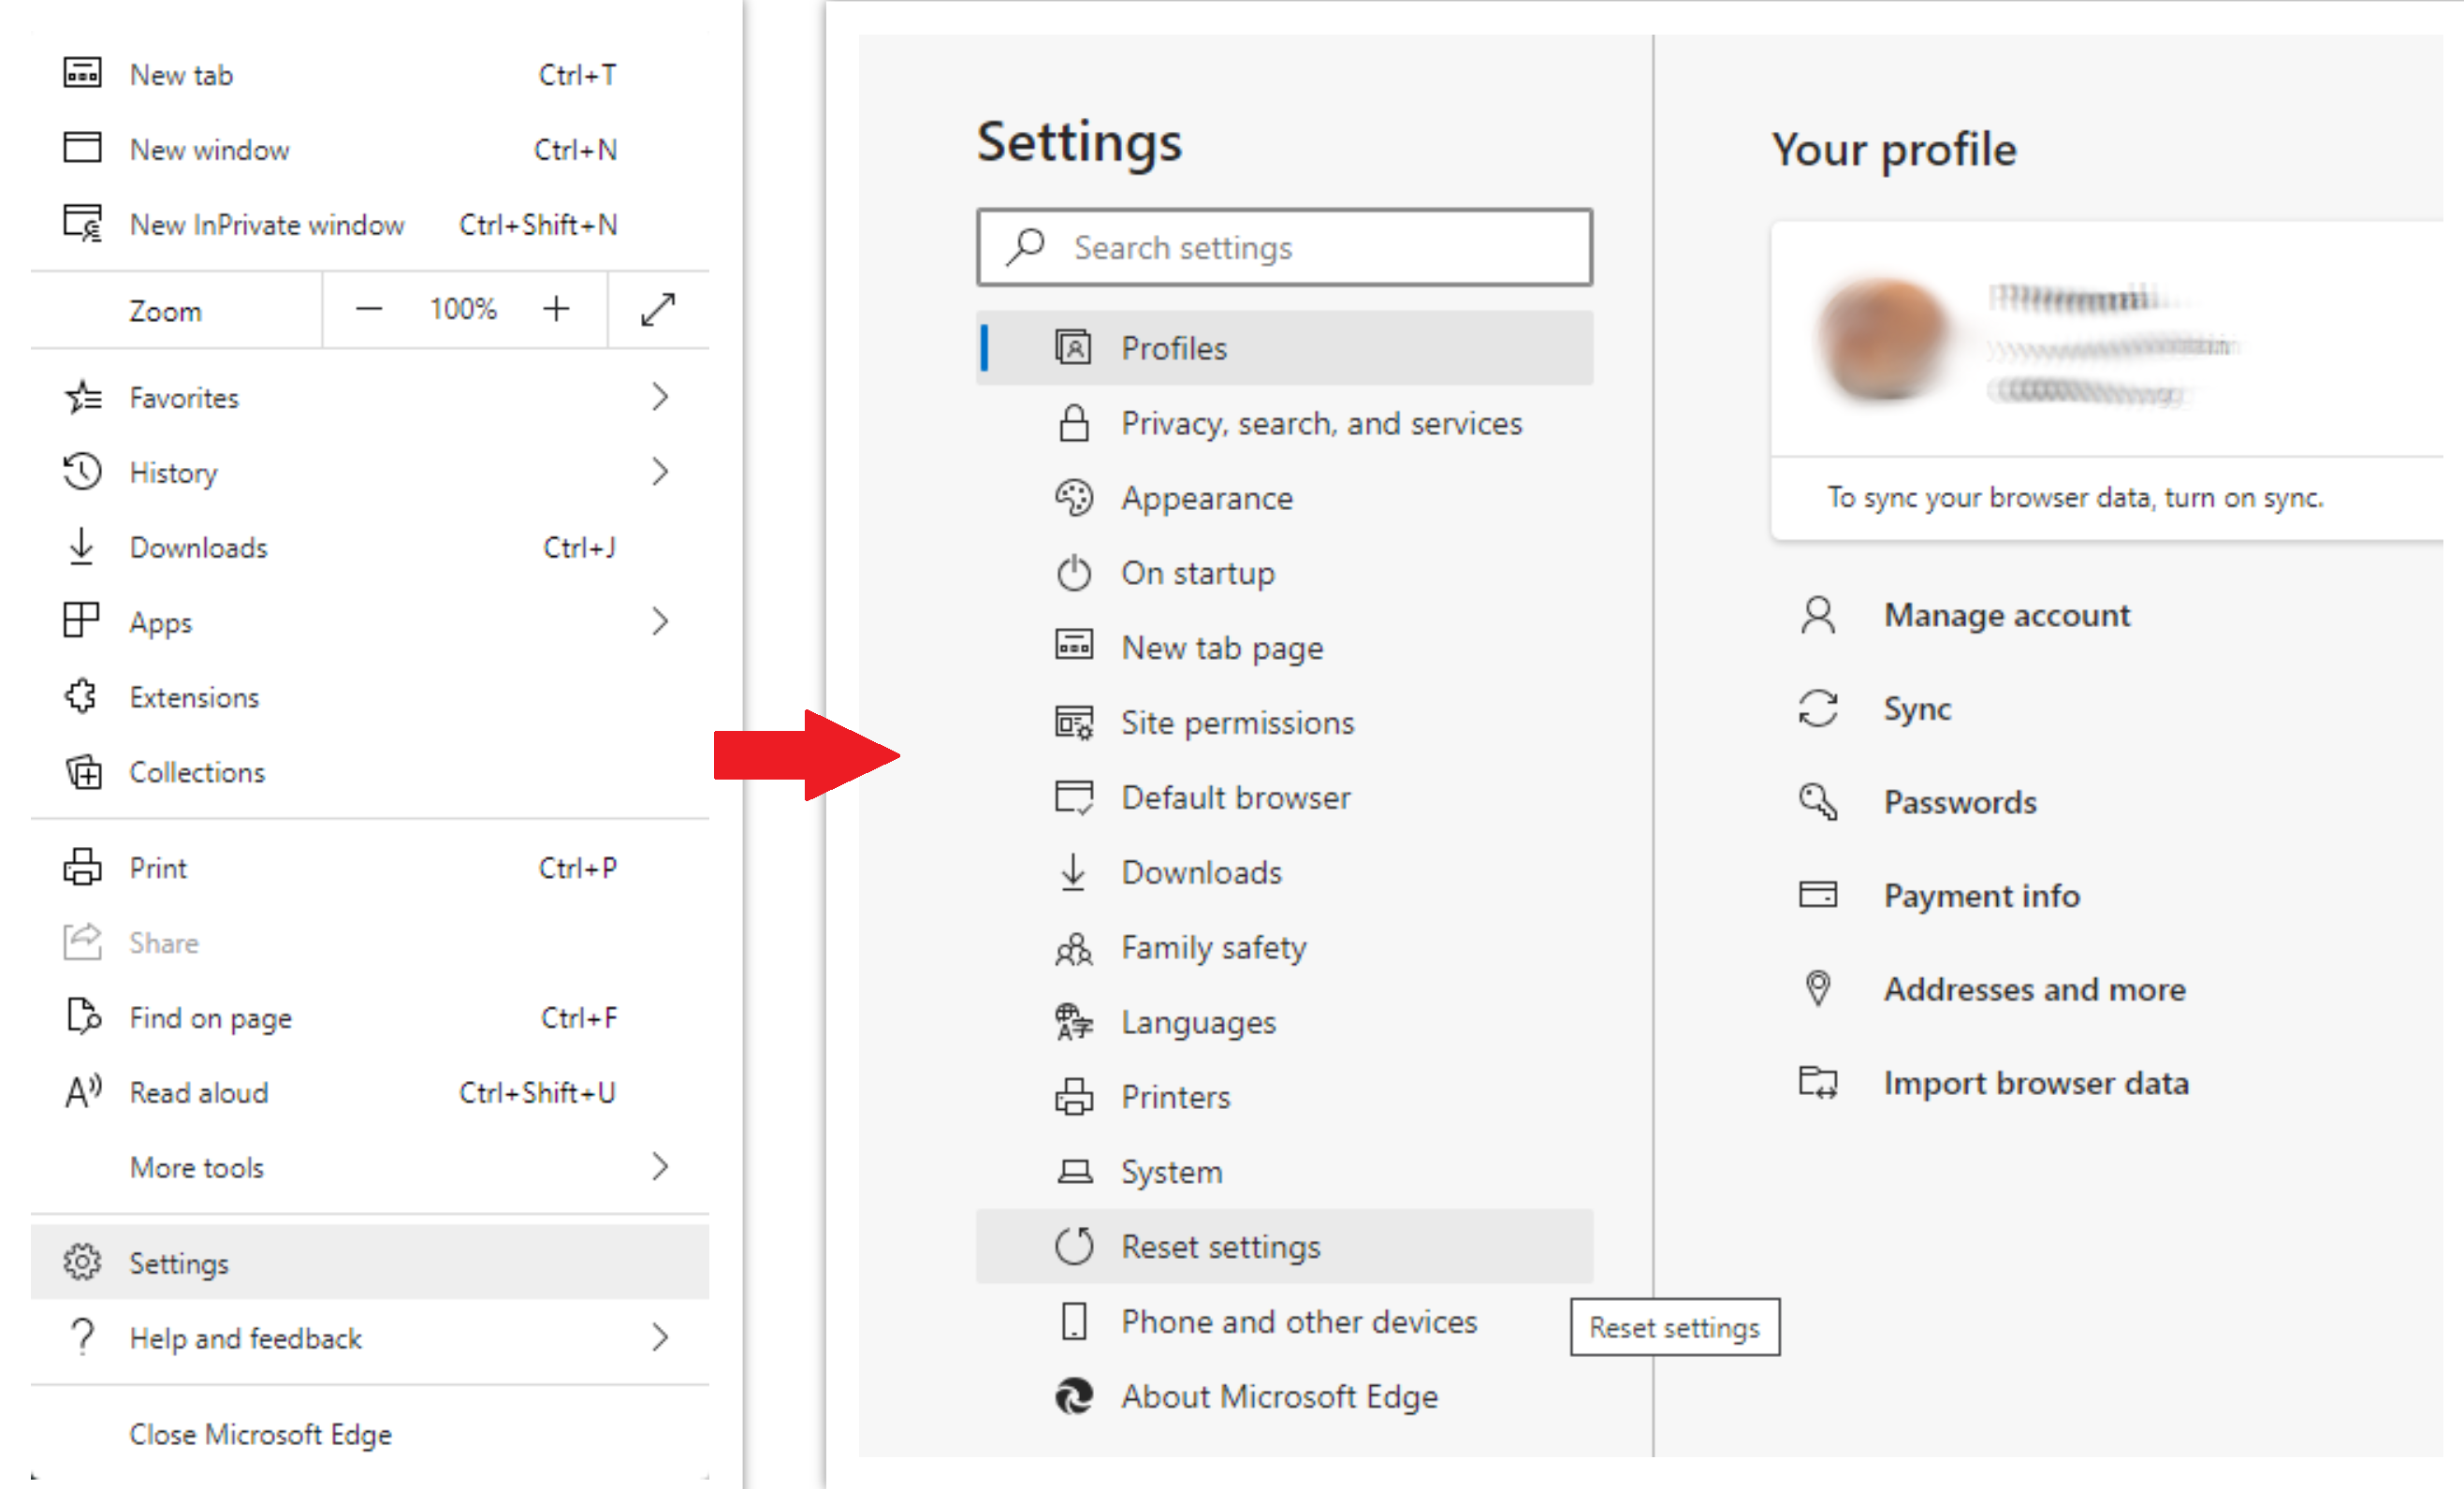
To reset Edge, do the following steps :
- Open the “Settings and more” tab in the upper right corner, then find here “Settings” button. In the appeared menu, choose “Reset settings” option :
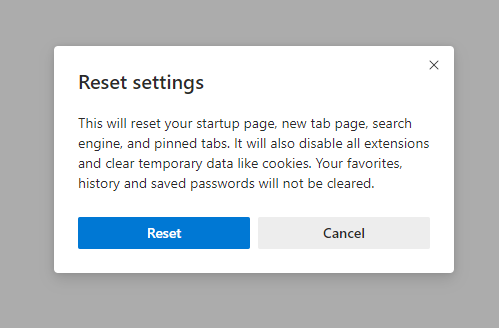
- After picking the Reset Settings option, you will see the following menu, stating the settings which will be reverted to original:
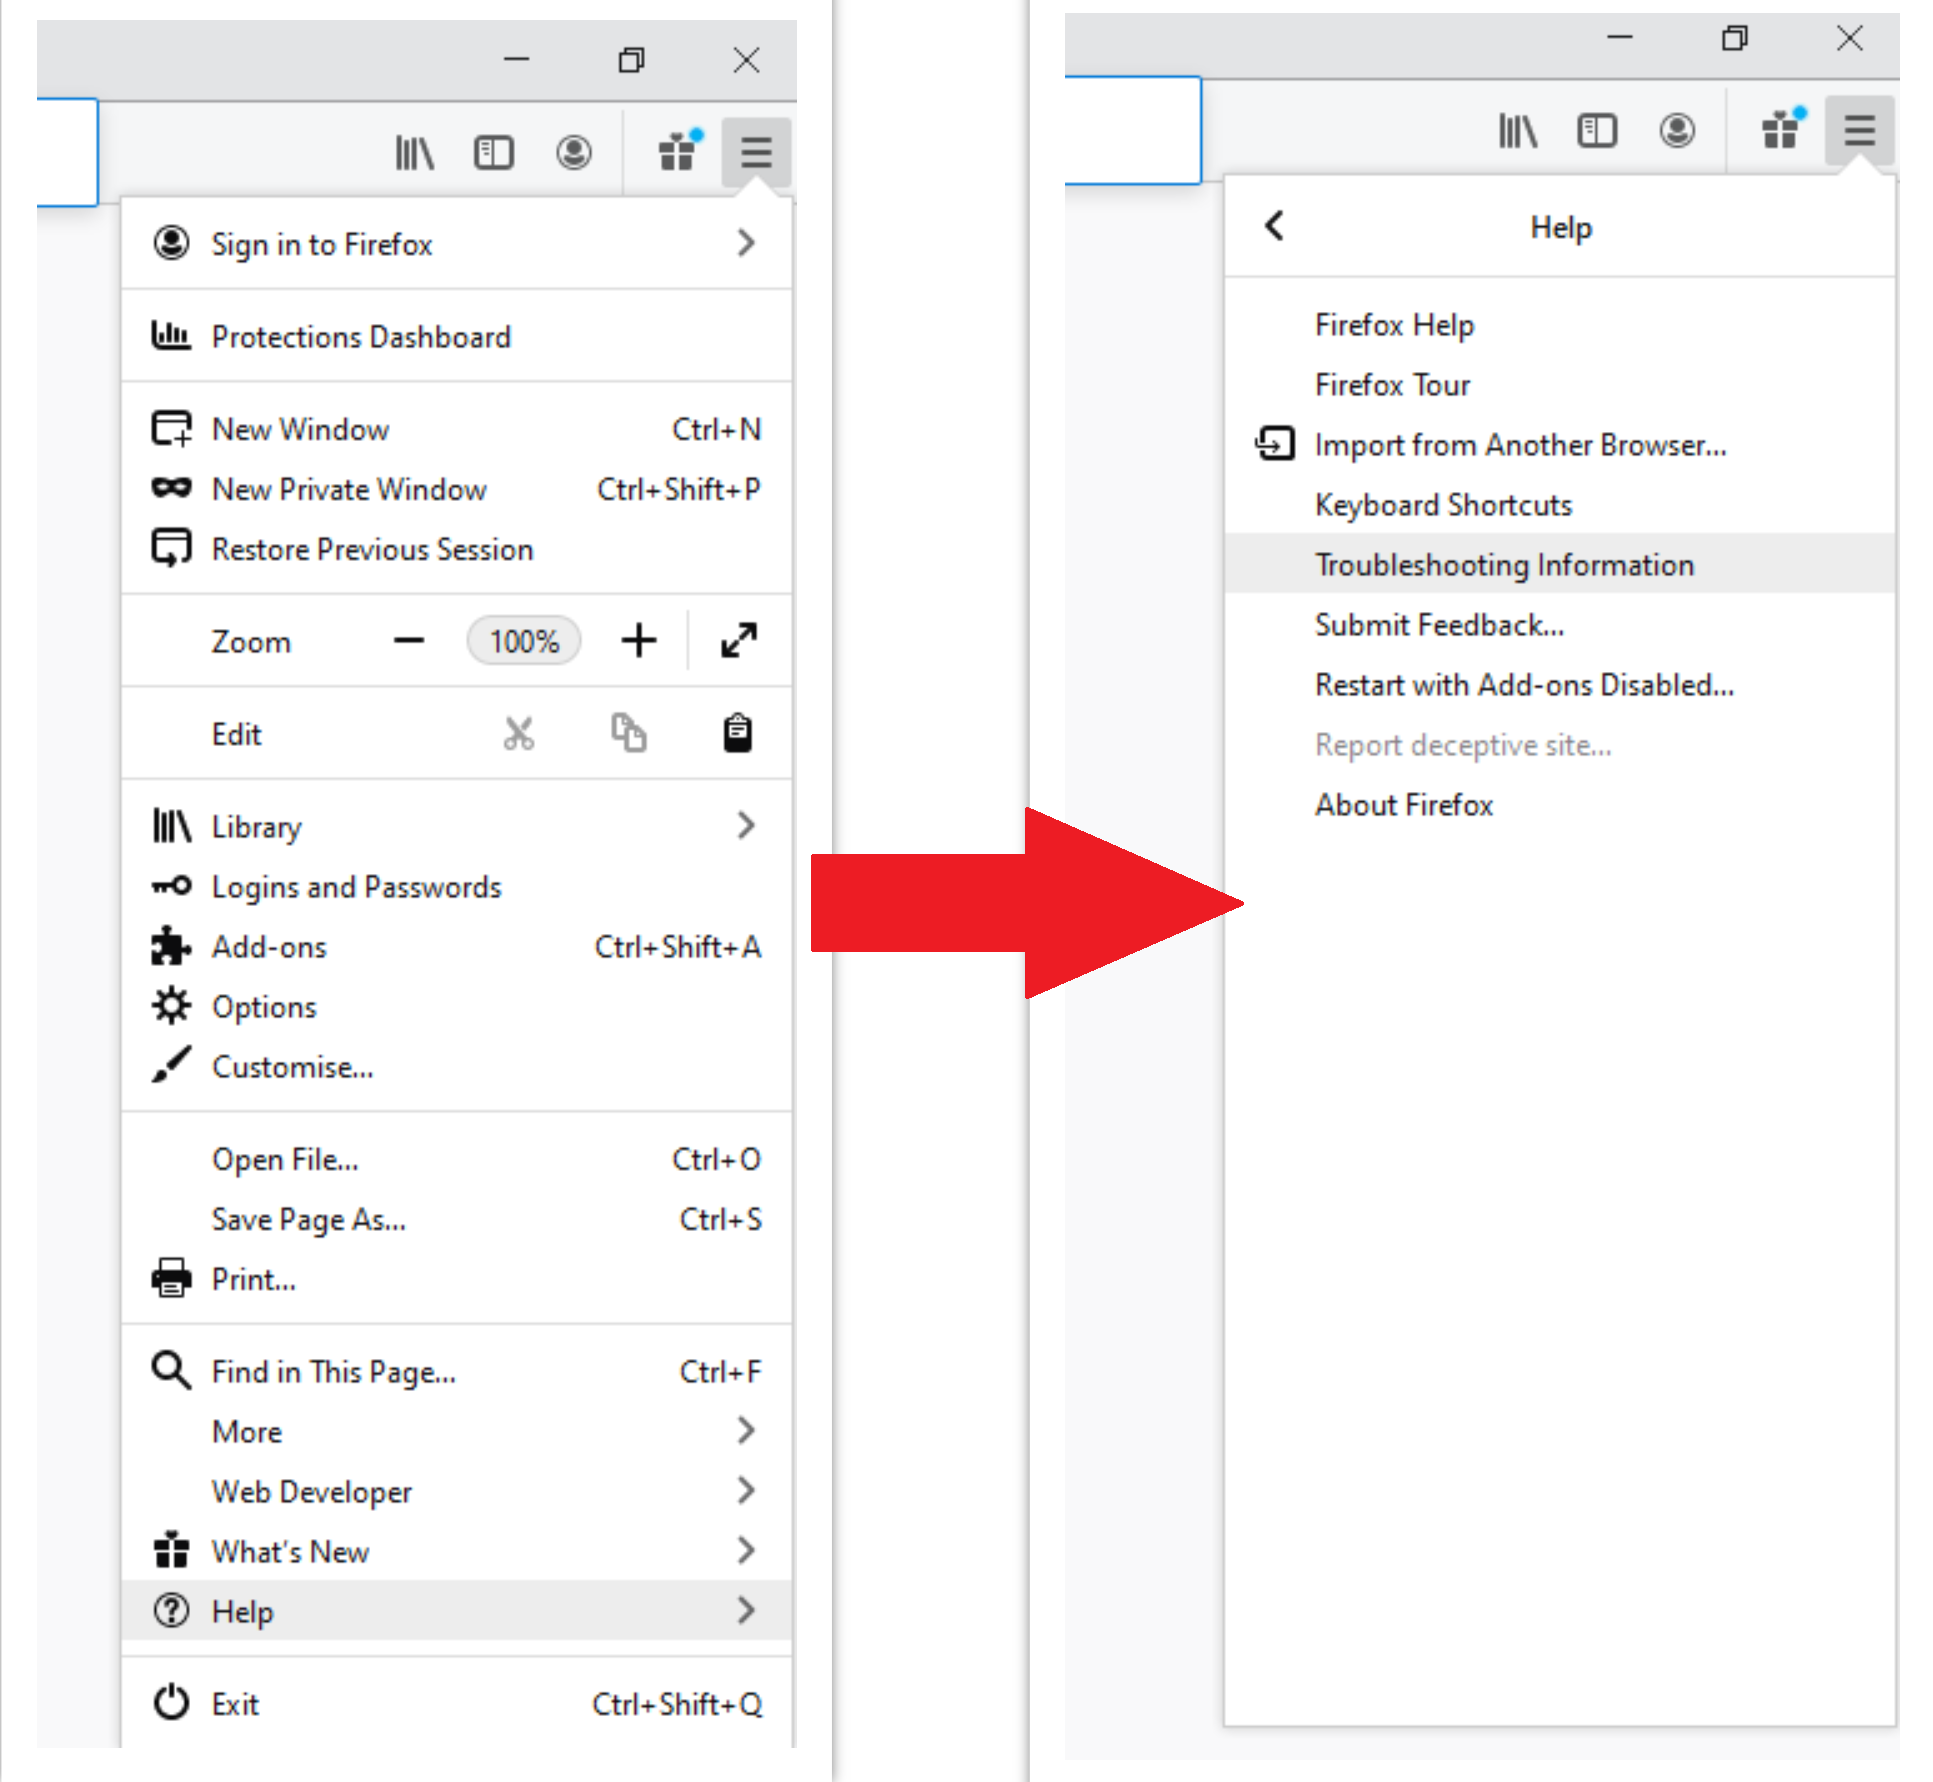
For Mozilla Firefox, do the next actions :
- Open the Menu tab (three strips in the upper right corner) and click the “Help” button. In the appeared menu choose “Troubleshooting information” :
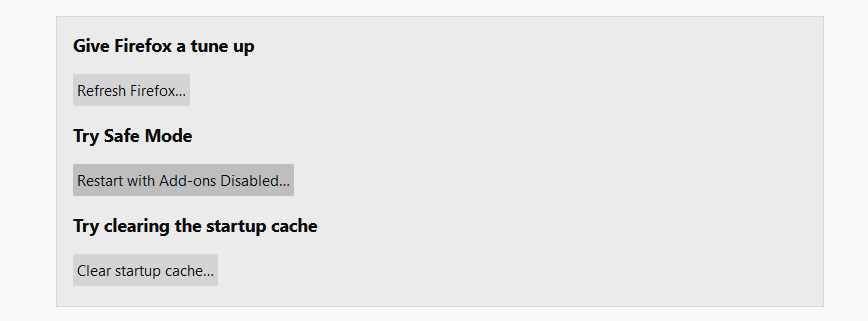
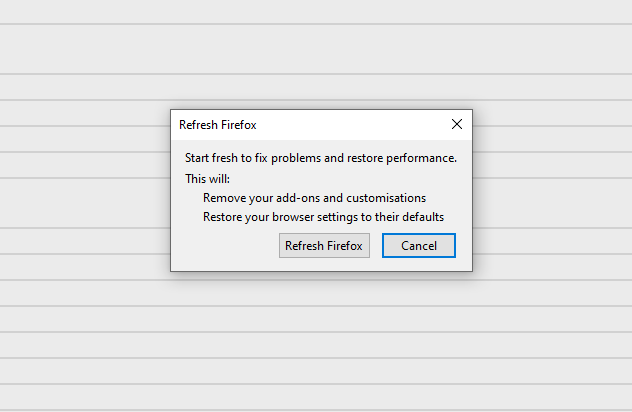
- In the next screen, find the “Refresh Firefox” option :
After choosing this option, you will see the next message :
If you use Google Chrome
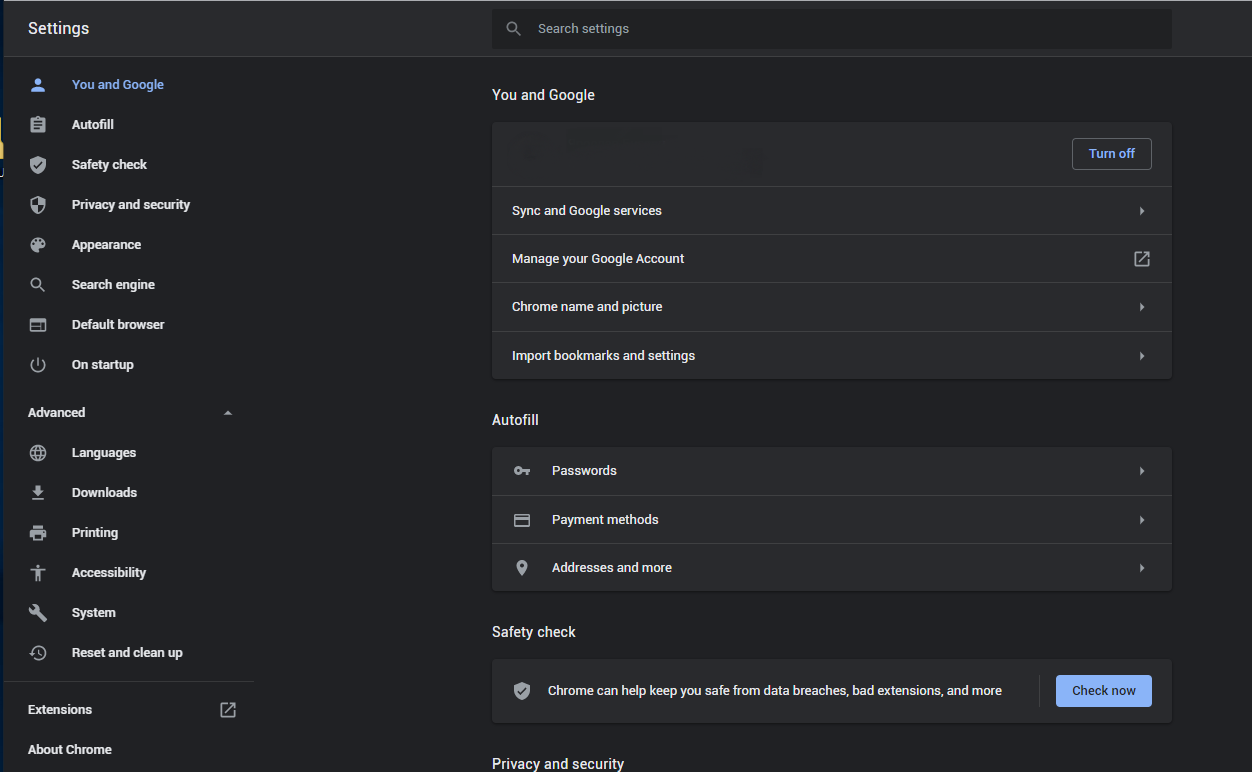
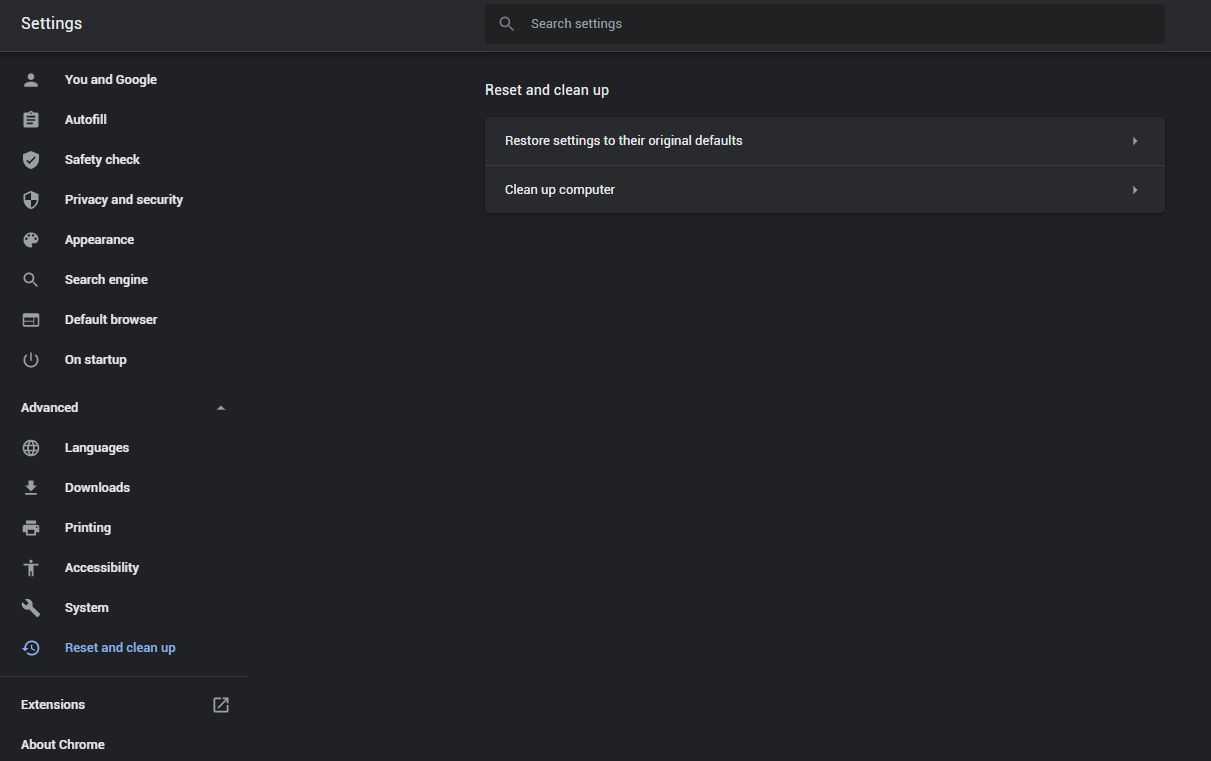
- Open the Settings tab, and find the “Advanced” button. In the extended tab, choose the “Reset and clean up” button:
- In the appeared list, click on the “Restore settings to their original defaults” :
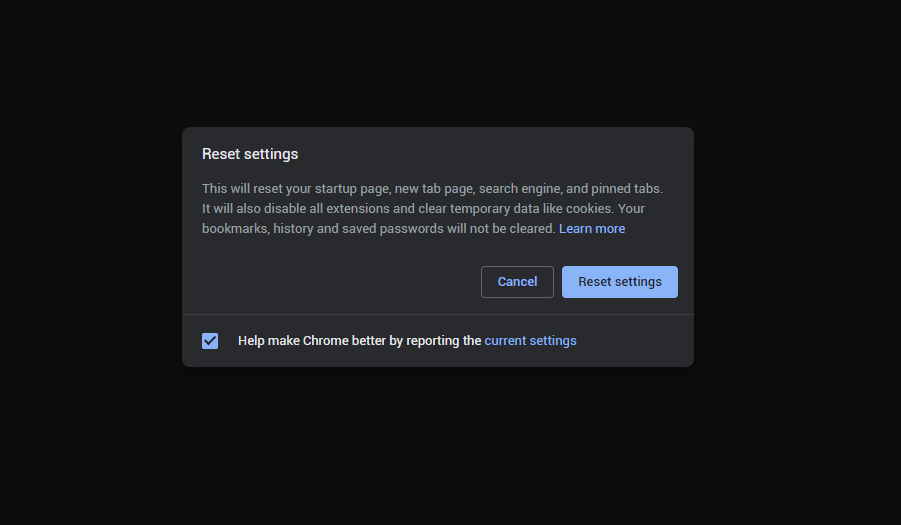
- Finally, you will see the window, where you can see all the settings which will be reset to default:
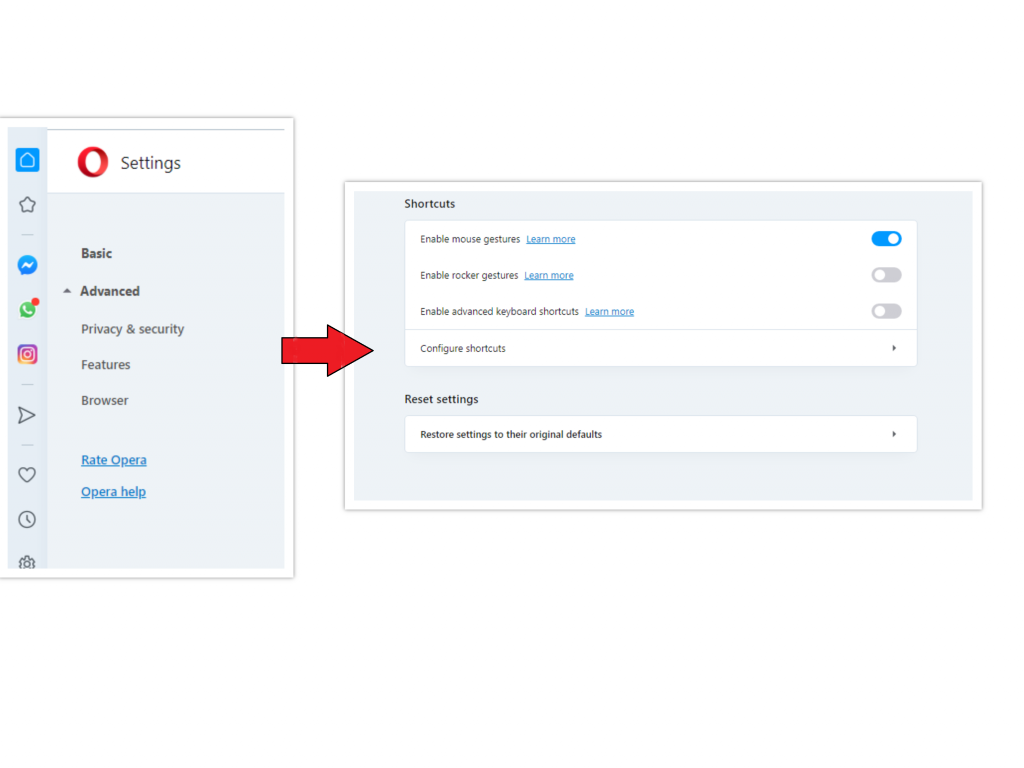
Opera can be reset in the next way
- Open the Settings menu by pressing the gear icon in the toolbar (left side of the browser window), then click the “Advanced” option and choose the “Browser” button in the drop-down list. Scroll down to the bottom of the settings menu. Find there “Restore settings to their original defaults” option:
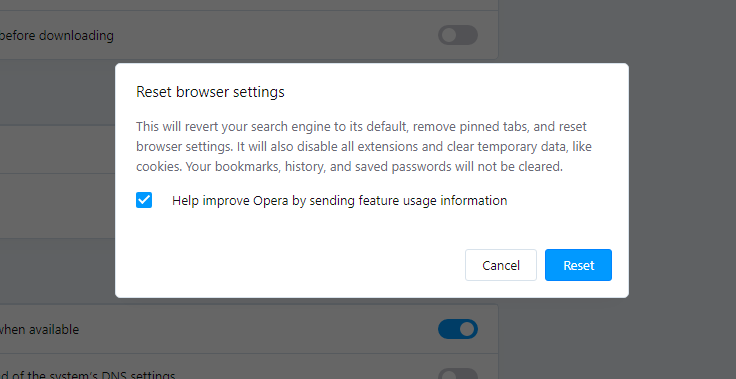
- After clicking the “Restore settings…” button, you will see the window where all settings, which will be reset, are shown:
The HOSTS file is a system configuration file that manages the DNS routing. Malware changes it for its purposes: to reroute your queue or to show you the phishing site instead of a legit one. Reverting it to the original settings is very important if you want to have your system working well. The following reset guide repeats the official Microsoft guide for HOSTS file reset.
Create a text file named “hosts” on your PC’s desktop, then open it and fill it with the following lines:
#
# This is a sample HOSTS file used by Microsoft TCP/IP for Windows.
#
# This file contains the mappings of IP addresses to host names. Each
# entry should be kept on an individual line. The IP address should
# be placed in the first column followed by the corresponding host name.
# The IP address and the host name should be separated by at least one
# space.
#
# Additionally, comments (such as these) may be inserted on individual
# lines or following the machine name denoted by a ‘#’ symbol.
#
# For example:
#
# 102.54.94.97 rhino.acme.com # source server
# 38.25.63.10 x.acme.com # x client host
# localhost name resolution is handle within DNS itself.
# 127.0.0.1 localhost
# ::1 localhost
Find the hosts.txt file in C:/Windows/System32/drivers/etc directory. Rename this file to “hosts.old.txt” (to distinguish it from the new one), and then move the file you created on the desktop to this folder. Remove the hosts.old from this folder. Now you have your hosts file as good as new.
Reset your browser settings with GridinSoft Anti-Malware
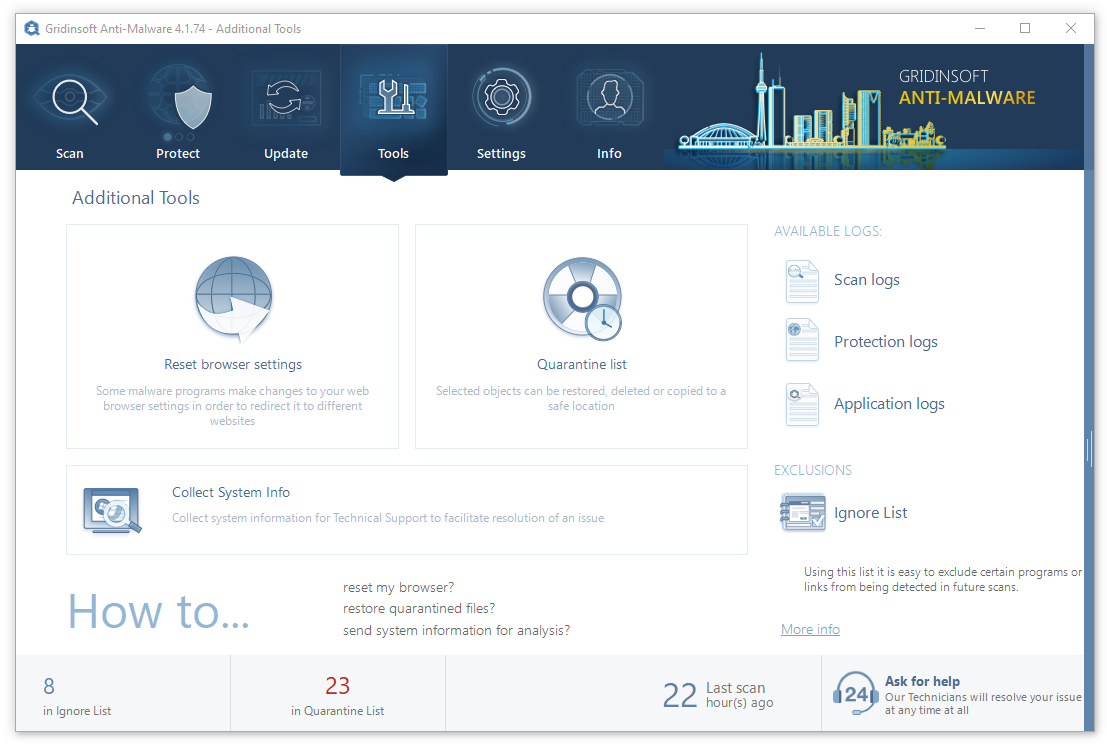
To reset your browser with GridinSoft Anti-Malware, open the Tools tab, and click the “Reset browser settings” button.
You can see the list of the options for each browser. By default, they are set up in a manner that fits the majority of users. Press the “Reset” button (lower right corner). In a minute, your browser will be as good as new.
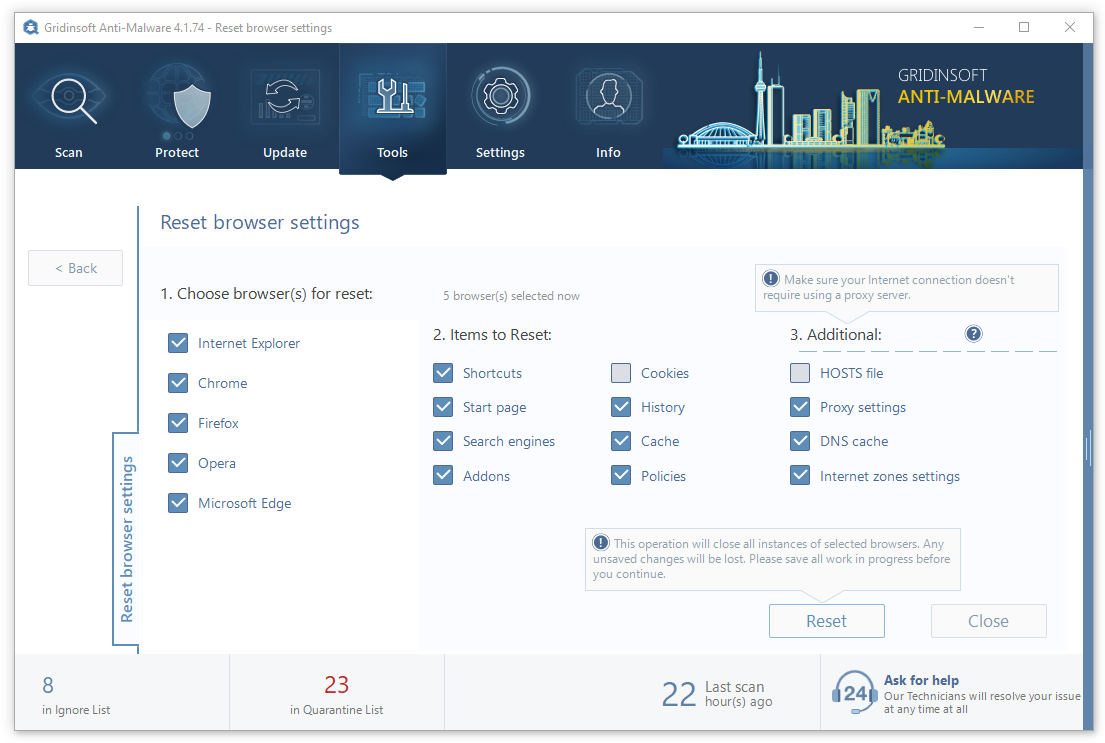
The browser reset is recommended to perform through the antivirus tool by GridinSoft because last can also reset the HOSTS file without any additional commands.
After all these steps, your system will be cleaned of all intruders. If you are still having some troubles with your PC, contact us via the form you can see below.
User Review
( votes)

![]() German
German ![]() Japanese
Japanese ![]() Spanish
Spanish ![]() Portuguese (Brazil)
Portuguese (Brazil) ![]() French
French ![]() Turkish
Turkish ![]() Chinese (Traditional)
Chinese (Traditional) ![]() Korean
Korean ![]() Indonesian
Indonesian ![]() Hindi
Hindi ![]() Italian
Italian
