Windows is an operating system that receives updates on a rolling basis. The more irritating it is to encounter an error that won’t allow you to update your system. Error 0x80070643 is just this error. The following message, visible in the Windows Update window, accompanies the error:
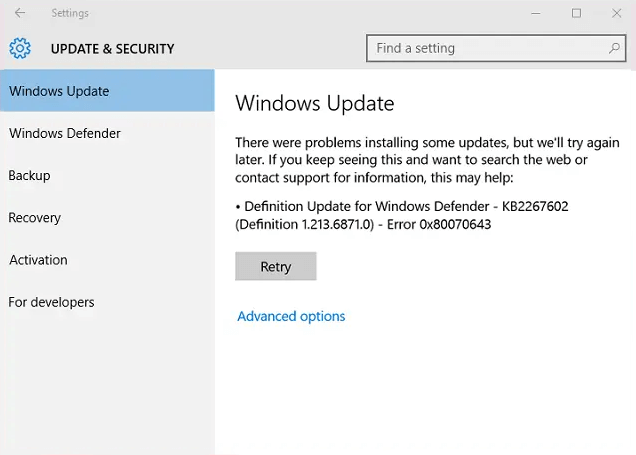
There were problems installing some updates but we’ll try again later. If you keep seeing this and want to search the web or contact support for information, this may help: Error 0x80070643.
In this article, you will find five easy-to-do recipes that are likely to solve this problem. We have already written about the 0x80070643 error emerging in Windows 11, so you may want to compare the two situations. But let’s get down to business.
Install the .NET Framework
The .NET Framework on your PC may be somehow damaged, and that causes your updates to stall. The best thing to do in such a case is to install the latest .NET Framework. This action will not harm your computer or system. No worries, the supplier of .NET is Microsoft itself.
Follow this link to download the most recent .NET Framework via the web installer.
Follow this link to download the offline installer for .NET Framework 4.7.
After the installation is complete, you will have to restart your computer. If the system restart is a part of the installation process, you won’t need to do it twice. Did this work against the 0x80070643 error? If it didn’t— proceed to the next option.
Windows Update Troubleshooter
Windows features many specialized troubleshooters — programs whose function matches their name. They detect and fix possible errors in software and hardware functioning. Now you have to find the Windows Update Troubleshooter, launch it, and follow its instructions. Just do the following:
- Use the Start Menu search bar to find Update & Security. Open it.
- In the left pane of the window, you will see the Troubleshoot line. Click on it.
- In the right pane, you will see the Get up and running title and options beneath it.
- Choose Windows Update and click the Run the troubleshooter button that will appear below.
- Follow simple instructions the troubleshooter will offer you.
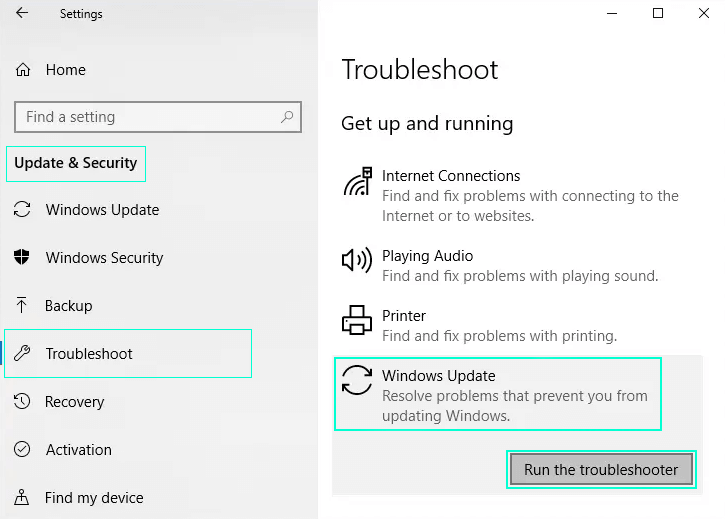
Go to Updates & Security, there choose Troubleshoot, and in the opened window run the Windows Update Troubleshooter.
If you succeed, good for you then. No? Proceed to the third recipe.
Restart Windows Update
Follow this simple instruction to restart the Windows Update service.
- Press Windows Button + R, and the Run prompt will appear.
- Type there: services.msc
- Press Enter.
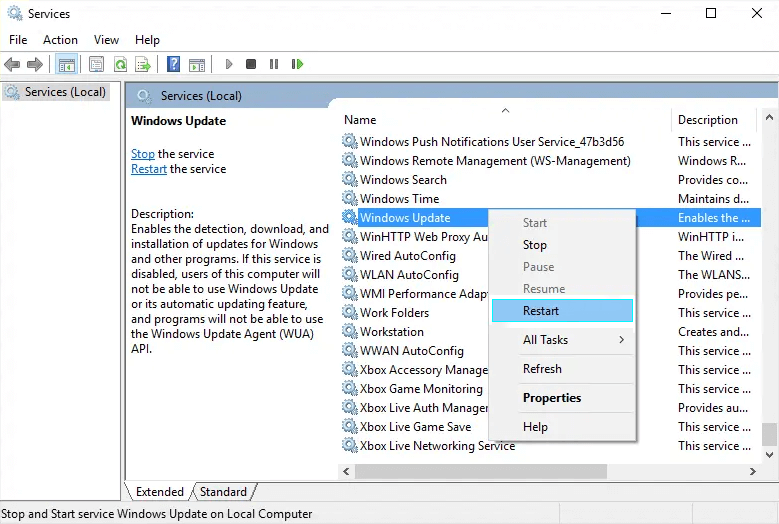
- Find Windows Update in the long list of services in the right pane of the window. Right-click on it.
- From the drop-down menu, select Restart.
Try to install the updates now. Windows Update Restart may have the job done. However, it might not. Then try the next thing.
CONSIDER READING: What’s new in Windows 11?
Disable your antivirus and firewall
Some conflict between your antivirus and Windows might be causing the problem. Therefore, it is reasonable to try installing the updates after switching protection off.
Disabling antivirus protection
No matter what antivirus program you are using, to temporarily disable the protection, you have to do more or less the same thing:
- Right-click the icon of your antivirus in the notifications area (the lower right of the screen).
- In the pop-up menu, choose Disable Protection or similar action.
- Read the warnings and skip them. Yes, it is dangerous to browse the Internet and use unknown data storage devices. But you only switch off the antivirus to download and install the safe item: a Windows 10 update.
- Most likely, the antivirus will ask you to define the time when to enable the protection again. Quarter an hour should be enough to check whether the issue’s roots are here.
Disabling a firewall
Now you need to turn off Windows Firewall. If you do not know what a firewall is and why you need it, you can read our article on network security. For now, it is enough to turn it off, following these instructions.
- Use the Start Menu search bar to find Firewall & Network Protection. Open it.
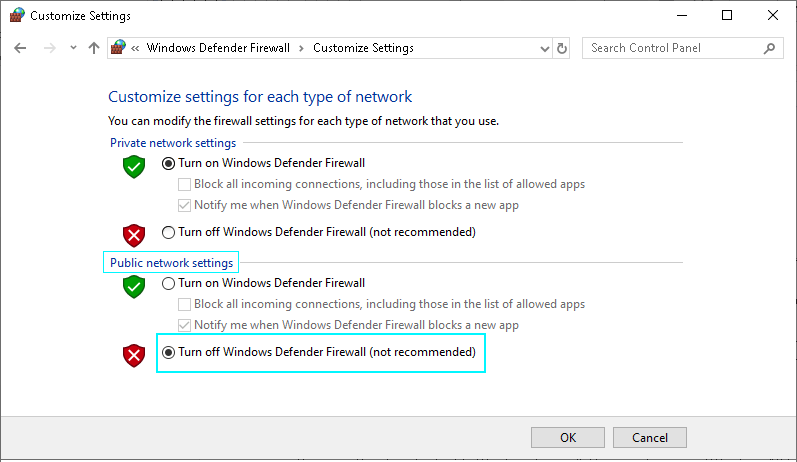
- Choose Public network profile.
- In the opened window, flip the switch to Off position.
- You will be getting a User Account Control warning that it is dangerous to turn off the firewall. Of course it is, but you know what you are doing. So proceed.
After you turn off the antivirus protection and firewall, try to install the stubborn update once more. As soon as you get rid of the 0x80070643 error or figure out that this was not the solution, turn all the protection back on!
If you want to protect your system from viruses fully, combine your background antivirus with GridinSoft Anti-Malware. It recognizes tons of virus signatures and works either as a substitute for an existing antivirus or an auxiliary scanner (recommended).
Install the updates manually
You can install the required updates by hand, bypassing the 0x80070643 error. Before you do it, you need to check the type of your system: 32-bit or 64-bit.
- To know that, right-click on This PC, and, in the drop-down menu, choose Properties.
- You will find yourself in a System Properties window. In its right pane, you will see the System Type row, which reads the type of your system.
- The next thing is to see the number of the failing update. Use the Start Menu search bar, find Updates & Security, and open it.
- Here you’ll need to find the number of the update that you’re failing to get. It starts with “KB” letters.
After you copy it, open your web browser and go to the Microsoft Update Catalog. - You can see a search bar at the upper right of the website. Insert or type the number of the update into it and click Search.
- From the results list, choose the latest version of the update that suits the architecture of your system.
NOTE: x86 updates are for 32-bit systems. - Click Download and then click on the downloaded file to start the installation. Follow the instructions of the installer.
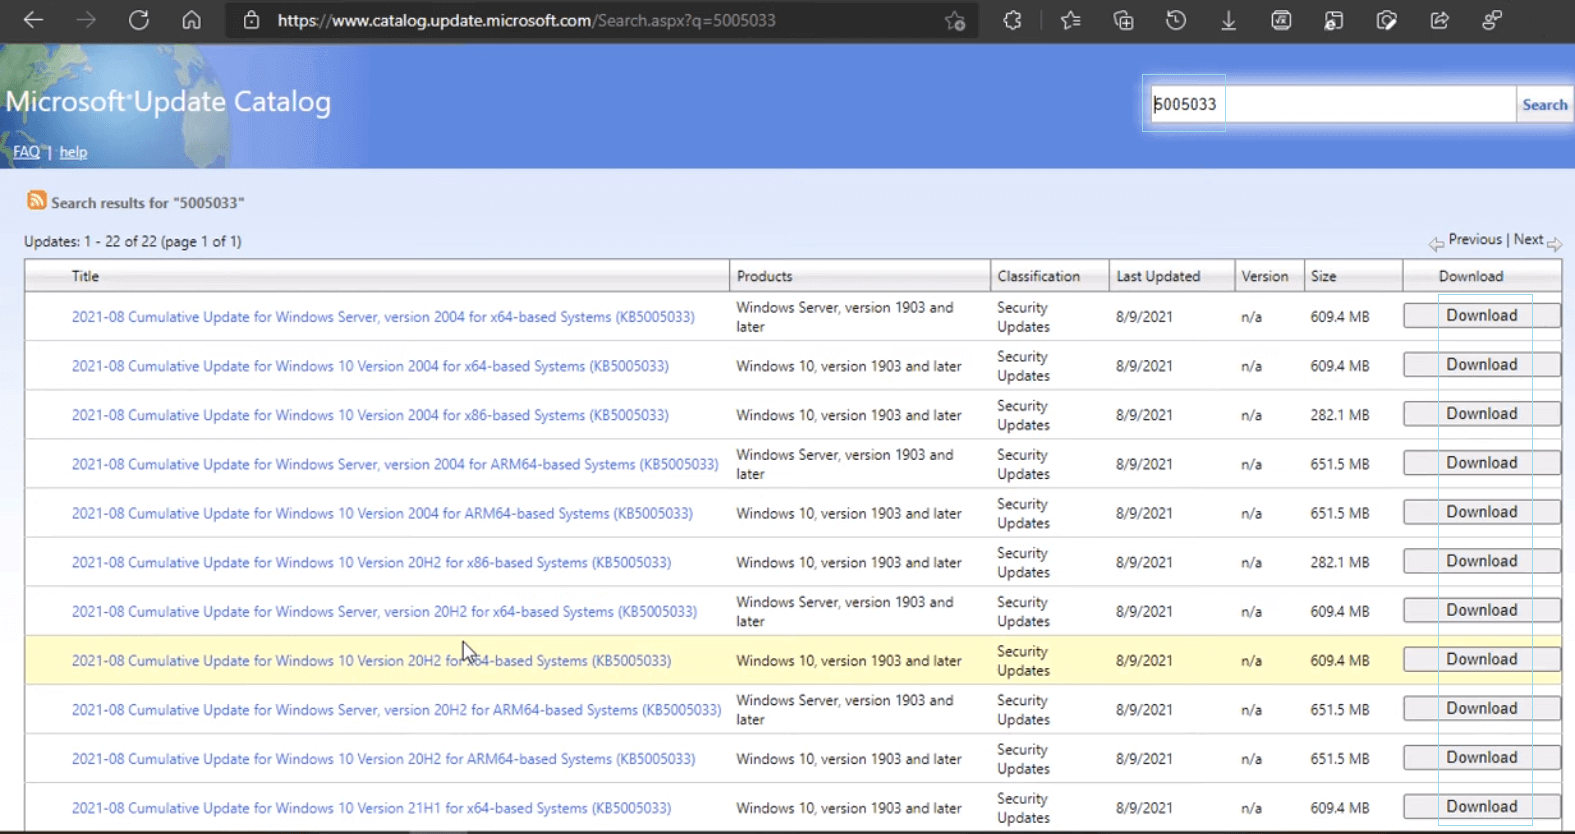
Installing updates manually. Find the needed update in the Microsoft Update Catalog list and click download.
User Review
( votes)